If you have a fondness for buttery, chocolatey treats with a delightful melt-in-your-mouth texture, then you’re going to adore this Piped Chocolate Butter Cookies Recipe. These cookies bring together the richness of cocoa and the smoothness of butter in a delicate yet impressive piped form that’s as fun to make as it is to eat. Perfect for sharing at tea time or as a special homemade gift, these cookies combine simple pantry staples to create an elegant sweet treat that feels both classic and indulgent.
Ingredients You’ll Need
Every ingredient in this recipe plays a starring role, making the creation of these cookies straightforward yet stunning. From the creamy butter that provides the luscious texture, to the cocoa powder that adds deep chocolate flavor and color, each component is vital to achieving the perfect batch of piped chocolate butter cookies.
- Unsalted butter (1 cup, softened): The base for rich flavor and tender texture, softened just right for easy creaming.
- Powdered sugar (½ cup): Adds sweetness and blends smoothly into the butter for a silky dough.
- Vanilla extract (1 teaspoon): Enhances the chocolate and butter with a warm, aromatic note.
- All-purpose flour (1¾ cups): Provides structure to the cookies, keeping them delicate yet firm enough to hold shape.
- Unsweetened cocoa powder (¼ cup): Intensifies the chocolate flavor and gives the cookies a rich, dark color.
- Milk (1-2 tablespoons): Adjusts the dough’s consistency, making it perfect for piping.
- Melted chocolate: For drizzling or dipping, it adds an extra layer of decadence.
- Sprinkles or chopped nuts: Optional garnishes that bring texture and visual appeal.
How to Make Piped Chocolate Butter Cookies Recipe
Step 1: Preheat the Oven and Prepare Baking Sheets
Start by setting your oven to 350°F (175°C). Line your baking sheets with parchment paper to ensure the cookies bake evenly and don’t stick. This simple step sets the foundation for perfectly baked cookies.
Step 2: Cream Butter and Sugar
Using softened butter and powdered sugar, whip them together for about 2-3 minutes until the mixture is light, fluffy, and pale. This creaming step is crucial as it incorporates air, which gives the cookies their tender crumb and delicate texture.
Step 3: Add Vanilla and Dry Ingredients
Pour in the vanilla extract and gently mix to combine. Then gradually add the all-purpose flour and unsweetened cocoa powder. Stir until a soft dough forms, adding milk one tablespoon at a time as needed to reach the perfect piping consistency. The dough should hold its shape but still be soft enough to pipe easily.
Step 4: Transfer Dough to Piping Bag and Shape Cookies
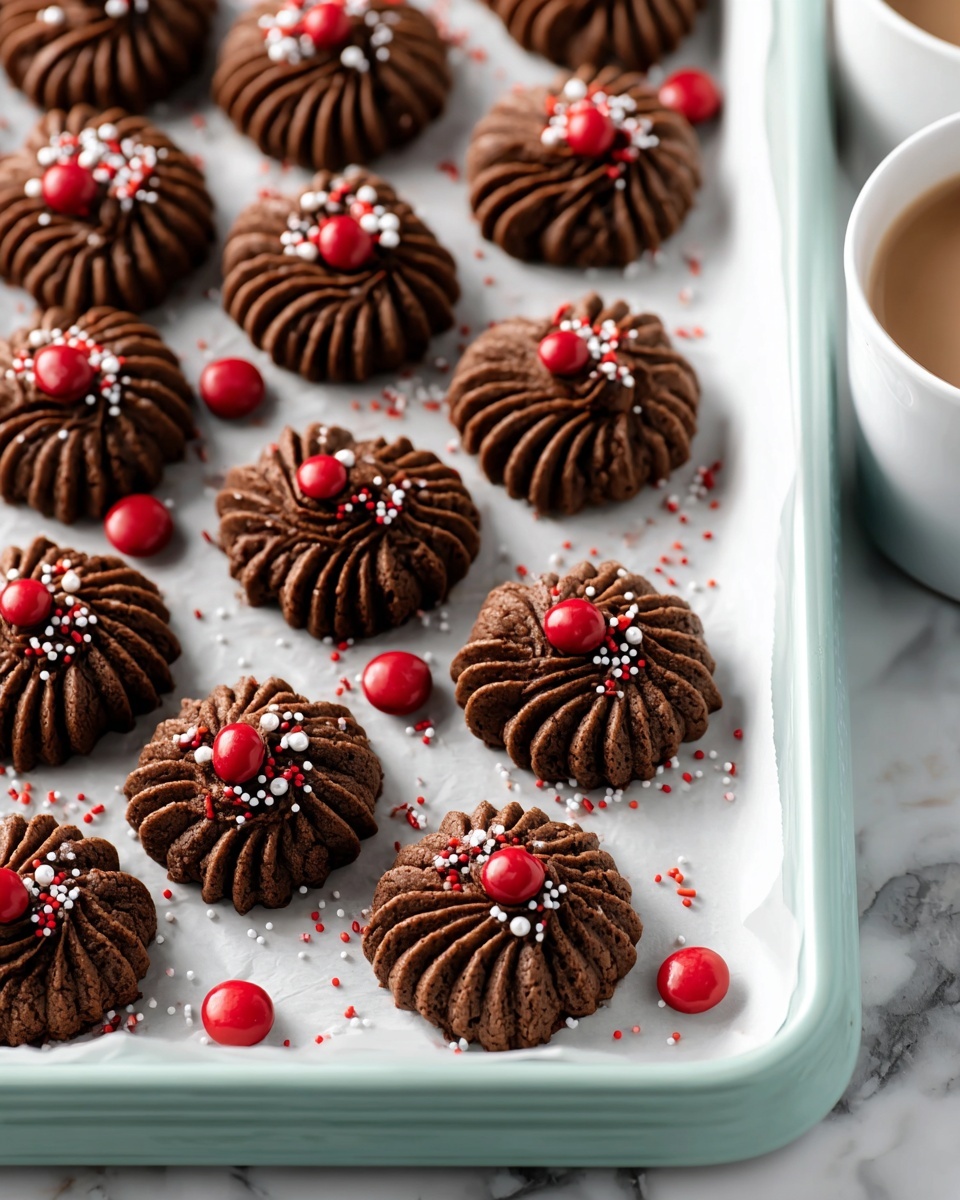
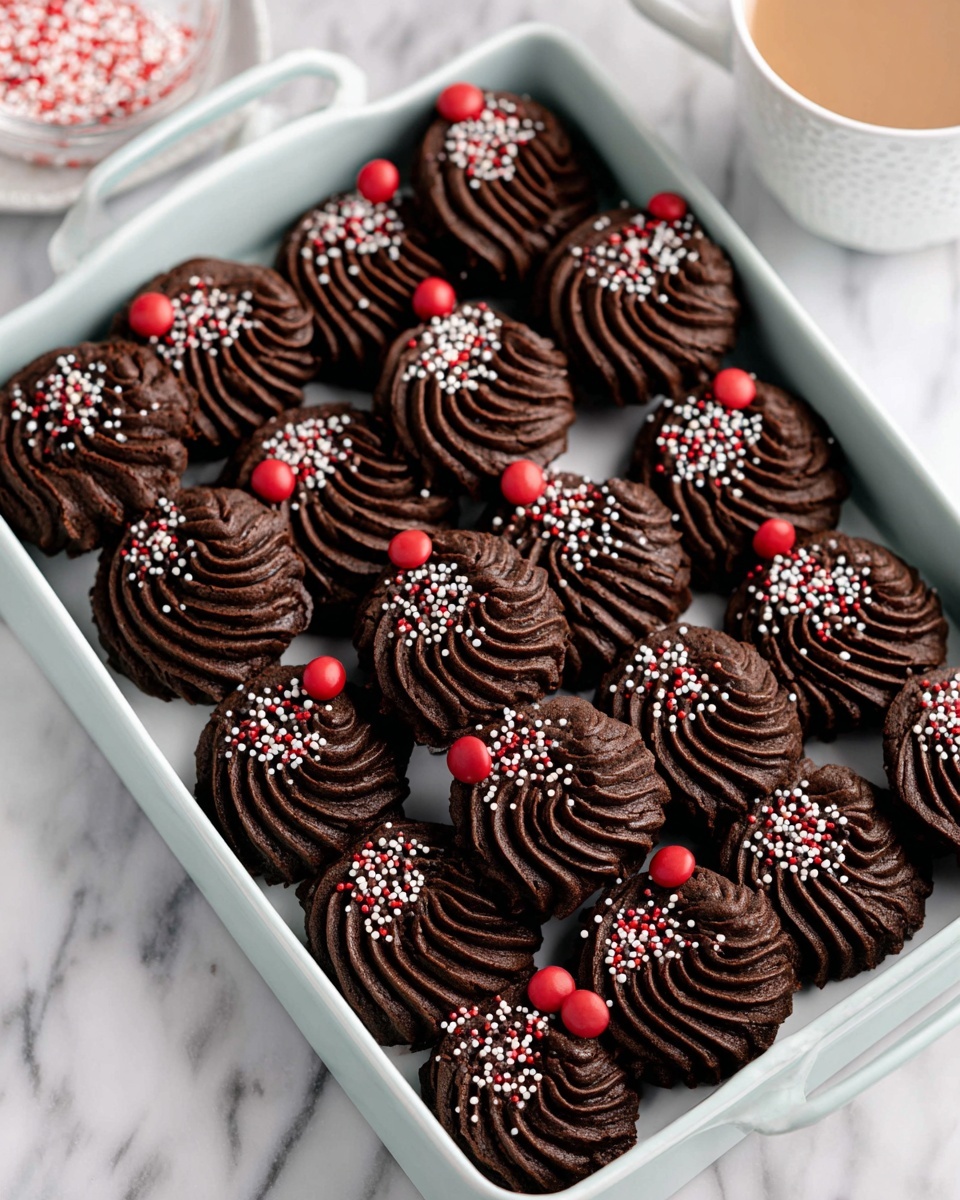
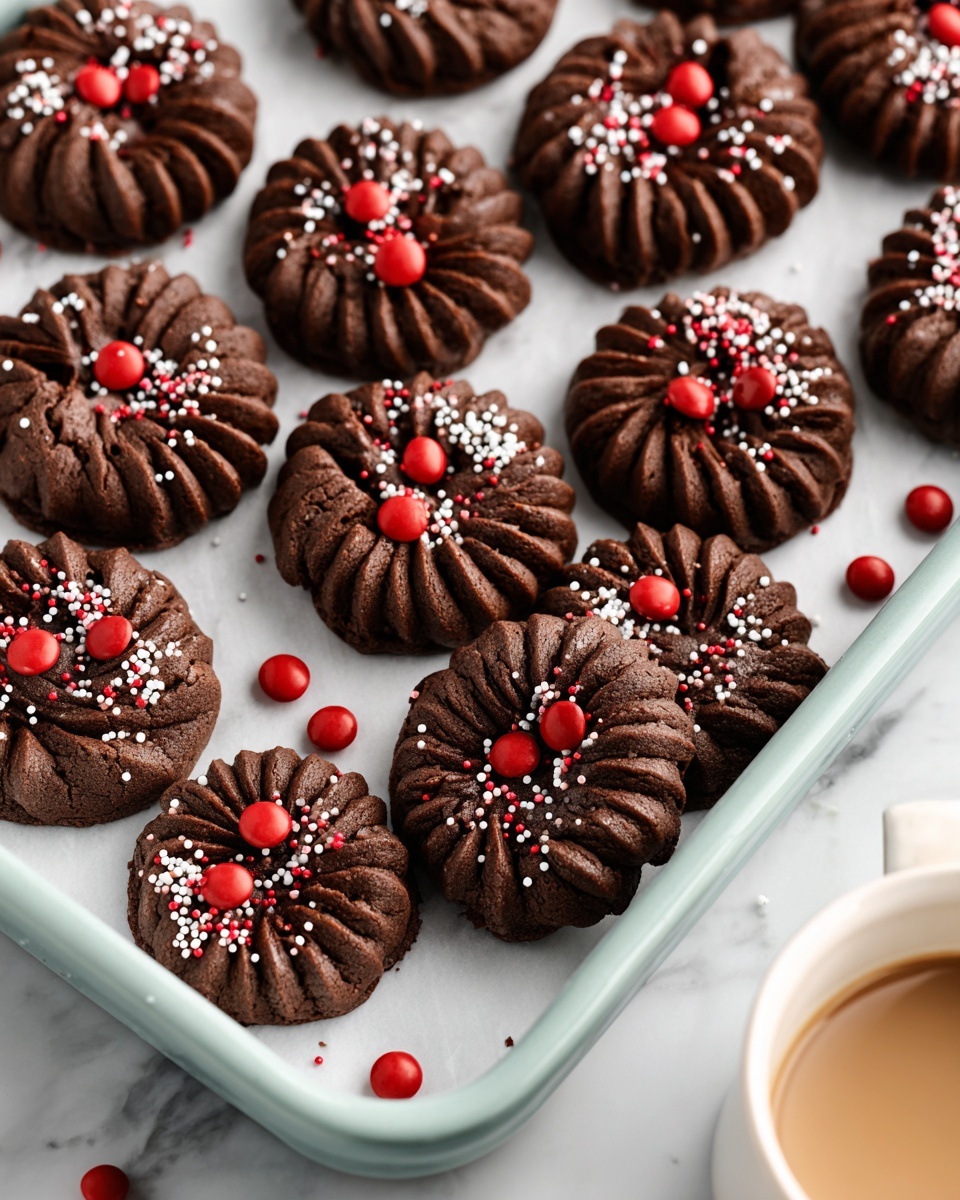
Fit a piping bag with a large star tip and fill it with your chocolate dough. Hold the bag upright and pipe your favorite shapes directly onto the prepared baking sheets. This is the fun part—get creative with swirls or rosettes to create elegant, bakery-style cookies!
Step 5: Bake the Cookies
Bake the piped shapes in your preheated oven for 10-12 minutes. The cookies will set around the edges but remain soft in the center—this balance is what makes them so delightful. Once baked, let them cool on the baking sheets for 5 minutes to firm up before transferring to a wire rack to cool completely.
Step 6: Decorate Your Cookies (Optional)
Once your cookies are cooled, drizzle melted chocolate over the tops or dip them partially to add extra indulgence. Add colorful sprinkles or chopped nuts for texture and a playful finish. These little details make your homemade cookies look professionally crafted and even more inviting.
How to Serve Piped Chocolate Butter Cookies Recipe
Garnishes
Adding garnishes like sprinkles, chopped nuts, or even edible gold dust can elevate the look and add a lovely crunch. They make your Piped Chocolate Butter Cookies Recipe not only taste amazing but look stunning on any cookie platter.
Side Dishes
These cookies pair wonderfully with warm beverages. Think coffee, rich hot chocolate, or a delicate cup of tea. The rich chocolate flavor of the cookies complements the bitterness or floral notes of these drinks perfectly.
Creative Ways to Present
Arrange your piped chocolate butter cookies in a decorative tin or on a beautiful plate lined with parchment or doilies for a charming presentation. You can even stack them with parchment paper layers to make an edible gift box that’s sure to impress friends and family.
Make Ahead and Storage
Storing Leftovers
Store your baked cookies in an airtight container at room temperature. They will stay fresh and delicious for up to a week, maintaining that lovely buttery texture and rich chocolate taste.
Freezing
If you want to bake in advance, the dough can be piped onto a baking sheet and frozen before baking. Once frozen solid, transfer to a freezer-safe bag for up to 2 months. Bake directly from frozen, adding a couple of extra minutes to the baking time.
Reheating
Warm the cookies slightly in a low oven or microwave for a few seconds to revive their softness before serving. Be careful not to overheat, or they may become too soft.
FAQs
Can I use salted butter instead of unsalted?
You can use salted butter but reduce or omit any added salt if the recipe calls for it elsewhere. Unsalted butter is preferred because it gives you better control over the overall saltiness of your cookies.
What if I don’t have a piping bag or star tip?
If you don’t have a piping bag, a sturdy zip-top bag with a corner snipped off works great. Although the star tip creates pretty ridges, you can pipe directly or even drop spoonfuls for a rustic look.
Can these cookies be made gluten-free?
Absolutely! Substitute the all-purpose flour with a gluten-free flour blend designed for baking, and your cookies will turn out just as delicious and tender.
Why add milk to the dough?
The milk helps adjust the dough’s consistency, making it soft enough to pipe smoothly without losing shape during baking. Adding too much can make the dough too runny, so add milk gradually.
How do I prevent cookies from spreading too much?
Make sure your butter is softened but not melted, and avoid overmixing the dough once flour is added. Chilling the dough briefly before piping can also help maintain the shape.
Final Thoughts
There is something truly joyful about making and sharing these Piped Chocolate Butter Cookies Recipe. Their tender crumb and rich chocolate flavor, matched with a beautiful piped design, make every bite feel like a special celebration. Try this recipe soon, and watch as it quickly becomes a beloved classic in your baking repertoire.
Print
Piped Chocolate Butter Cookies Recipe
- Prep Time: 15 minutes
- Cook Time: 12 minutes
- Total Time: 27 minutes
- Yield: 24 cookies
- Category: Dessert
- Method: Baking
- Cuisine: American
Description
These Piped Chocolate Butter Cookies are delightful, buttery treats with a rich cocoa flavor, perfect for any occasion. Soft, piped dough creates elegant shapes that bake into crisp-edged, tender cookies. Finished with optional melted chocolate drizzle and colorful sprinkles or chopped nuts, they make a beautiful and delicious snack or dessert.
Ingredients
Cookie Dough
- 1 cup unsalted butter, softened
- ½ cup powdered sugar
- 1 teaspoon vanilla extract
- 1¾ cups all-purpose flour
- ¼ cup unsweetened cocoa powder
- 1–2 tablespoons milk (as needed for piping consistency)
Decoration
- Melted chocolate for drizzling
- Sprinkles or chopped nuts
Instructions
- Preheat the Oven: Preheat your oven to 350°F (175°C) and line baking sheets with parchment paper to prevent sticking and ensure easy cleanup.
- Cream Butter and Sugar: Beat the softened unsalted butter and powdered sugar together using an electric mixer or stand mixer for 2-3 minutes until the mixture becomes light, fluffy, and pale in color, which helps create a tender cookie texture.
- Add Vanilla and Dry Ingredients: Mix in the vanilla extract thoroughly. Gradually add the all-purpose flour and unsweetened cocoa powder to the butter mixture. Stir until a soft dough forms. If the dough is too stiff for piping, add 1 to 2 tablespoons of milk to adjust consistency.
- Prepare for Piping: Transfer the smooth dough into a piping bag fitted with a large star tip. Pipe decorative shapes, such as rosettes or swirls, onto the prepared baking sheets, spacing them about 2 inches apart to allow spreading.
- Bake: Place the baking sheets in the preheated oven and bake the cookies for 10-12 minutes or until the edges look set and slightly firm. Once baked, allow the cookies to cool on the sheets for 5 minutes before transferring them carefully to a wire rack to cool completely.
- Decorate (Optional): Once cookies have cooled, drizzle or dip them in melted chocolate. Immediately add sprinkles or chopped nuts on top before the chocolate sets to add color and texture.
Notes
- Make sure the butter is properly softened to ensure smooth creaming with sugar.
- If you don’t have a piping bag, you can use a plastic zip-top bag with a corner cut off as a substitute.
- Adjust milk quantity carefully; too much will make dough too soft and difficult to pipe.
- Cookies can be stored in an airtight container at room temperature for up to 5 days.
- Use good-quality cocoa powder for the best chocolate flavor.


