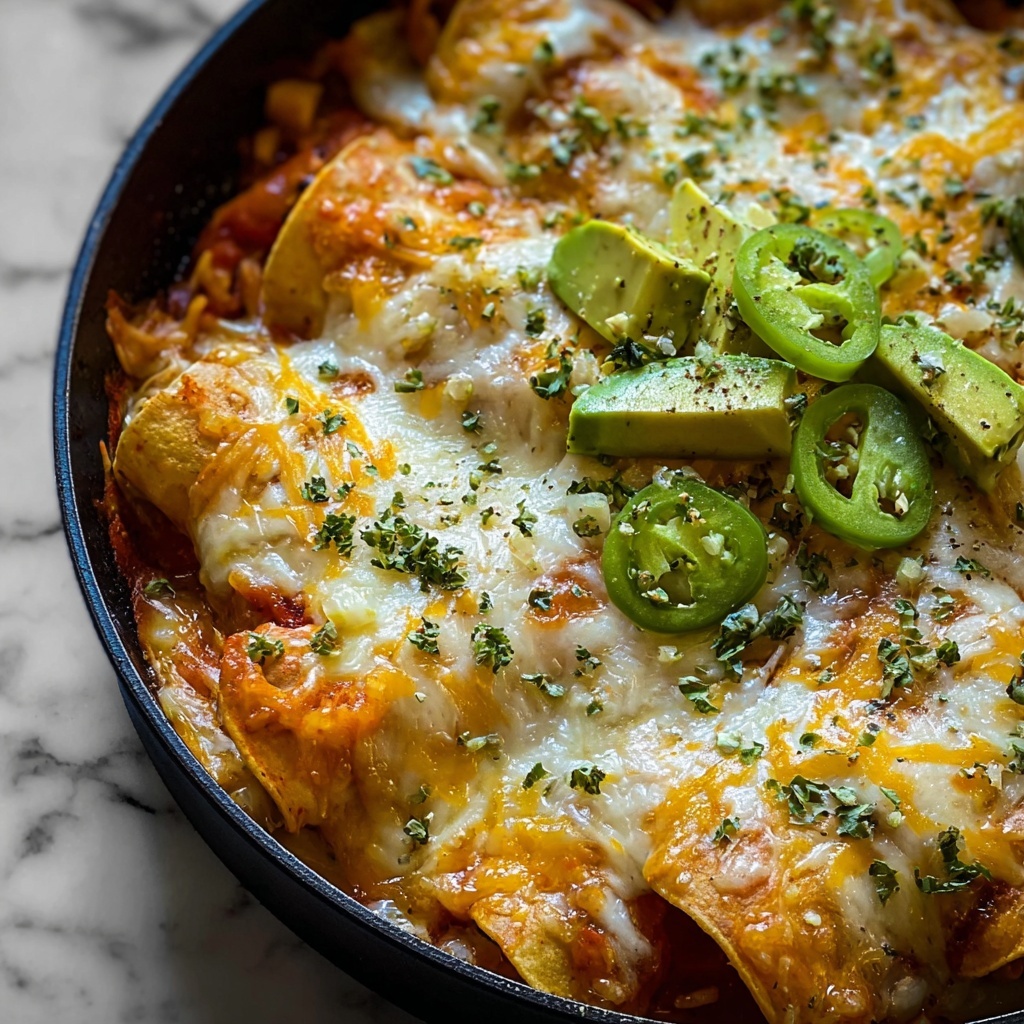
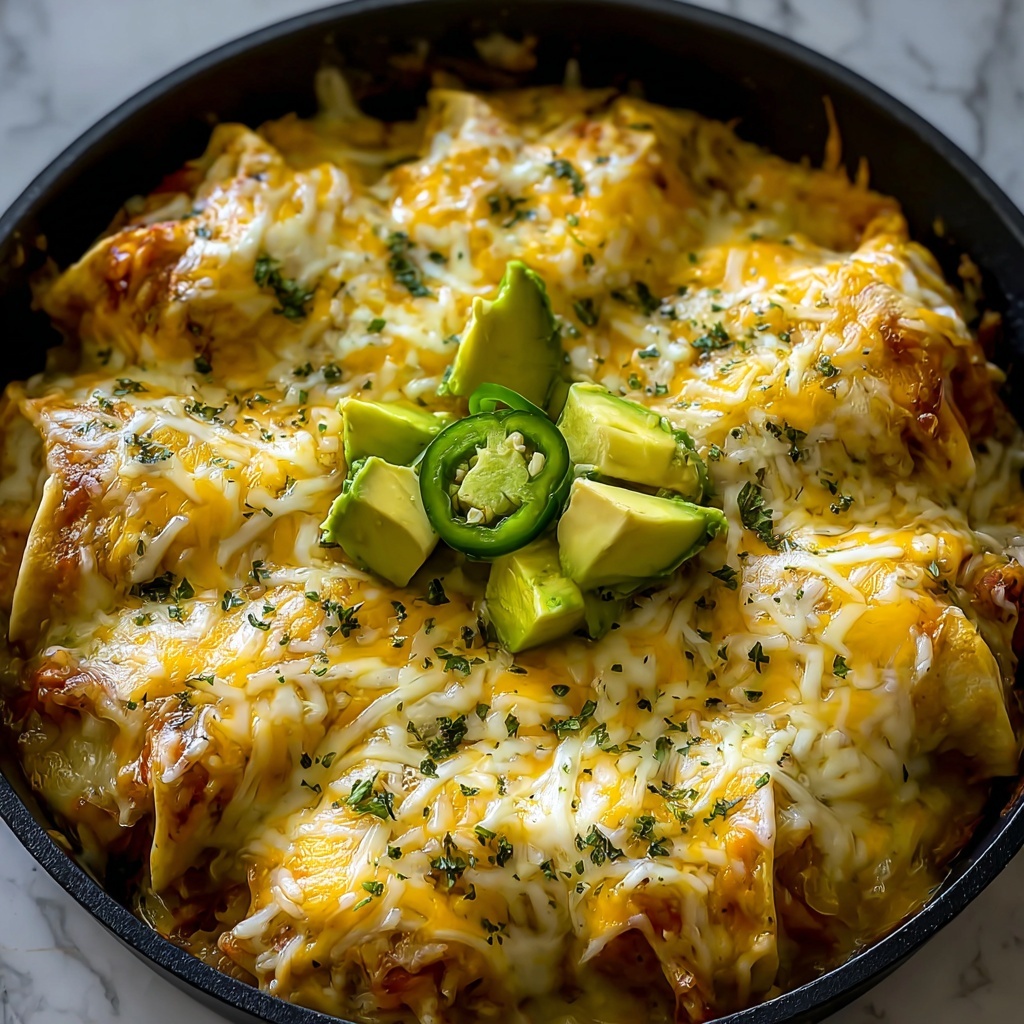
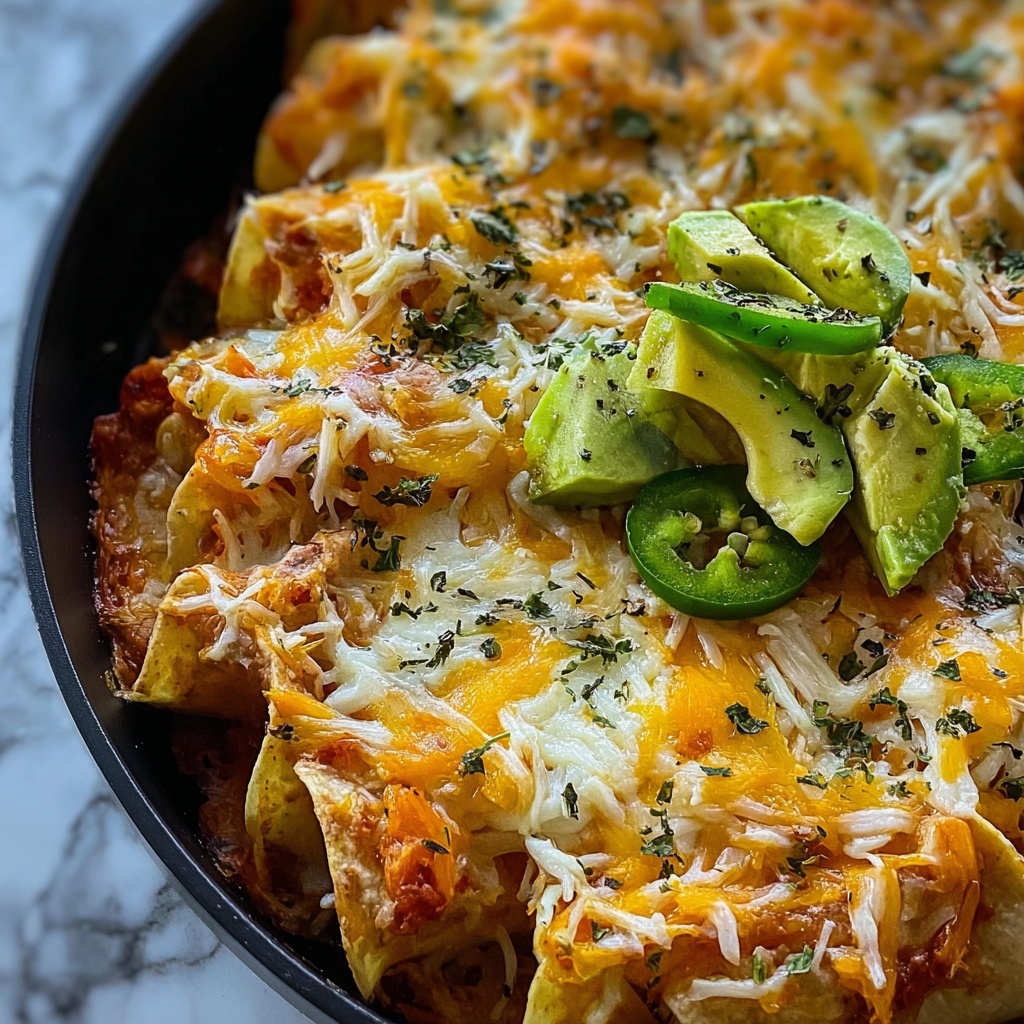
If you are craving a vibrant, soul-satisfying dish that bursts with flavor, the Green Chile and Extra Cheese Chilaquiles Recipe is exactly what you need. This recipe takes the humble tortilla chip to an entirely new level, soaking it in tangy, mildly spicy green chile salsa and topping it generously with not one but two kinds of melty cheese. The result is a harmonious blend of creamy, crunchy, and savory sensations that will have you coming back for seconds. Whether you want a comforting brunch or a quick dinner that feels special, this chilaquiles recipe delivers every single time.
Ingredients You’ll Need
Getting the ingredients right is key to making your Green Chile and Extra Cheese Chilaquiles Recipe absolutely shine. Each component plays its part, from the crispy tortilla chips providing texture to the luscious cheeses adding richness and the fresh garnishes bringing a pop of color and freshness.
- 8 cups tortilla chips: Homemade or store-bought, they form the crunchy base that soaks up all the delicious sauce.
- 2 cups green chile salsa or sauce: This gives the dish its signature tangy and slightly spicy flavor that wakes up every bite.
- 1 cup shredded Monterey Jack cheese: Known for its smooth melt and mild flavor, it adds a creamy element.
- 1 cup shredded cheddar cheese: Provides a sharp, bold contrast and beautiful golden melt.
- 1/2 cup diced onions: Sautéed until translucent, these bring subtle sweetness and aroma.
- 1/4 cup chopped fresh cilantro: Offers a bright, herbal freshness that balances the richness.
- 1/2 cup sour cream or Mexican crema: Adds cool creaminess as a perfect finishing touch.
- 2 tbsp vegetable oil: For sautéing the onions and gently carrying flavors.
- Salt to taste: Enhances all the other flavors harmoniously.
- Optional toppings: Sliced avocado, fried eggs, or sliced radishes for extra texture and taste.
How to Make Green Chile and Extra Cheese Chilaquiles Recipe
Step 1: Sauté the onions
Begin by heating the vegetable oil in a large skillet over medium heat. Add the diced onions and sauté them gently until they turn translucent and fragrant. This step builds a sweet and savory foundation that infuses the whole dish with subtle depth.
Step 2: Simmer the green chile salsa
Next, pour the green chile salsa into the skillet along with a pinch of salt. Bring the mixture to a gentle simmer so the flavors meld together beautifully and the salsa thickens just a bit. This sauce will coat the chips perfectly later.
Step 3: Coat the tortilla chips
Now, add the tortilla chips to the skillet, stirring gently to ensure every chip is coated in that flavorful green chile sauce. Let them cook for 2 to 3 minutes so the chips soften slightly but don’t lose their satisfying crunch. This is the heart of the chilaquiles experience—the tender yet crisp bite.
Step 4: Add the cheeses
Sprinkle the shredded Monterey Jack and cheddar cheeses evenly over the top of the sauced chips. Cover the skillet and let it cook for another 3 to 5 minutes. During this time, the cheeses melt into gooey, golden perfection, adding indulgent creaminess.
Step 5: Garnish and finish
Once the cheese is melted, remove the skillet from the heat. Sprinkle the chopped fresh cilantro over the dish and add a generous dollop of sour cream or Mexican crema. These fresh and creamy touches elevate both the flavor and presentation.
Step 6: Serve with optional toppings
Finally, serve your Green Chile and Extra Cheese Chilaquiles Recipe piping hot with optional sliced avocado, fried eggs, or crunchy radishes to add even more texture and taste to every forkful. This step lets you personalize the dish to your heart’s desire.
How to Serve Green Chile and Extra Cheese Chilaquiles Recipe
Garnishes
The simplest garnishes can make a big difference. Fresh cilantro brightens up every bite, a cold scoop of sour cream cuts through the heat, and creamy avocado slices add a buttery richness. A sunny fried egg on top brings a luscious yolk that ties everything together beautifully.
Side Dishes
Green Chile and Extra Cheese Chilaquiles Recipe pairs wonderfully with light sides like a crisp green salad or refried beans. A glass of fresh-squeezed orange juice or a café con leche can complete the meal with warmth and balance.
Creative Ways to Present
You can get playful by serving this dish family-style straight from the skillet, encouraging everyone to dig in. Or, plate individual portions with a drizzle of extra crema and a sprinkle of radishes for an elegant touch. For a crowd, turning it into a layered casserole topped with tortillas chips and cheese is a show-stopper.
Make Ahead and Storage
Storing Leftovers
Store any leftover Green Chile and Extra Cheese Chilaquiles Recipe in an airtight container in the refrigerator for up to 2 days. The chips will soften more over time but the flavors stay vibrant, making it perfect for a quick next-day meal.
Freezing
While freezing chilaquiles is not ideal because of the chips’ texture, you can freeze the green chile salsa separately for up to 3 months. Reheat the salsa, then toss fresh tortilla chips and cheese for an almost-fresh experience anytime.
Reheating
To reheat leftovers, warm the chilaquiles in a skillet over low heat until heated through, adding a splash of water or extra salsa if it’s too dry. Avoid the microwave to keep textures from becoming rubbery.
FAQs
Can I use red salsa instead of green chile salsa?
Absolutely! While green chile salsa brings its unique tangy and fresh flavor, red salsa offers a richer and slightly smoky profile. Either will work, but the dish’s character changes accordingly.
What type of cheese is best for chilaquiles?
The combination of Monterey Jack and cheddar cheese is ideal for this recipe because Monterey Jack melts beautifully with a mild taste, while cheddar adds sharpness and color. Feel free to experiment with queso fresco for a more authentic touch.
Can I make this dish vegan?
Yes! Substitute the cheeses with your favorite vegan cheese alternatives and swap sour cream with a plant-based version. Use oil or vegan butter for sautéing, and the green chile salsa is typically vegan-friendly.
How spicy is the green chile salsa?
The heat level depends on the salsa brand or recipe you use. Most green chile salsas have a mild to medium heat, which is balanced by the cheese and sour cream. Adjust according to your spice tolerance!
Is it better to use homemade tortilla chips?
Homemade chips add a freshly-cooked crunch and you can season them exactly how you like. However, good-quality store-bought chips are a convenient and tasty option that save time without compromising flavor.
Final Thoughts
There is something truly magical about the Green Chile and Extra Cheese Chilaquiles Recipe that makes it a comfort food staple with a gourmet twist. It’s fast, flavorful, and easy to customize, making it a perfect go-to whenever you want something cozy and satisfying. Give this recipe a try and discover your new favorite way to enjoy chilaquiles with rich cheeses and lively green chile flavor. Your taste buds will thank you!
Print
Green Chile and Extra Cheese Chilaquiles Recipe
- Prep Time: 10 minutes
- Cook Time: 15 minutes
- Total Time: 25 minutes
- Yield: 4 servings
- Category: Breakfast
- Method: Stovetop
- Cuisine: Mexican
- Diet: Vegetarian
Description
These Green Chile and Extra Cheese Chilaquiles are a deliciously cheesy and flavorful Mexican breakfast or brunch dish featuring crispy tortilla chips simmered in a tangy green chile salsa and topped with melted Monterey Jack and cheddar cheeses. Garnished with fresh cilantro, sour cream, and optional toppings like avocado and fried eggs, this easy skillet meal delivers a satisfying and comforting start to your day.
Ingredients
Base Ingredients
- 8 cups tortilla chips (homemade or store-bought)
- 2 cups green chile salsa or sauce
- 2 tbsp vegetable oil
- Salt to taste
Cheese and Toppings
- 1 cup shredded Monterey Jack cheese
- 1 cup shredded cheddar cheese
- 1/2 cup diced onions
- 1/4 cup chopped fresh cilantro
- 1/2 cup sour cream or Mexican crema
- Optional toppings: sliced avocado, fried eggs, sliced radishes
Instructions
- Sauté onions: Heat vegetable oil in a large skillet over medium heat. Add diced onions and sauté until translucent, enhancing their natural sweetness and forming the flavor base for the dish.
- Simmer salsa: Pour green chile salsa into the skillet with the onions, season with salt to taste, and bring the mixture to a simmer to meld the flavors together.
- Add tortilla chips: Gently add the tortilla chips to the skillet, stirring carefully to coat them evenly with the green chile sauce. Cook for 2-3 minutes until the chips soften slightly but remain intact, avoiding a mushy texture.
- Melt cheese: Sprinkle the shredded Monterey Jack and cheddar cheeses evenly over the chilequiles. Cover the skillet and cook for another 3-5 minutes until the cheese is fully melted and gooey, binding the dish together.
- Garnish and finish: Remove the skillet from heat, then garnish with freshly chopped cilantro and a generous dollop of sour cream or Mexican crema for richness and tang.
- Serve immediately: Plate the chilaquiles hot and serve right away with optional toppings such as sliced avocado, fried eggs, or sliced radishes to add texture and complementary flavors.
Notes
- Use fresh or good-quality store-bought green chile salsa for best flavor.
- For homemade tortilla chips, cut corn tortillas into wedges and lightly fry or bake until crispy.
- Adjust cheese quantity and types according to preference; a mix of Monterey Jack and cheddar offers a great balance of meltiness and sharpness.
- Covering the skillet during cheese melting helps ensure the cheese melts evenly without drying out the dish.
- This dish is best enjoyed immediately to maintain chip texture; leftovers may become soggy when reheated.
- Feel free to add protein like shredded chicken or black beans to make it more substantial.


