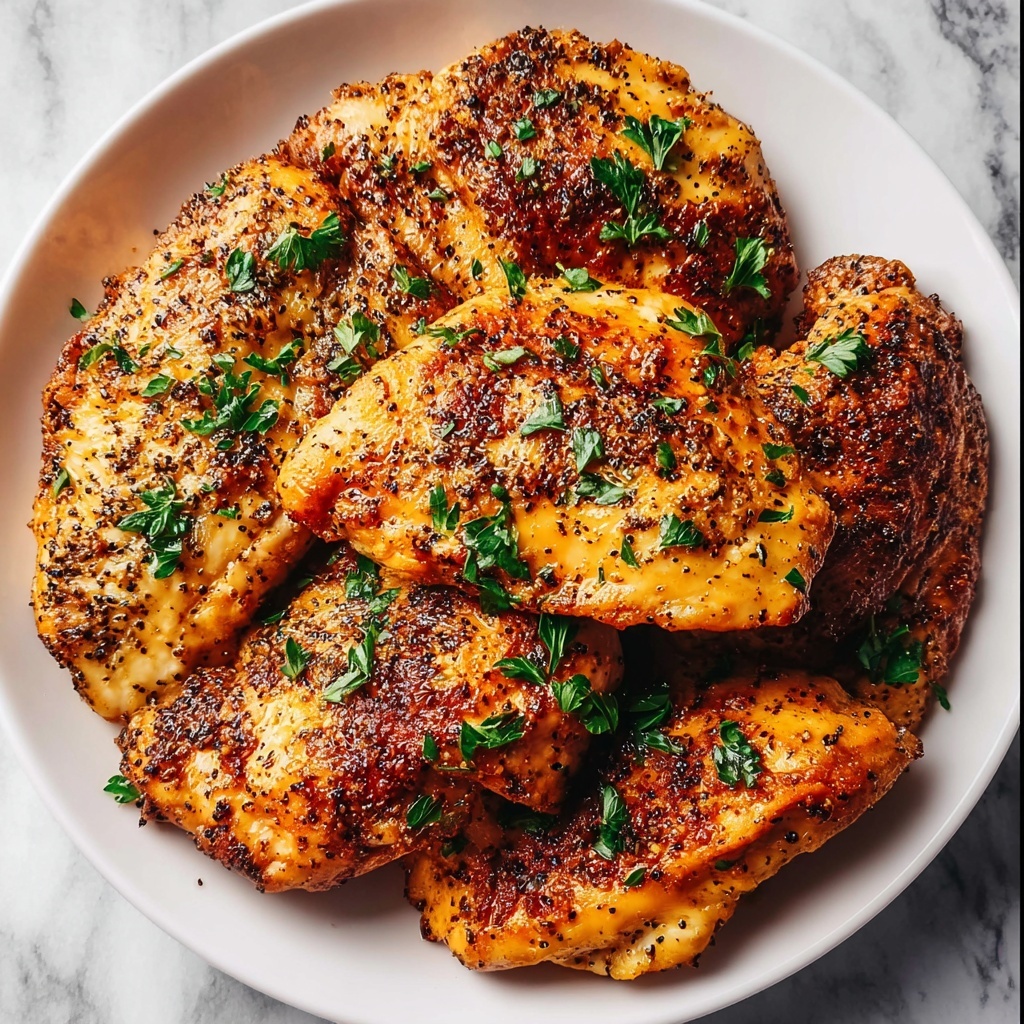
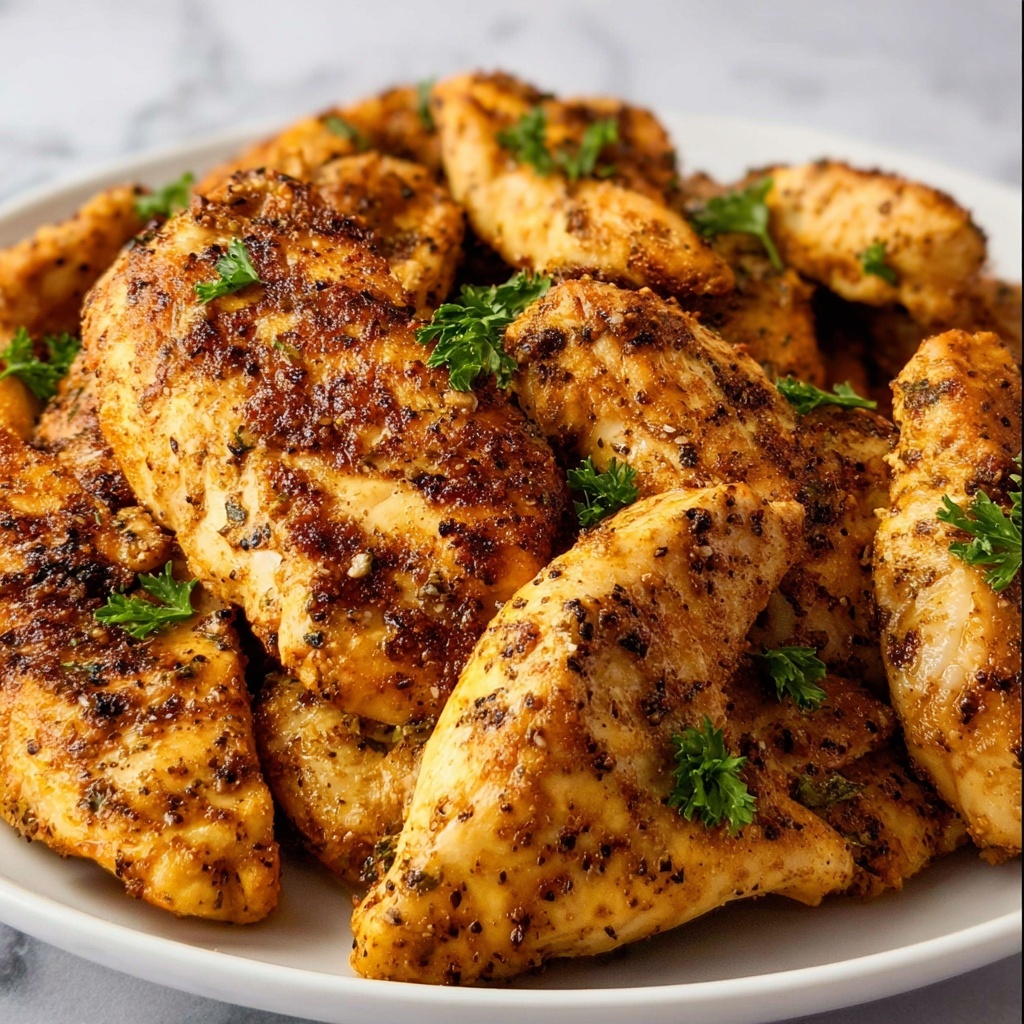
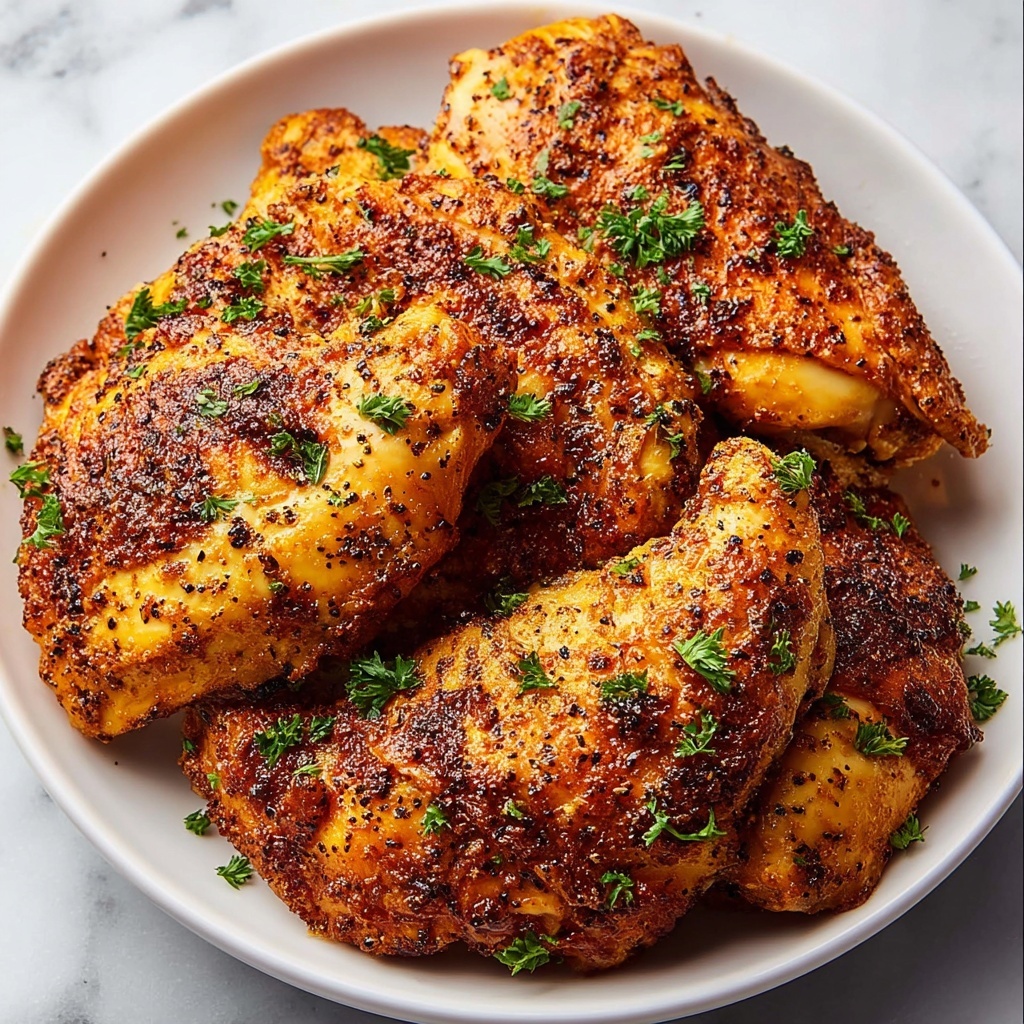
If you’re craving a dish that brings together crispy, golden goodness and a burst of savory flavor, you’re going to adore this Air Fried Chicken Tenderloins with Parmesan and Panko Recipe. This recipe elevates simple chicken tenderloins with a perfectly crunchy coating of panko and Parmesan, all cooked to crispy perfection in the air fryer for a healthier twist. Whether you’re looking to impress dinner guests or just want a satisfying yet lighter comfort food option, these tenderloins hit every mark with a flavorful, crunchy crust and tender center.
Ingredients You’ll Need
These ingredients might be pantry staples but trust me, they’re the magic behind that irresistible crunch and flavor. Each plays a vital role — from the savory Parmesan adding rich depth to the light and airy panko creating that signature crisp texture. Let’s break them down:
- Chicken Tenderloins: The star of the show, tender and quick to cook for juicy bites.
- All-Purpose Flour: Helps the coating stick perfectly and ensures a smooth base layer.
- Eggs: Beaten eggs act as the glue that binds the coating to the chicken.
- Panko Bread Crumbs: Gives the chicken that extra crispy, airy crunch everyone loves.
- Grated Parmesan Cheese: Brings an irresistible umami and cheesy flavor to the crust.
- Garlic Powder: Adds a warm, aromatic punch that pairs beautifully with the Parmesan.
- Onion Powder: Adds subtle sweetness and complexity to the seasoning.
- Smoked Paprika: Imparts a smoky depth and vibrant color without heat.
- Dried Oregano: A touch of herbal brightness that complements the spices.
- Salt: Enhances all the flavors perfectly balanced in the coating.
- Black Pepper: Adds just enough bite for a well-rounded taste.
- Cooking Spray (Olive or Avocado Oil): Helps achieve golden crispiness without excess oil.
How to Make Air Fried Chicken Tenderloins with Parmesan and Panko Recipe
Step 1: Prepare the Chicken
Start by patting your chicken tenderloins dry with paper towels. Removing excess moisture is key to getting that crunchy crust to cling beautifully to every piece.
Step 2: Set Up Your Breading Station
Set out three shallow dishes: one with all-purpose flour, the second with beaten eggs, and the third with a combination of panko, Parmesan, and your spices (garlic powder, onion powder, smoked paprika, oregano, salt, and pepper). Mixing the dry ingredients well ensures every bite is packed with flavor.
Step 3: Flour Coating
Dredge each chicken tenderloin in the flour, making sure you shake off any excess. This first layer helps the egg wash adhere better for a perfect crust.
Step 4: Egg Wash
Dip your floured chicken into the beaten eggs, letting any surplus drip off. This step is essential for the panko-Parmesan coating to stick firmly.
Step 5: Apply the Panko-Parmesan Mixture
Now comes the fun part. Press the egg-coated tenderloins into the panko mixture, ensuring every side is fully covered. Don’t be shy about firmly pressing the crumbs into the chicken—it really locks in that crisp crunch.
Step 6: Repeat for All Tenderloins
Continue the flour, egg, and crumb process with all your chicken pieces to build that gorgeous crust on every tenderloin.
Step 7: Preheat Your Air Fryer
Set your air fryer to 400°F (200°C) and let it warm up. A hot air fryer is crucial for achieving that golden-brown exterior without frying in oil.
Step 8: Prepare the Air Fryer Basket
Lightly spray your air fryer basket with cooking spray to prevent sticking, ensuring the tenderloins cook evenly with a crisp bottom.
Step 9: Arrange the Tenderloins
Place your chicken in a single layer in the basket without overcrowding. Crowding the basket can cause steaming rather than crisping, so work in batches if needed.
Step 10: Spray the Tops
Give the tops of your coated tenderloins a light spray of oil to promote golden color and crisp texture.
Step 11: Air Fry
Cook for 8-10 minutes, flipping halfway through to ensure even browning both sides. Keep an eye on them—the chicken is perfectly cooked when golden and reaches an internal temperature of 165°F (74°C).
Step 12: Check and Continue if Needed
If after 8 minutes they need a bit more time, continue cooking in short increments while watching carefully to avoid burning.
Step 13: Repeat for Remaining Chicken
Work in batches if necessary, repeating the cooking steps with the rest of your tenderloins for consistently crispy results.
Step 14: Let the Chicken Rest
Give your tenderloins a few minutes to rest after cooking. This helps the juices redistribute and lets the crust set up perfectly.
Step 15: Serve While Hot
Serve these crispy beauties fresh from the air fryer with your favorite dipping sauces for an unforgettable crunch and flavor experience.
How to Serve Air Fried Chicken Tenderloins with Parmesan and Panko Recipe
Garnishes
Fresh herbs like chopped parsley or basil add a pop of color and a fresh herbal note that balances the richness of the Parmesan crust. A squeeze of lemon over the top brings brightness that cuts through the crispy, savory coating.
Side Dishes
These tenderloins pair wonderfully with a simple side salad, roasted vegetables, or even crispy sweet potato fries. For a heartier meal, creamy mashed potatoes or garlic butter noodles complement the bold flavors effortlessly.
Creative Ways to Present
Turn this recipe into a fun appetizer by cutting the tenderloins into bite-sized pieces and serving them with an array of dipping sauces like honey mustard, spicy aioli, or ranch. You can also stuff them in a sandwich with crisp lettuce and tomatoes for an elevated chicken sandwich.
Make Ahead and Storage
Storing Leftovers
After cooking, allow the chicken tenderloins to cool completely before storing them in an airtight container. They keep well in the refrigerator for 3 to 4 days, maintaining much of their crispiness when reheated properly.
Freezing
You can freeze the cooked tenderloins by wrapping them tightly in plastic wrap and placing them in a freezer-safe bag. Frozen, they stay good for up to 2 months. When ready to enjoy, thaw overnight in the fridge for best results.
Reheating
To bring back that fresh-from-the-air-fryer crisp, reheat leftovers in your air fryer at 350°F for 3-5 minutes. Avoid the microwave if you want to maintain the crispy, golden crust this Air Fried Chicken Tenderloins with Parmesan and Panko Recipe is known for.
FAQs
Can I use chicken breasts instead of tenderloins?
Absolutely! Just slice the chicken breasts into tenderloin-sized strips for even cooking and follow the same breading and air frying process.
Is it necessary to use Parmesan cheese in the coating?
While Parmesan is essential for that nutty, savory flavor and golden color, you can omit it if needed. Just note that it adds a special depth that elevates this recipe.
Can I make these gluten-free?
Yes! Substitute the all-purpose flour with a gluten-free flour blend and use gluten-free panko crumbs to keep the crunch without gluten.
What dipping sauces pair best with these tenderloins?
Honey mustard, ranch, spicy buffalo sauce, and garlic aioli are top choices that bring out the best in the crispy, cheesy chicken coating.
Do I need to flip the chicken during air frying?
Flipping halfway through cooks the tenderloins evenly and helps both sides achieve a beautiful golden crust. So yes, it’s definitely recommended.
Final Thoughts
If you want a dish that’s crisp, flavorful, and guilt-free, this Air Fried Chicken Tenderloins with Parmesan and Panko Recipe should be your go-to. It’s easy to prepare, quick to cook, and endlessly satisfying. Trust me, once you try these, they’ll become a favorite for weeknight dinners or anytime you crave that perfect crispy chicken bite. Give it a whirl—you won’t regret it!
Print
Air Fried Chicken Tenderloins with Parmesan and Panko Recipe
- Prep Time: 20 minutes
- Cook Time: 10 minutes
- Total Time: 30 minutes
- Yield: 4-6 servings
- Category: Main Dish
- Method: Air Frying
- Cuisine: American
- Diet: Low Fat
Description
Crispy and healthier air fried chicken tenderloins coated in seasoned panko and Parmesan, perfect for a quick and delicious meal with a guilt-free crunch.
Ingredients
Chicken
- 1.5 lbs Chicken Tenderloins, trimmed of any excess fat
Breading
- 1 cup All-Purpose Flour
- 2 large Eggs, beaten
- 1 cup Panko Bread Crumbs
- 1/2 cup Grated Parmesan Cheese
- 1 tbsp Garlic Powder
- 1 tbsp Onion Powder
- 1 tsp Smoked Paprika
- 1 tsp Dried Oregano
- 1/2 tsp Salt
- 1/4 tsp Black Pepper
For Cooking
- Cooking Spray (Olive Oil or Avocado Oil)
Instructions
- Prepare the Chicken: Pat chicken tenderloins dry with paper towels to remove excess moisture, ensuring better breading adherence and crisper results.
- Set up Breading Station: Arrange three shallow dishes: one with flour, another with beaten eggs, and a third mixing panko, grated Parmesan, garlic powder, onion powder, smoked paprika, dried oregano, salt, and black pepper. Mix dry ingredients thoroughly.
- Flour Coating: Dredge each chicken tenderloin in the flour, tapping off any excess to avoid clumps in the breading.
- Egg Wash: Dip the floured chicken piece into the beaten eggs, allowing any surplus to drip off for an even coating.
- Breadcrumb Coating: Press the egg-coated chicken firmly into the panko and Parmesan mixture, coating both sides evenly for maximum crunch and flavor.
- Repeat Breading: Continue the flour, egg, and breadcrumb coating process with the remaining chicken tenderloins.
- Preheat Air Fryer: Heat the air fryer to 400°F (200°C) to ensure a hot cooking environment for the crispiest finish.
- Prepare the Air Fryer Basket: Lightly spray the basket with cooking spray to prevent sticking and promote browning.
- Arrange the Chicken: Place breaded chicken in a single layer inside the basket, avoiding overcrowding which can lead to soggy spots; cook in batches if necessary.
- Spray with Oil: Lightly mist the tops of the chicken tenderloins with cooking spray to encourage even browning and a golden crust.
- Air Fry: Cook for 8-10 minutes, flipping the tenderloins halfway through to brown both sides evenly and reach an internal temperature of 165°F (74°C).
- Check for Doneness: After 8 minutes, inspect the chicken; if not golden or cooked through, continue air frying for an additional 1-2 minutes, checking frequently to avoid burning.
- Repeat if Necessary: If cooking in batches, repeat the placing, spraying, and air frying steps for the remaining chicken.
- Rest the Chicken: Allow the cooked tenders to rest for a few minutes to lock in juices and ensure optimal texture.
- Serve Immediately: Serve hot and crispy with your favorite dipping sauces and side dishes for a satisfying meal experience.
Notes
- Ensure chicken tenderloins are thoroughly dried before breading to help the coating stick better.
- Do not overcrowd the air fryer basket to maintain crispiness during cooking.
- Cooking times can vary depending on air fryer model; always check internal temperature to ensure safety.
- For extra flavor, add herbs like thyme or rosemary to the breadcrumb mixture.
- Serve with a side of fresh salad or steamed vegetables for a balanced meal.

