
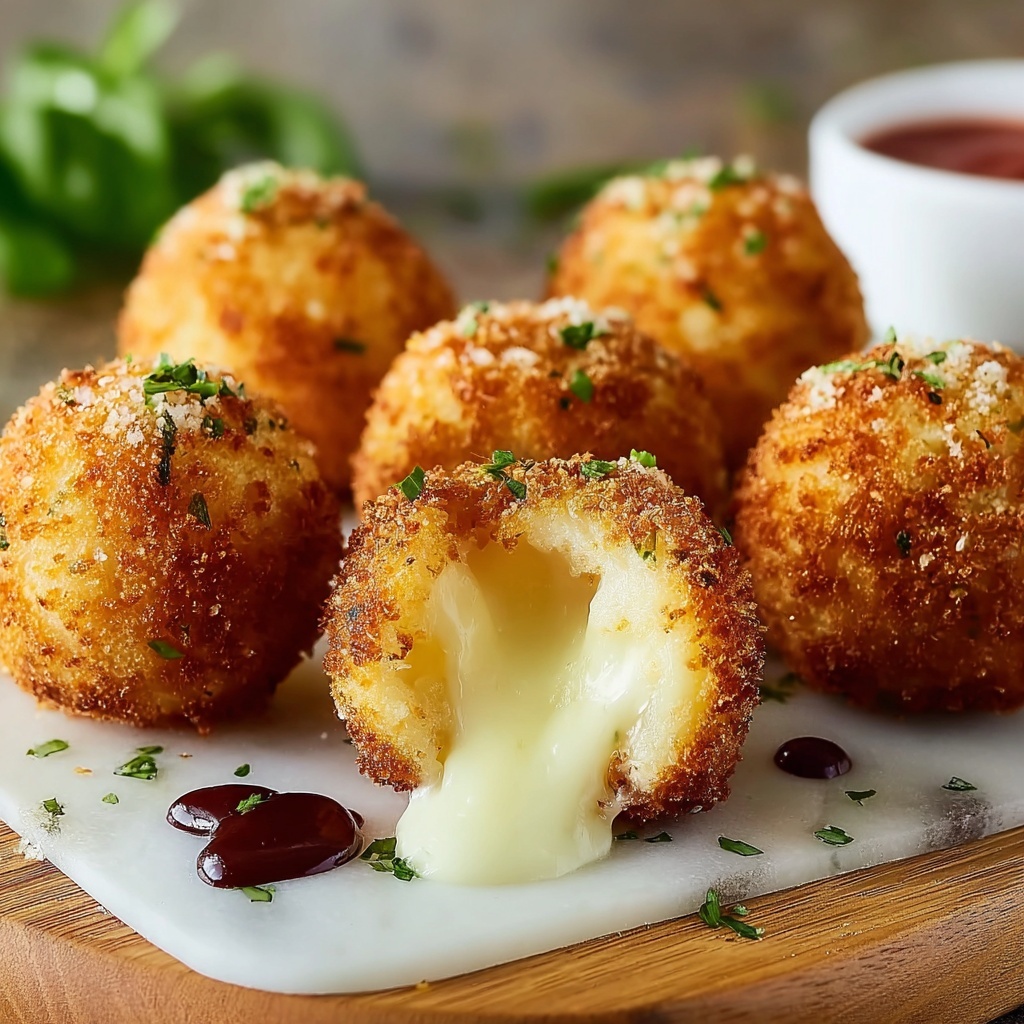
If you are on the hunt for a snack that truly dazzles, this Crispy Fried Cheese Balls Recipe That’s Better Than Takeout Recipe is about to become your new best friend in the kitchen. Imagine the perfect golden exterior crackling with each bite, giving way to a luxuriously gooey, seasoned cheese center that melts in your mouth like a dream. More than just an appetizer, these cheese balls bring together simple ingredients combined to create unforgettable flavors and textures, making every gathering feel just a little more special. Whether you’re hosting a party or craving comfort food, this recipe promises to deliver that crispy, cheesy satisfaction you never knew you needed.
Ingredients You’ll Need
Getting started with this Crispy Fried Cheese Balls Recipe That’s Better Than Takeout Recipe is a breeze, thanks to the straightforward list of ingredients. Each one plays a vital role in crafting the perfect balance of flavor, crunch, and melt-in-your-mouth texture that sets these cheese balls apart.
- 4 cups grated cheese or vegan cheese: The star of the dish that offers richness and gooeyness, choose your favorite variety for personalized flavor.
- 2 eggs: Binds the mixture together, ensuring every bite holds its shape during frying.
- 4 tbsp all-purpose flour: Adds structure and prevents the cheese mixture from being too loose.
- 2 tsp garlic powder: Brings a warm, savory undertone that makes these irresistible.
- 2 tsp onion powder: Enhances depth of flavor and complements the cheese beautifully.
- 2 tsp oregano: Adds a touch of earthiness and Mediterranean flair.
- 1 tsp black pepper: Provides subtle heat and balances the overall seasoning.
- 1 tsp smoked paprika: Infuses a smoky note that adds complexity.
- 1 tsp chili flakes: For a gentle kick that wakes up your taste buds.
- 1 cup bread crumbs: Creates the crisp, crunchy crust that is signature to this recipe.
- 6-8 cups vegetable oil: The perfect medium for frying to golden perfection.
How to Make Crispy Fried Cheese Balls Recipe That’s Better Than Takeout Recipe
Step 1: Prep Your Space
Start by lining a baking tray with parchment paper; this will be where your cheese balls chill and keep from sticking. This simple prep step is key for an easy release after refrigeration.
Step 2: Mix the Cheese and Spices
In a large bowl, combine the grated cheese, eggs, flour, and all the spices. A hand mixer works wonders here to quickly bring everything together into a uniform, pliable mixture. This blend is where your flavors truly come alive!
Step 3: Shape the Cheese Balls
Scoop out about two tablespoons of the mixture for each cheese ball and roll gently between your palms until smooth and round. This size is perfect for frying evenly while keeping a satisfying gooey center.
Step 4: Coat with Bread Crumbs
Roll each formed cheese ball generously in bread crumbs, coating every inch for maximum crunch. Place them carefully on your lined tray to keep the coating intact.
Step 5: Chill to Firm Up
Pop the tray into the fridge for 30 to 45 minutes. This step helps the cheese balls firm up and hold their shape when they hit the hot oil, preventing any messy meltdowns.
Step 6: Prepare for Frying
Line another tray with paper towels; this will be your resting spot post-fry to soak up any excess oil and keep the cheese balls perfectly crisp.
Step 7: Heat the Oil
In a deep pot, heat 6 to 8 cups of vegetable oil to between 350 and 355 degrees Fahrenheit. Using a thermometer ensures your oil is at the right temperature to create that irresistibly crunchy crust quickly without overcooking.
Step 8: Fry Until Golden
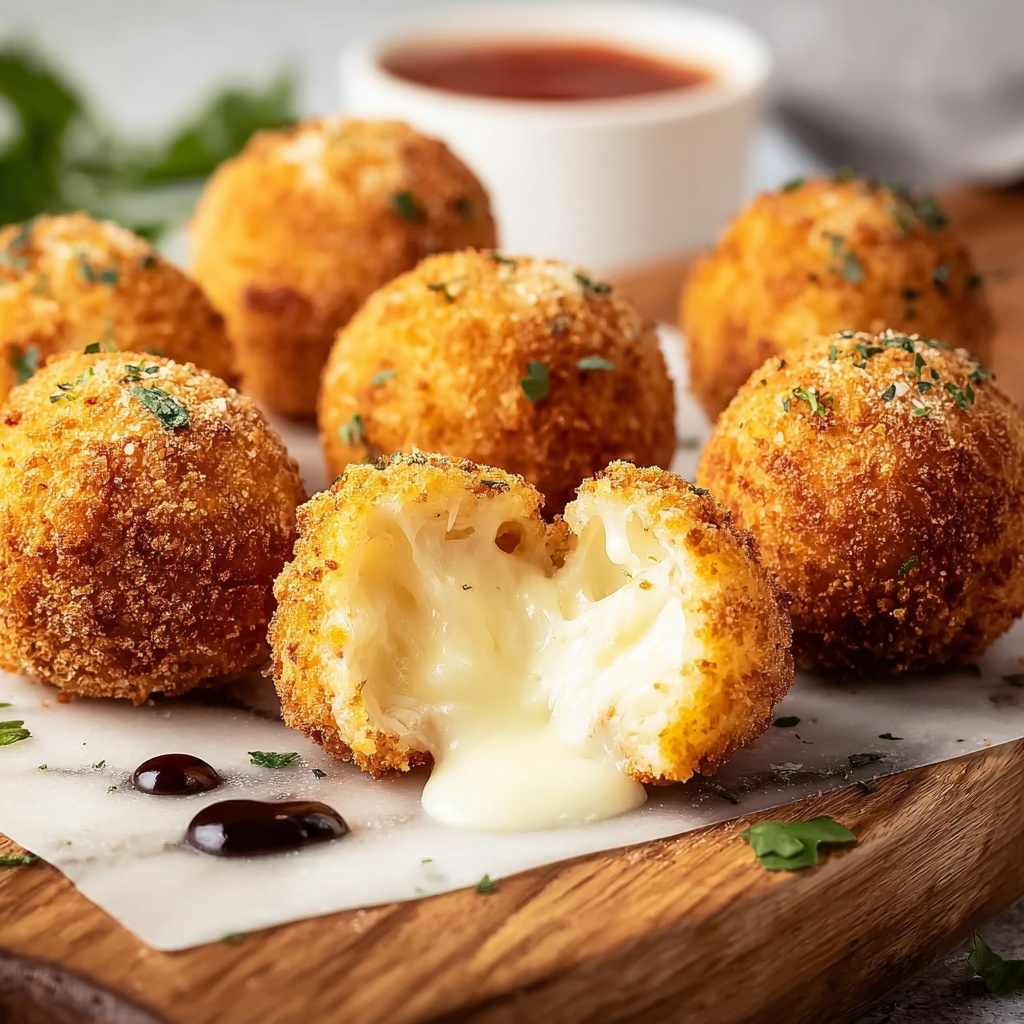
Fry 4 to 5 cheese balls at a time, giving them about 30 seconds per side. Watch as they turn a beautiful golden brown — a sign that crispy perfection is happening.
Step 9: Drain and Cool Slightly
Use a slotted spoon to transfer the fried cheese balls to your paper towel-lined tray to drain any extra oil. This keeps them from feeling greasy and helps maintain that satisfying crunch.
Step 10: Serve and Enjoy
Serve immediately with some bright, fresh marinara sauce and a sprinkle of fresh basil leaves. The warm, tangy sauce complements the rich, cheesy goodness perfectly.
How to Serve Crispy Fried Cheese Balls Recipe That’s Better Than Takeout Recipe
Garnishes
A shower of finely chopped fresh basil or parsley on top adds a splash of vibrant color and refreshing aroma that cuts through the richness beautifully. A sprinkle of shredded Parmesan enhances the cheesy indulgence even further.
Side Dishes
These cheese balls shine alongside zesty marinara sauce, but they also pair wonderfully with a crisp green salad or crunchy crudités to balance out the richness. For a truly cozy feast, serve with a bowl of warm tomato soup for dipping.
Creative Ways to Present
Arrange the cheese balls on a wooden board surrounded by small bowls of dips like garlic aioli, spicy sriracha mayo, or tangy ranch dressing. They’re a fantastic centerpiece for parties, encouraging everyone to grab and savor together.
Make Ahead and Storage
Storing Leftovers
If you happen to have leftovers, store them in an airtight container in the fridge for up to 2 days. To keep them from getting soggy, separate layers with parchment paper.
Freezing
You can freeze the raw, breaded cheese balls on a tray until solid, then transfer them into a freezer-safe bag for up to 1 month. Fry them directly from frozen, adding an extra minute or two to the cooking time.
Reheating
Reheat leftover fried cheese balls in a preheated oven set to 375°F for about 8-10 minutes to restore the crisp exterior. Avoid microwaving as this will make them lose their delightful crunch.
FAQs
Can I use different types of cheese?
Absolutely! Mozzarella is a classic choice for its meltability, but mixing in cheddar or even pepper jack can add delicious twists. For a vegan option, make sure to use a plant-based cheese that melts well.
What oil is best for frying these cheese balls?
Vegetable oil is ideal due to its high smoke point and neutral flavor, but you can also use canola or peanut oil depending on what you have on hand.
Why do I need to refrigerate the cheese balls before frying?
Refrigeration firms them up so they retain their shape when placed in hot oil, preventing them from falling apart and ensuring a crispy outer shell.
Can I bake these instead of frying?
Baking is possible but will result in a different texture. The crispy fried coating is part of what makes this recipe stand out. For best results, stick to frying or consider an air fryer to mimic the texture.
How do I make sure the cheese balls don’t burst open while frying?
Make sure the cheese mixture is well bound with eggs and flour, chill them thoroughly, and don’t overcrowd the oil when frying. Maintaining the right oil temperature is also crucial.
Final Thoughts
This Crispy Fried Cheese Balls Recipe That’s Better Than Takeout Recipe is pure kitchen magic in every bite. Simple ingredients transform into a crispy, gooey delight that will wow family and friends alike. If you’ve been searching for a snack that’s easy to make but feels indulgent and special, this recipe should be your go-to. Trust me, once you try these, you’ll wonder why you ever settled for anything else!
Print
Crispy Fried Cheese Balls Recipe That’s Better Than Takeout Recipe
- Prep Time: 15 minutes
- Cook Time: 10 minutes
- Total Time: 25 minutes plus 30-45 minutes chilling time
- Yield: 24 cheese balls
- Category: Appetizer
- Method: Frying
- Cuisine: American
Description
These Crispy Fried Cheese Balls are a deliciously crunchy and cheesy appetizer perfect for any occasion. Made with a blend of grated cheese, flavorful spices, and coated in crispy bread crumbs, they’re fried to golden perfection for a taste that’s better than takeout.
Ingredients
Cheese Ball Mixture
- 4 cups grated cheese or vegan cheese
- 2 eggs
- 4 tbsp all-purpose flour
- 2 tsp garlic powder
- 2 tsp onion powder
- 2 tsp oregano
- 1 tsp black pepper
- 1 tsp smoked paprika
- 1 tsp chili flakes
Coating
- 1 cup bread crumbs
For Frying
- 6–8 cups vegetable oil
Instructions
- Prepare the tray: Line a baking tray with parchment paper and set aside to place the cheese balls after coating.
- Mix ingredients: In a large bowl, combine grated cheese, eggs, flour, and all spices. Use a hand mixer until the mixture is fully incorporated and smooth.
- Form balls: Scoop approximately 2 tablespoons of the mixture and roll into small, uniform balls.
- Coat with bread crumbs: Evenly coat each cheese ball in bread crumbs and place them on the prepared parchment-lined tray.
- Chill: Refrigerate the coated cheese balls for 30–45 minutes to help them firm up for frying.
- Prepare draining tray: Line another tray with paper towels to drain excess oil from the fried cheese balls.
- Heat oil: In a deep pot, heat 6–8 cups of vegetable oil to 350–355°F, using a thermometer to monitor the temperature accurately.
- Fry cheese balls: Fry 4–5 cheese balls at a time until golden brown, approximately 30 seconds per side, watching carefully to prevent burning.
- Drain excess oil: Remove the fried cheese balls from the oil and place them on the paper towel-lined tray to absorb excess oil.
- Serve: Serve immediately while hot, ideally with marinara sauce and fresh basil for an extra flavor boost.
Notes
- Use a thermometer to maintain the correct oil temperature for even frying and avoid greasy cheese balls.
- Refrigerating the cheese balls before frying helps them hold their shape and prevents melting too quickly.
- You can use any type of cheese or vegan cheese depending on your preference.
- Serve with marinara sauce or your favorite dipping sauce for enhanced flavor.
- Make sure to not overcrowd the fryer to maintain oil temperature and ensure crispy results.
