
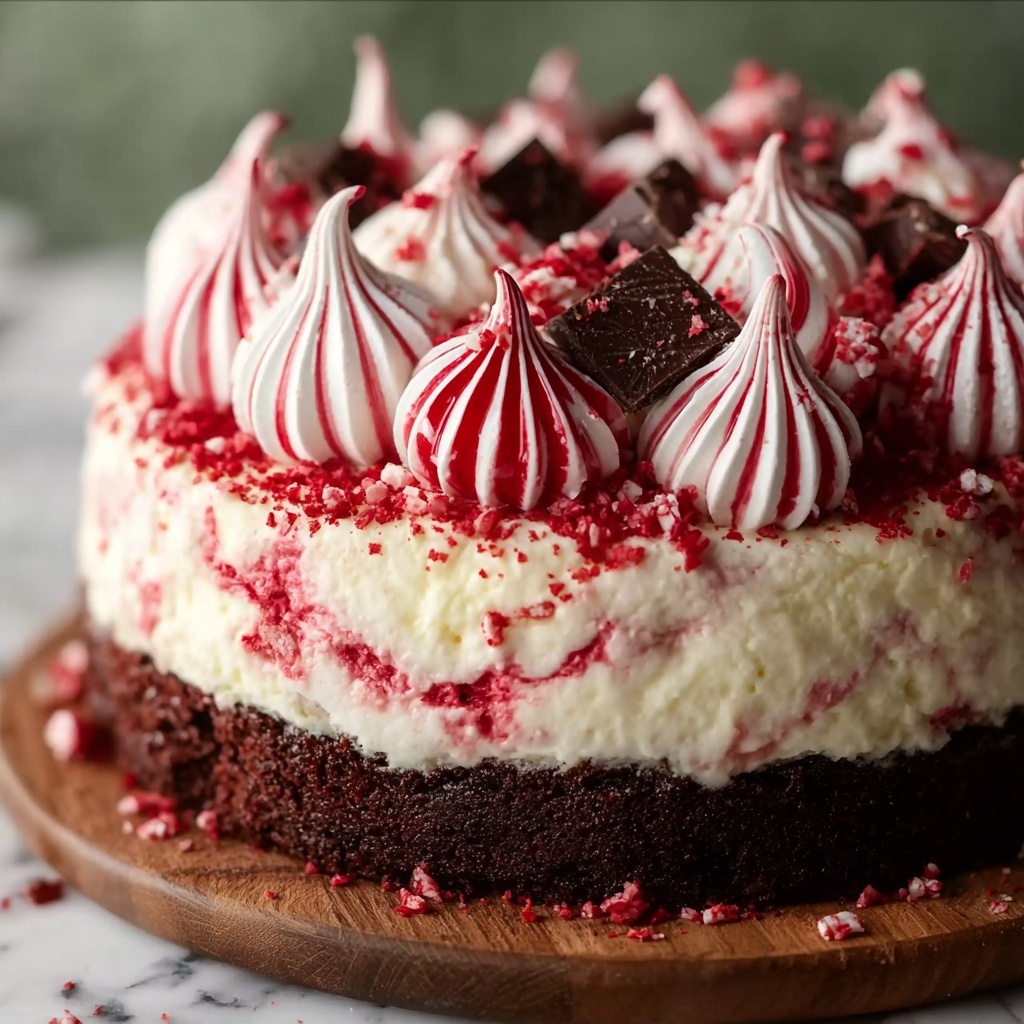
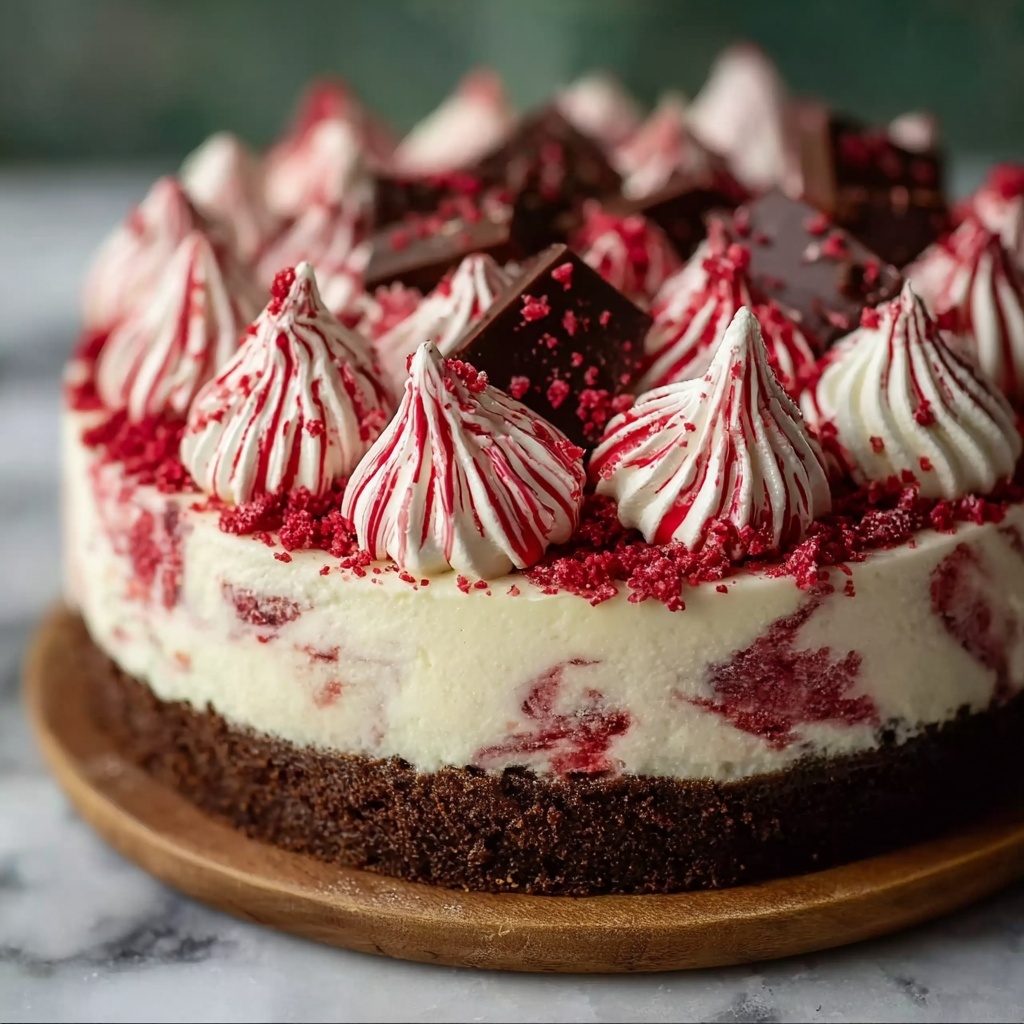
If you’re craving a dessert that feels like a festive hug in every bite, look no further than this Peppermint Ice Cream Cake Recipe. It masterfully combines the rich crunch of a chocolate cookie crust, the creamy coolness of peppermint ice cream, and the light sweetness of whipped cream topping, all adorned with crunchy peppermint candies and chocolate shavings. This cake is not just a treat for the taste buds but a dazzling centerpiece for any celebration, easily serving 8 to 10 happy guests. It’s effortless to make and guaranteed to spread smiles all around the table.
Ingredients You’ll Need
Gathering simple yet powerful ingredients is what makes this Peppermint Ice Cream Cake Recipe truly shine. Each component plays a special role in adding texture, flavor, and that gorgeous holiday look you want on your dessert plate.
- 2 cups (200g) chocolate cookie crumbs: Provides a rich, crunchy base that contrasts beautifully with the creamy layers.
- 6 tbsp (85g) unsalted butter, melted: Binds the cookie crumbs together to create a firm crust.
- 1 ½ quarts (1.4 liters) peppermint ice cream, slightly softened: The star ingredient that brings refreshing minty coolness.
- ½ cup (50g) crushed peppermint candies or candy canes: Adds extra crunch and festive flair sprinkled within the ice cream layer.
- 2 cups (480ml) heavy whipping cream: Whipped to fluffy perfection, it gives the cake a cloud-like topping.
- 3 tbsp powdered sugar: Sweetens the whipped cream just right, balancing the mint and chocolate.
- ½ tsp vanilla extract: Enhances the whipped cream’s flavor for smooth, comforting notes.
- Crushed candy canes or peppermint candies: Ideal for decorating and creating that irresistible holiday vibe.
- Chocolate shavings or mini chocolate chips: Adds a touch of elegance and extra chocolate crunch on top.
How to Make Peppermint Ice Cream Cake Recipe
Step 1: Prepare the Chocolate Cookie Crust
Start by greasing a 9-inch springform pan or lining it with parchment paper for easy removal later. Mix the chocolate cookie crumbs with melted butter until you get a texture like damp sand. Press this mixture firmly into the pan’s bottom for a solid, even crust that will hold the creamy layers beautifully. Pop it into the freezer for 15 minutes to set it up.
Step 2: Add the Peppermint Ice Cream Layer
Spread the slightly softened peppermint ice cream evenly across the chilled crust. This layer should be smooth and consistent to make every bite luscious. For an extra surprise, sprinkle half of the crushed peppermint candies over the ice cream, giving it an enticing crunch and festive sparkle.
Step 3: Freeze Until Firm
Cover the pan tightly with plastic wrap to protect the ice cream from freezer odors. Freeze the cake for at least 4 hours or until it’s rock solid, ensuring the ice cream sets perfectly on the crust.
Step 4: Whip the Cream Topping
In a chilled bowl, whip the heavy cream with powdered sugar and vanilla extract until stiff peaks form. This fluffy topping will bring a smooth, light contrast to the dense ice cream layer, marrying the flavors seamlessly.
Step 5: Assemble and Decorate the Cake
Take the cake out of the freezer and spread the whipped cream evenly over the ice cream layer. Then, sprinkle crushed candy canes, chocolate shavings, or mini chocolate chips generously on top. These touches add texture, color, and festive cheer, making your cake truly eye-catching.
Step 6: Final Chill and Serve
Return the fully assembled cake to the freezer for at least 1 hour so the whipped topping firms up nicely. When you’re ready to serve, let the cake sit at room temperature for 5 to 10 minutes. This makes cutting easier and ensures each slice looks clean and inviting.
How to Serve Peppermint Ice Cream Cake Recipe
Garnishes
The magic of this Peppermint Ice Cream Cake Recipe comes alive with the right garnishes. I love topping it with extra crushed candy canes for a festive crunch and a pop of color, along with chocolate shavings that add a hint of indulgence. These simple touches make the cake look like a masterpiece ready to impress.
Side Dishes
While this cake is a star on its own, light fruit salads or a drizzle of warm chocolate sauce serve as excellent companions. The freshness of berries or clementines contrasts nicely with the minty richness, and a bit of chocolate sauce amps up the indulgence without overpowering the cake’s delicate flavors.
Creative Ways to Present
Try serving this cake on a festive platter surrounded by peppermint sticks or holly leaves for a holiday-ready display. You can also slice individual portions into clear cups layered with additional crushed candies or chocolate chips for a fun and portable dessert option that delights guests at parties.
Make Ahead and Storage
Storing Leftovers
Any leftovers of your Peppermint Ice Cream Cake Recipe should be covered tightly and returned to the freezer promptly. This prevents the ice cream from absorbing other freezer smells and keeps the whipped cream topping fresh and fluffy.
Freezing
This cake freezes beautifully for up to two weeks. To maintain its texture and flavor, make sure it’s sealed well with plastic wrap and an airtight container. When you’re ready to enjoy it, allow it a few minutes to soften slightly before serving for the best experience.
Reheating
No reheating needed here! The perfect way to enjoy this Peppermint Ice Cream Cake Recipe is chilled or slightly softened. Just a brief rest at room temperature before slicing is all it takes to make cutting smooth and effortless.
FAQs
Can I use another flavor of ice cream?
Absolutely! While peppermint ice cream gives this cake its signature festive flair, vanilla or chocolate ice cream would be delicious alternatives. Just keep in mind that the peppermint candies add the minty crunch, so adjust accordingly if skipping peppermint ice cream.
What if I don’t have a springform pan?
You can use a regular cake pan lined well with parchment paper for easier removal. Just gently warm the outside of the pan in warm water for a moment to loosen the cake before unmolding.
Can I make this cake dairy-free?
Yes, by choosing dairy-free peppermint ice cream, vegan butter, and coconut cream whipped topping, you can create a similar delightful dessert that suits dairy-free diets without losing the essence of the Peppermint Ice Cream Cake Recipe.
How far in advance can I make this cake?
You can prepare this cake up to three days in advance and keep it frozen until serving. Just add fresh garnishes right before serving to keep them vibrant and crunchy.
How do I avoid the whipped topping from melting?
Ensure your mixing bowl and beaters are well chilled before whipping the cream, and keep the cake in the freezer until right before serving. Avoid leaving it out too long at room temperature to maintain the luscious texture.
Final Thoughts
From the first bite to the last, this Peppermint Ice Cream Cake Recipe is pure joy wrapped up in festive flavors. It’s surprisingly easy to make, yet it looks like something from a gourmet bakery. Trust me, once you try it, this cake will become your go-to dessert for holidays and special occasions. So go ahead, make one today, and watch everyone’s faces light up with delight!
Print
Peppermint Ice Cream Cake Recipe
- Prep Time: 15 minutes
- Cook Time: 0 minutes
- Total Time: 5 hours 15 minutes
- Yield: 8 to 10 servings
- Category: Dessert
- Method: No-Cook
- Cuisine: American
Description
This Peppermint Ice Cream Cake is a delightful no-bake dessert featuring a crunchy chocolate cookie crust, creamy peppermint ice cream, and a fluffy whipped cream topping garnished with crushed candy canes and chocolate shavings. Perfect for festive occasions or any time you want a refreshing, minty treat that’s easy to assemble and sure to impress.
Ingredients
Crust
- 2 cups (200g) chocolate cookie crumbs (e.g., Oreos, without the filling)
- 6 tbsp (85g) unsalted butter, melted
Ice Cream Layer
- 1 ½ quarts (1.4 liters) peppermint ice cream, slightly softened
- ½ cup (50g) crushed peppermint candies or candy canes
Whipped Topping
- 2 cups (480ml) heavy whipping cream
- 3 tbsp powdered sugar
- ½ tsp vanilla extract
Garnish
- Crushed candy canes or peppermint candies
- Chocolate shavings or mini chocolate chips
Instructions
- Prepare the Crust: Grease a 9-inch springform pan or line it with parchment paper to ensure easy removal of the cake later.
- Mix Crust Ingredients: In a bowl, combine the chocolate cookie crumbs with the melted butter until the mixture has a wet sand-like texture, which helps it bind together.
- Form the Crust: Press the cookie crumb mixture firmly and evenly into the bottom of the prepared pan. Freeze this crust for 15 minutes to set.
- Add the Ice Cream Layer: Spread the softened peppermint ice cream evenly over the chilled crust, creating a smooth layer.
- Sprinkle Peppermint Candies: Evenly distribute the crushed peppermint candies over the ice cream to add crunch and extra mint flavor.
- Freeze to Firm: Cover the pan tightly with plastic wrap and place it in the freezer for at least 4 hours, or until the ice cream is completely firm.
- Prepare the Whipped Topping: In a chilled mixing bowl, whip the heavy cream together with powdered sugar and vanilla extract until stiff peaks form, ensuring a light and fluffy texture.
- Assemble the Cake: Remove the ice cream cake from the freezer and spread the whipped cream topping evenly over the ice cream layer, creating a smooth and decorative surface.
- Decorate: Sprinkle the top with crushed candy canes and chocolate shavings or mini chocolate chips for an attractive and flavorful finish.
- Chill Before Serving: Return the cake to the freezer for at least 1 hour to set the whipped topping firmly.
- Serve: Before slicing, allow the cake to sit at room temperature for 5-10 minutes. This softens the ice cream slightly, making it easier to cut clean slices.
Notes
- For easier slicing, use a warm knife and wipe it clean between cuts.
- The cake can be stored in the freezer for up to 1 week, tightly covered to avoid freezer burn.
- Substitute peppermint ice cream with vanilla if peppermint flavor is not desired, and adjust toppings accordingly.
- For a gluten-free version, use gluten-free chocolate cookie crumbs.
- Make sure the mixing bowl and beaters are chilled before whipping the cream to achieve better volume.


