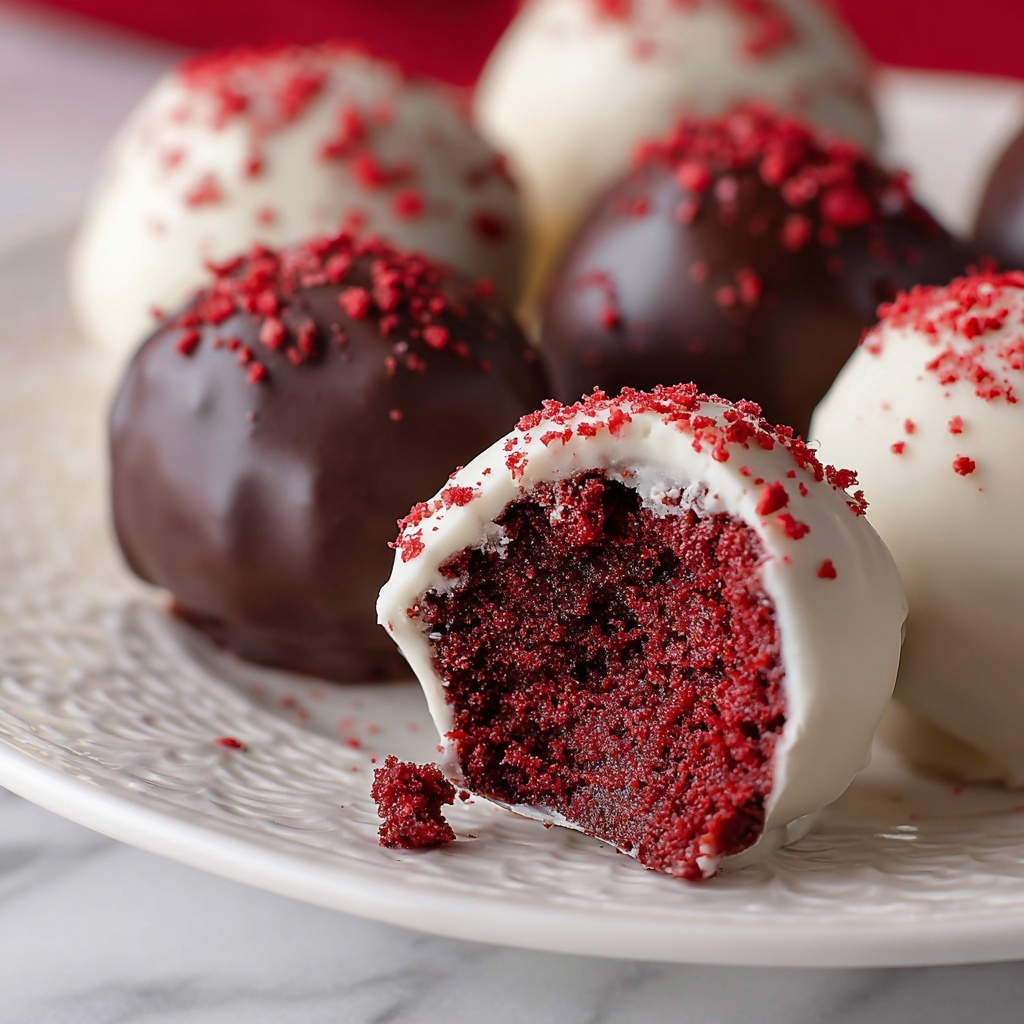
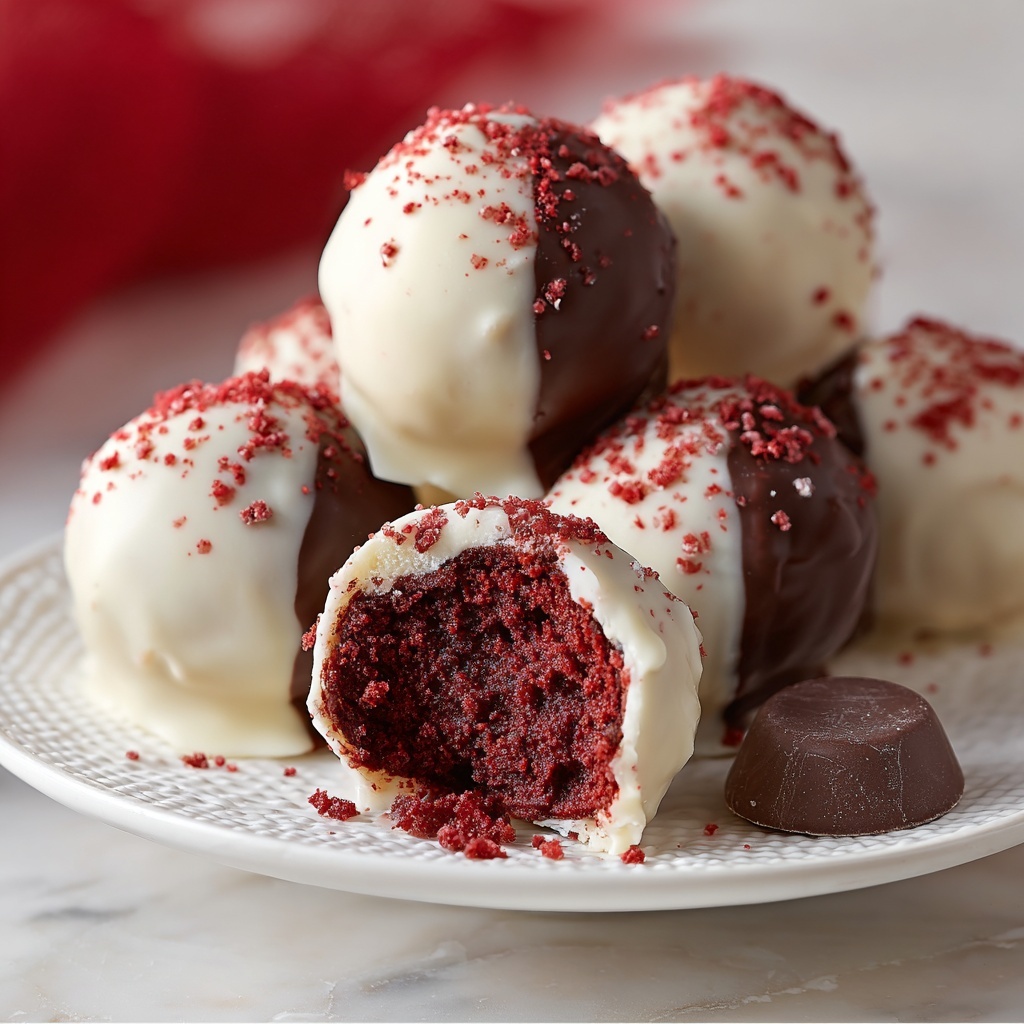
If you have a sweet tooth and love little bites of happiness, then this Red Velvet Cake Balls Recipe is going to become your new favorite treat. Imagine the rich, moist flavor of red velvet cake combined with the smooth creaminess of cream cheese frosting, all rolled into perfect, bite-sized spheres covered in a luscious chocolate or candy shell. These cake balls are not only incredibly easy to make, but also irresistibly indulgent, making them perfect for parties, gifts, or just a special snack to brighten your day.
Ingredients You’ll Need
With just a few simple ingredients, you can create these delightful red velvet cake balls that are bursting with flavor and texture. Each ingredient plays a crucial role, from the tender cake crumb to the creamy frosting that holds everything together, and finally the smooth coating that adds a perfect finishing touch.
- Red velvet cake mix: Gives you a tender, moist base with that classic red velvet flavor and beautiful color.
- Cream cheese frosting (16 oz): Adds creamy sweetness and helps bind the cake crumbs into perfectly smooth balls.
- Chocolate or candy melts: Provides a shiny, crisp coating that seals in flavor and looks stunning.
How to Make Red Velvet Cake Balls Recipe
Step 1: Bake the Perfect Cake
Begin by preparing your red velvet cake according to the package instructions (or your homemade recipe). Baking it just right is essential because the softness and moisture of the cake will determine how easy it is to crumble and blend with frosting later on. Once baked, allow the cake to cool completely before moving forward—patience here makes the best texture.
Step 2: Crumble and Combine
Once your cake is cool, crumble it into a large mixing bowl using your hands or a fork. The goal is to achieve fine, fluffy crumbs. Add in the cream cheese frosting and mix gently but thoroughly with your hands or a spoon until every crumb is evenly coated. The mixture should be moist enough to hold together but not too sticky to roll.
Step 3: Roll into Balls
Pinch off small amounts of the mixture and roll them between your palms to create uniform quarter-sized balls. This size is perfect for popping into your mouth or serving at parties. Place each one carefully on a baking sheet lined with wax paper to prevent sticking.
Step 4: Chill for Firmness
Pop your tray of cake balls into the refrigerator for at least one hour. This step is key because it firms up the balls, making them much easier to coat with chocolate without falling apart. It also helps the flavors meld together beautifully.
Step 5: Melt the Coating
While your cake balls chill, melt your choice of chocolate or candy melts following the package instructions. Whether you go for a rich dark chocolate, white chocolate, or colorful candy melts, this layer will add that irresistible glossy finish and a delicious crunch when you bite in.
Step 6: Dip and Coat
Using a fork or dipping tool, carefully dip each chilled cake ball into the melted coating. Make sure it’s entirely covered, then gently tap off any excess chocolate. Place the coated cake balls back onto the wax paper-lined tray to set.
Step 7: Let Them Set
Allow your cake balls to sit at room temperature or refrigerate them briefly until the coating is fully hardened. This final step guarantees a beautiful presentation and that satisfying snap when you dive in.
How to Serve Red Velvet Cake Balls Recipe

Garnishes
Sprinkle a bit of crushed pecans, edible glitter, or a drizzle of contrasting white chocolate over the top for some extra flair. These little touches make the cake balls look stunning and add another layer of texture and flavor.
Side Dishes
Red velvet cake balls are perfectly paired with a cup of hot coffee, a bold espresso, or even a creamy hot chocolate. If you’re serving them at a party, think about including fresh berries or a scoop of vanilla bean ice cream for a sweet contrast.
Creative Ways to Present
Arrange the cake balls in a colorful cupcake liner or place them on a decorative platter with festive toothpicks for easy grabbing. You can also stick them on lollipop sticks for a fun “cake pop” style that’s sure to be a hit at any gathering.
Make Ahead and Storage
Storing Leftovers
If you’re lucky enough to have leftovers, store your red velvet cake balls in an airtight container in the refrigerator. They’ll keep their freshness and texture for up to a week, making them a fantastic make-ahead treat.
Freezing
Want to save them for later? Freeze the cake balls by placing them on a tray first to freeze individually, then transfer to a freezer-safe bag or container. When properly sealed, they can last for up to three months without losing their magic.
Reheating
No need to heat these little treats, but if you prefer the coating slightly softened, simply bring them to room temperature for about 15 minutes. Avoid microwaving as this can melt the coating and change the texture.
FAQs
Can I make red velvet cake balls without a cake mix?
Absolutely! You can use your favorite homemade red velvet cake recipe instead of a box mix. Just be sure your cake is fully cooled before crumbling, so the texture holds.
What toppings work best on Red Velvet Cake Balls Recipe?
Classic choices include crushed nuts, sprinkles, or drizzled contrasting chocolates. Get creative with colored sugars or edible flowers to match your occasion.
Can I use regular frosting instead of cream cheese frosting?
While you can, cream cheese frosting complements the rich chocolatey flavor of red velvet perfectly and gives the right tang. Using a different frosting may change the taste and texture slightly.
How do I prevent the cake balls from falling apart?
Ensuring the cake is fully cooled and using enough frosting to bind the crumbs are key. Chilling the balls before dipping also helps them maintain their shape.
Are red velvet cake balls gluten-free?
Traditional recipes use wheat-based cake mix, which contains gluten. However, you can find or make a gluten-free red velvet cake mix to make this recipe suitable for gluten-free diets.
Final Thoughts
There’s something truly joyful about creating and sharing Red Velvet Cake Balls Recipe, especially when you see how quickly they disappear! With just a handful of easy ingredients and straightforward steps, you can bring a little celebration to your day anytime. So grab your mixing bowl, get your frosting ready, and dive into this delightfully indulgent treat — I promise it will be love at first bite.
Print
Red Velvet Cake Balls Recipe
- Prep Time: 1h 20m
- Cook Time: 30m
- Total Time: 1h 50m
- Yield: 45 cake balls
- Category: Dessert
- Method: Baking
- Cuisine: American
Description
Delicious and easy-to-make Red Velvet Cake Balls that feature moist red velvet cake crumbs combined with creamy frosting, coated in rich melted chocolate or candy melts. Perfect bite-sized treats for parties, gifts, or a sweet indulgence.
Ingredients
Cake Balls
- 1 box red velvet cake mix (or homemade red velvet cake)
- 1 can (16 oz) cream cheese frosting
Coating
- Chocolate or candy melts for coating
Instructions
- Bake the Cake: Bake the red velvet cake according to the package instructions or your homemade recipe. Allow the cake to cool completely before proceeding to the next step.
- Crumble and Mix: Crumble the cooled cake into a large mixing bowl, breaking it down into fine crumbs. Add the cream cheese frosting and mix thoroughly until the cake crumbs are evenly coated and the mixture holds together well.
- Form Balls: Using your hands or a small scoop, roll the mixture into quarter-sized balls. Place the formed balls evenly spaced on a baking sheet lined with wax or parchment paper.
- Chill: Refrigerate the cake balls for at least 1 hour to allow them to firm up, which will make the coating process easier and prevent them from crumbling.
- Melt Coating: Melt the chocolate or candy melts according to the package instructions, usually by heating gently in a microwave or double boiler until smooth.
- Coat the Cake Balls: Dip each cake ball into the melted chocolate or candy melts, ensuring it is fully covered. Use a fork or dipping tool to lift the cake ball out, letting excess coating drip off. Place the coated cake ball back onto the wax paper to set.
- Set and Serve: Allow the coating to harden completely at room temperature or place in the refrigerator for faster setting. Once set, serve immediately or package for gifting or storage.
Notes
- Ensure the cake is completely cooled before mixing with frosting to prevent melting or sogginess.
- Refrigerate the cake balls well; this helps maintain their shape during coating.
- Use a fork or dipping tool to avoid fingerprints and achieve a smooth coating.
- Store cake balls in an airtight container in the refrigerator for up to 5 days.
- You can decorate the coated cake balls with sprinkles or drizzled chocolate before the coating sets.

