
“`html
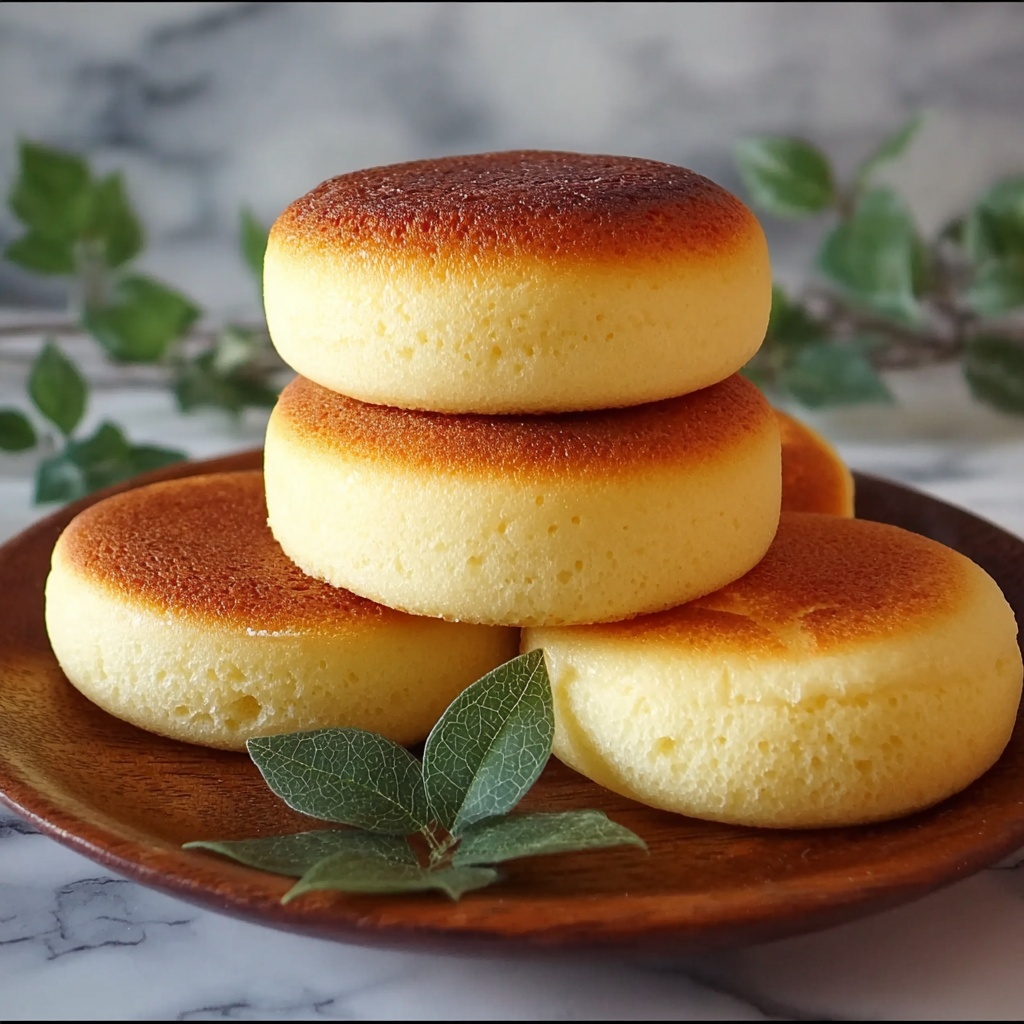
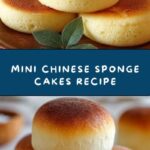
If you have a soft spot for delicate, melt-in-your-mouth treats, this Mini Chinese Sponge Cakes Recipe is going to steal your heart instantly. These little cakes are airy, subtly sweet, and have that perfect bouncy texture that makes every bite a tiny celebration. Whether you’re craving a light snack or a charming dessert to impress your guests, this recipe brings out the classic flavors and gentle softness that make traditional Chinese sponge cakes so beloved. Plus, they’re easy to whip up, making them a favorite for both novice and seasoned bakers alike.
Ingredients You’ll Need
These ingredients are as straightforward as it gets, yet each plays a crucial role in crafting the perfect mini sponge cakes. From the eggs providing structure and airiness, to the flour and baking powder giving the cakes their light crumb, every component contributes to the texture, flavor, and overall magic of the final product.
- 2 large eggs: Essential for creating that fluffy, airy texture that defines these sponge cakes.
- 1/2 cup granulated sugar: Adds just the right amount of sweetness to balance the lightness.
- 1/2 cup all-purpose flour: The backbone of the cakes, offering structure without heaviness.
- 1/4 teaspoon baking powder: Helps the cakes rise gently for a soft, spongy texture.
- 1/4 teaspoon vanilla extract: Infuses a lovely warm aroma and subtle flavor depth.
- 1/4 cup milk: Adds moisture to the batter, keeping the cakes tender and smooth.
- 2 tablespoons vegetable oil: Keeps the sponge moist and prevents dryness.
- A pinch of salt: Enhances all the flavors, balancing sweetness perfectly.
How to Make Mini Chinese Sponge Cakes Recipe
Step 1: Preheat and Prepare Your Molds
Start by heating your oven to 350°F (175°C). Grease your mini muffin tin or egg-shaped cake molds thoroughly so your sponge cakes release effortlessly once baked. This simple prep will set you up for success as you move through the recipe.
Step 2: Whisk Eggs and Sugar Until Fluffy
In a clean mixing bowl, beat the eggs together with the granulated sugar until the mixture turns pale and thickens, about five minutes with a hand mixer. This step incorporates air, laying the foundation for those light-as-air cakes you’re aiming for.
Step 3: Combine Dry Ingredients
In a separate bowl, sift together the flour, baking powder, and a pinch of salt. This helps spread the leavening evenly throughout the cake batter, ensuring each mini cake rises uniformly and stays tender.
Step 4: Blend Milk, Oil, and Vanilla
Whisk together the milk, vegetable oil, and vanilla extract in a small bowl. Gradually add this flavorful liquid mix to your beaten eggs and sugar, folding gently to keep as much air in the batter as possible.
Step 5: Fold in Dry Ingredients
Carefully fold the flour mixture into the wet ingredients bit by bit to maintain the batter’s fluffy texture. Don’t overmix—gentle folding is key to preserving all those tiny air bubbles contributing to the cake’s delicate crumb.
Step 6: Fill the Molds
Evenly pour the batter into your prepared molds, filling about three-quarters full. This amount ensures the cakes rise nicely without overflowing and creates that charming little dome shape everyone loves.
Step 7: Bake to Perfection
Pop the filled molds into the oven and bake for 12 to 15 minutes. Look for a lightly golden surface and test doneness by inserting a toothpick into the center—it should come out clean. This timing nails the tender, spongy texture without drying the cakes out.
Step 8: Cool and Remove
Let the cakes cool for a few minutes in their molds so they set perfectly. Then gently remove each mini cake and let them cool a bit more on a wire rack or serve warm to showcase their soft charm.
How to Serve Mini Chinese Sponge Cakes Recipe
Garnishes
This Mini Chinese Sponge Cakes Recipe shines beautifully with simple garnishes. A light dusting of powdered sugar or a thin drizzle of honey elevates their sweetness subtly. Fresh fruit slices, like strawberries or kiwis, add a refreshing contrast and vibrant color, making your presentation pop.
Side Dishes
Pair these sponge cakes with a cup of jasmine or green tea to enhance their gentle flavors and provide a soothing balance. For a more indulgent treat, a dollop of whipped cream or a scoop of vanilla ice cream adds richness without overpowering the cake’s delicate nature.
Creative Ways to Present
For a fun twist, serve Mini Chinese Sponge Cakes Recipe stacked in mini “cake towers” with alternating layers of fruit or cream. You can also place them in individual parchment paper wrappers with personalized tags to make a charming gift or party favor. Their petite size and lovely texture invite lots of playful presentations!
Make Ahead and Storage
Storing Leftovers
If you have any leftover mini sponge cakes, store them in an airtight container at room temperature for up to two days. This preserves their delicate texture while keeping them fresh enough to enjoy later without refrigeration dulling their charm.
Freezing
To keep these cakes longer, freeze them in a single layer on a baking sheet before transferring to a freezer bag or airtight container. They’ll stay good for up to a month. When ready to enjoy, thaw at room temperature to maintain their softness and flavor.
Reheating
Warm leftover or thawed cakes gently in a microwave for 10 to 15 seconds or in a low oven (about 300°F/150°C) for a few minutes. This brings back their freshly baked feel, making every bite taste as delightful as when they came out of the oven.
FAQs
Can I substitute the vegetable oil with butter?
You can swap vegetable oil for melted butter to add a richer flavor, but be aware it might slightly change the texture, making it denser. Vegetable oil keeps the cakes extra moist and tender, which is ideal for this Mini Chinese Sponge Cakes Recipe.
Is it necessary to use baking powder in this recipe?
Yes, baking powder is crucial for giving these sponge cakes their signature light and fluffy rise. Without it, the cakes could turn out heavy and flat, lacking that classic airy bounce you want.
Can I make these cakes gluten-free?
Absolutely! You can replace the all-purpose flour with a gluten-free baking flour blend. Just make sure your baking powder is gluten-free too. The texture might vary slightly, but the cakes will still be delightful.
What’s the best way to avoid deflating the batter?
Gentle folding is the trick—use a spatula to carefully incorporate the dry ingredients without stirring vigorously. Overmixing can knock out the air bubbles you worked so hard to build in the eggs and sugar.
How long do Mini Chinese Sponge Cakes stay fresh?
These cakes are best enjoyed within two days at room temperature for optimal texture and flavor. After that, they may begin to lose their softness unless stored properly in the fridge or freezer.
Final Thoughts
I cannot recommend enough giving this Mini Chinese Sponge Cakes Recipe a try. It’s simple, satisfying, and absolutely delightful whether you’re baking for a special occasion or just treating yourself to a sweet moment. Once you taste these airy, lightly sweet cakes, you’ll find yourself coming back to the recipe again and again for a little slice of happiness.
“`
Print
Mini Chinese Sponge Cakes Recipe
- Prep Time: 15 minutes
- Cook Time: 15 minutes
- Total Time: 30 minutes
- Yield: 12 mini cakes
- Category: Dessert
- Method: Baking
- Cuisine: Chinese
Description
Mini Chinese Sponge Cakes are light, fluffy, and delicately sweet treats baked in mini muffin or egg-shaped molds. These moist cakes are perfect for a snack or dessert and are made using simple ingredients like eggs, sugar, and flour, with a subtle hint of vanilla.
Ingredients
Dry Ingredients
- 1/2 cup all-purpose flour
- 1/4 teaspoon baking powder
- A pinch of salt
Wet Ingredients
- 2 large eggs
- 1/2 cup granulated sugar
- 1/4 teaspoon vanilla extract
- 1/4 cup milk
- 2 tablespoons vegetable oil
Instructions
- Preheat Oven: Preheat your oven to 350°F (175°C) and grease a mini muffin pan or egg cake molds to ensure the cakes don’t stick.
- Beat Eggs and Sugar: In a mixing bowl, whisk the eggs and sugar together with a hand mixer for about 5 minutes, until the mixture turns pale and fluffy, creating a light aerated batter.
- Combine Dry Ingredients: In a separate bowl, mix the all-purpose flour, baking powder, and a pinch of salt thoroughly.
- Mix Wet Ingredients: In another small bowl, combine the milk, vegetable oil, and vanilla extract, then gradually add this to the beaten egg and sugar mixture, blending gently to maintain the airiness.
- Fold Dry Ingredients: Gently fold the dry ingredient mixture into the wet mixture, being careful not to deflate the batter to keep it light.
- Fill Molds: Pour the batter into the prepared mini muffin or egg-shaped molds, filling each about three-quarters full to give room for rising.
- Bake: Place the molds in the preheated oven and bake for 12-15 minutes until the cakes are lightly golden on top and a toothpick inserted into the center comes out clean.
- Cool and Serve: Allow the cakes to cool slightly in the molds before carefully removing them. Serve warm or at room temperature for the best taste and texture.
Notes
- Do not overmix the batter when folding the dry ingredients to keep the cakes fluffy.
- Using mini muffin or specialized egg-shaped molds contributes to the traditional shape and size.
- Serve these cakes fresh as they are best enjoyed shortly after baking.
- You can substitute the all-purpose flour with cake flour for an even lighter texture.
- Store leftover cakes in an airtight container at room temperature for up to 2 days.

