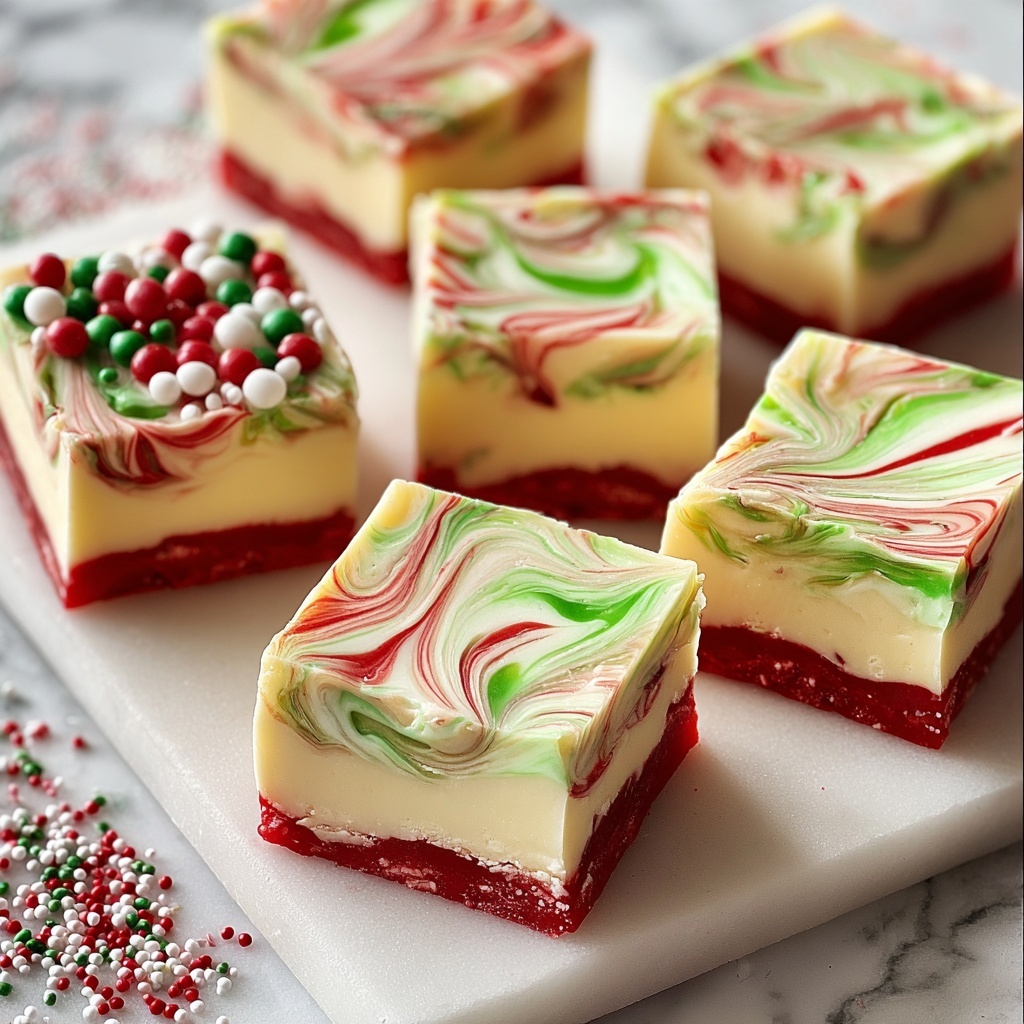
If you’re looking for a festive dessert that bursts with color, creamy sweetness, and that unmistakable holiday cheer, this Christmas Swirled White Chocolate Fudge Recipe is an absolute must-try. Swirling vibrant red and green hues through luscious white chocolate not only makes for a stunning presentation but also delivers a rich, melt-in-your-mouth texture that guests will rave about. Perfect for gift-giving or sharing around the holiday table, this fudge embodies the joyful spirit of the season in every bite.
Ingredients You’ll Need
Making this Christmas Swirled White Chocolate Fudge Recipe is wonderfully simple because it relies on just a handful of ingredients, each playing a crucial role in the final flavor and festive look. From creamy white chocolate providing the base to colorful food coloring that brings it all to life, these essentials come together effortlessly to create a show-stopping treat.
- 3 cups white chocolate chips: The rich, smooth base of the fudge, ensuring that signature creamy texture that melts in your mouth.
- 1 (14-ounce) can sweetened condensed milk: Adds sweetness and moisture, binding everything together perfectly without any fuss.
- 1/2 teaspoon vanilla extract: Enhances the white chocolate’s flavor with a warm, aromatic touch that makes every bite more indulgent.
- Red and green food coloring: These vibrant colors bring instant holiday cheer, transforming ordinary fudge into a festive masterpiece.
- 1/4 cup holiday sprinkles (optional): For that final decorative flair, adding a bit of crunch and sparkle right on top.
How to Make Christmas Swirled White Chocolate Fudge Recipe
Step 1: Prepare the Pan
Start by lining an 8×8-inch baking dish with parchment paper, making sure to leave some overhang on the sides. This simple setup makes it so easy to lift the fudge out once it’s firm, ensuring clean edges and effortless removal from the pan.
Step 2: Melt the Base Mixture
In a medium saucepan set over low heat, gently combine your white chocolate chips with the sweetened condensed milk. Stirring constantly, melt the mixture until it’s smooth and glossy—this is your fudge’s creamy foundation. Once melted, remove the pan from heat and mix in the vanilla extract to infuse that lovely warmth into your fudge batter.
Step 3: Divide and Color
Next, split this luscious mixture evenly into three separate bowls. Tint one bowl with red food coloring, another with green, and leave the third bowl plain to keep that classic white fudge color. This step is where the magic starts to take shape, turning simple white chocolate into a festive swirl of holiday colors.
Step 4: Create the Swirl Effect
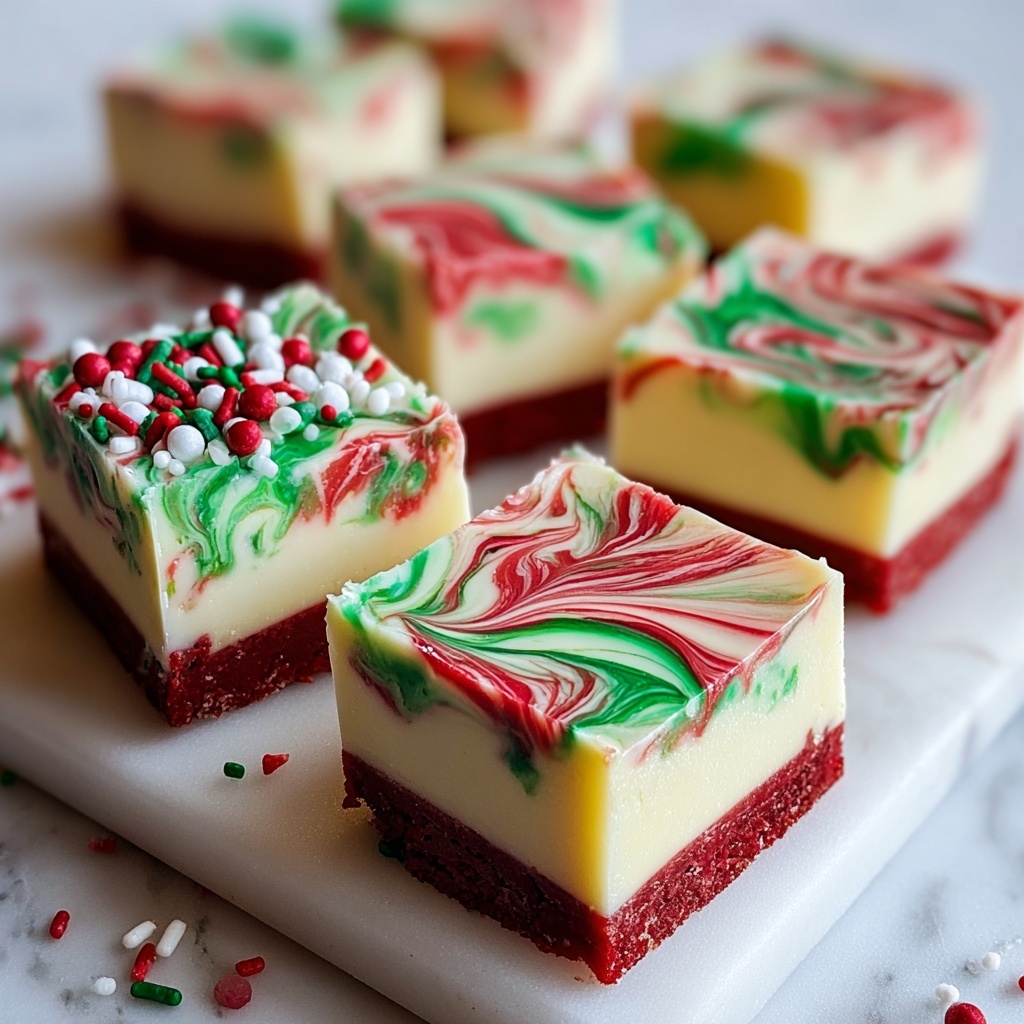
Pour the red-colored fudge evenly into the lined baking dish first, followed by the plain white fudge in the middle, and finish with the green fudge on top. Using a knife or skewer, swirl through the layers to create that beautiful marbled effect. This technique gives your fudge a visually stunning pattern that’s as delightful to look at as it is to eat.
Step 5: Add Sprinkles and Chill
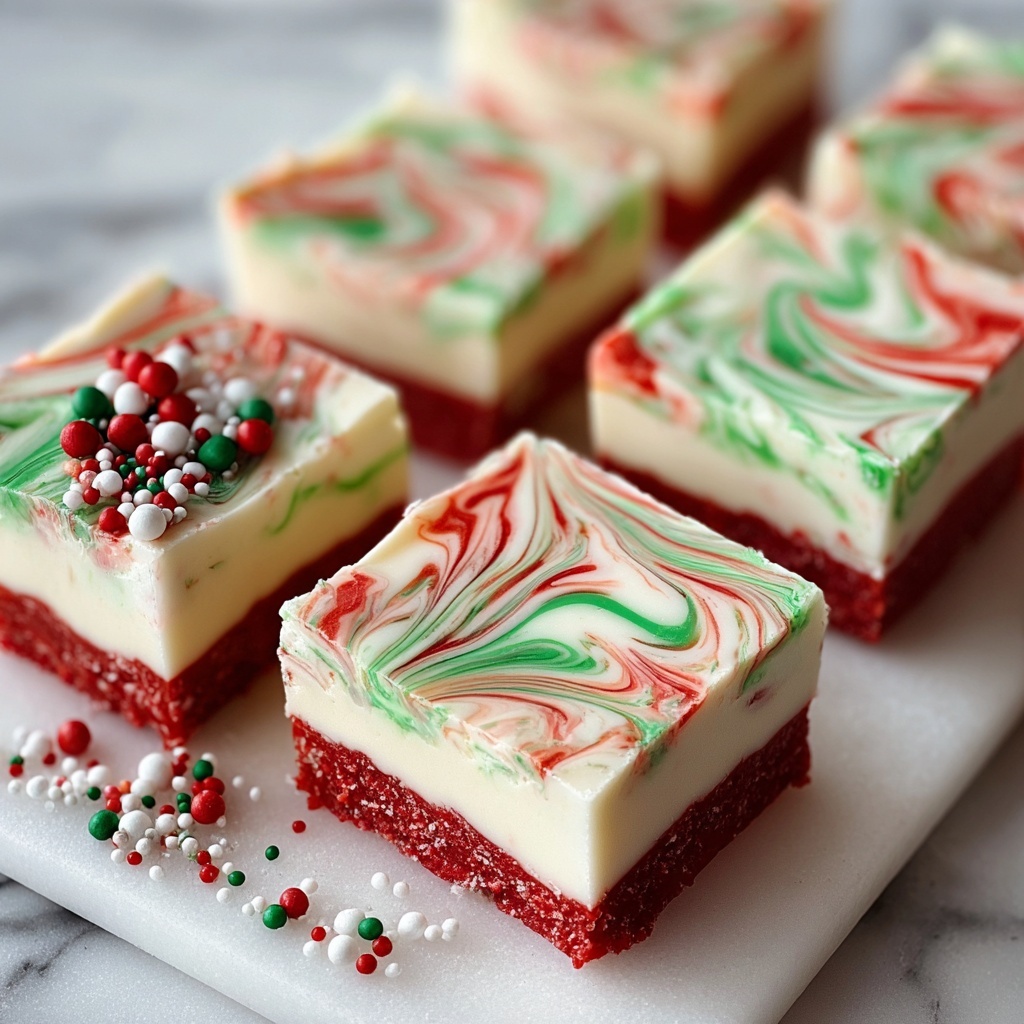
While the fudge is still warm, sprinkle the holiday sprinkles across the top to add a playful crunch and festive sparkle. Then, place the pan in the refrigerator and chill for at least 2 hours until the fudge sets completely firm.
Step 6: Slice and Serve
When chilled, use the parchment paper overhang to carefully lift the fudge out of the pan. Slice into 24 festive squares, perfect for sharing, gifting, or keeping all to yourself (we won’t judge)!
How to Serve Christmas Swirled White Chocolate Fudge Recipe
Garnishes
To make your Christmas Swirled White Chocolate Fudge Recipe extra special, consider topping each piece with a tiny dusting of powdered sugar or a few extra sprinkles before serving. Fresh mint leaves can add a lovely contrast in color and a hint of freshness that pairs beautifully with the fudge’s sweetness.
Side Dishes
This fudge pairs wonderfully with a cozy cup of hot cocoa, spiced tea, or even a glass of cold milk. Its rich and creamy texture balances perfectly with warm, comforting drinks, making it a delightful treat during holiday gatherings.
Creative Ways to Present
Presentation makes all the difference! Arrange your squares on a festive platter layered with pine needles or holly sprigs, or wrap individual pieces in colorful cellophane tied with ribbon to create charming edible gifts. You might even layer the fudge squares between sheets of wax paper inside a decorative tin for a practical yet beautiful presentation.
Make Ahead and Storage
Storing Leftovers
Leftover fudge keeps beautifully at room temperature for up to a week when stored in an airtight container. For best quality, keep it in a cool, dry place away from direct sunlight to maintain its creamy texture and vibrant colors.
Freezing
If you want to keep your Christmas Swirled White Chocolate Fudge Recipe longer, freezing works like a charm. Wrap the fudge tightly in plastic wrap and place it in an airtight container or freezer bag. It’s best consumed within 2 months for optimal flavor and texture.
Reheating
Fudge is best enjoyed chilled or at room temperature, but if you prefer it a bit softer, allow thawed fudge to sit at room temperature for 20 to 30 minutes. Avoid microwaving, which can melt and alter the texture unevenly.
FAQs
Can I use regular chocolate chips instead of white chocolate?
This Christmas Swirled White Chocolate Fudge Recipe relies on the creamy sweetness of white chocolate to create its signature flavor and texture. While you can experiment with regular chocolate, it will change the color and flavor profile, steering away from the classic festive swirl.
Is there a way to make this recipe nut-free?
Absolutely! This recipe is naturally nut-free, but always double-check your ingredients, especially the chocolate chips and sprinkles, to ensure they haven’t been processed in a facility that handles nuts if allergies are a concern.
Can I substitute natural food coloring?
Yes, natural food colorings like beet juice for red or spinach powder for green can be used, but keep in mind they might slightly affect the taste and the intensity of the colors compared to synthetic dyes.
How long does the fudge take to set?
Typically, chilling the fudge for at least 2 hours in the refrigerator is enough to achieve a firm texture that’s easy to cut and serve. For extra firmness, you can leave it overnight.
Can I add nuts or other mix-ins?
Mix-ins like chopped nuts or dried cranberries are a great way to add texture and flavor. If you choose to add them, fold them into the melted mixture before dividing and coloring. This way, they’ll be evenly distributed throughout the fudge.
Final Thoughts
This Christmas Swirled White Chocolate Fudge Recipe is the ultimate festive treat that’s as much fun to make as it is to eat. Its simplicity, stunning colors, and creamy texture make it a go-to for holiday celebrations, gift exchanges, or cozy nights by the fire. I encourage you to dive in and create this joyful dessert—it’s guaranteed to bring smiles and sweet memories to your holiday season.
Print
Christmas Swirled White Chocolate Fudge Recipe
- Prep Time: 10 minutes
- Cook Time: 0 minutes
- Total Time: 2 hours 10 minutes
- Yield: 24 pieces
- Category: Dessert
- Method: No-Cook
- Cuisine: American
- Diet: Vegetarian
Description
This festive Christmas Fudge recipe combines creamy white chocolate and sweetened condensed milk with vibrant red and green color swirls to create a delightful marbled treat. Perfect for holiday celebrations, it’s easy to make, requires no baking, and can be customized with holiday sprinkles for an extra festive touch.
Ingredients
Fudge Base
- 3 cups white chocolate chips
- 1 (14-ounce) can sweetened condensed milk
- 1/2 teaspoon vanilla extract
Coloring and Decoration
- Red food coloring
- Green food coloring
- 1/4 cup holiday sprinkles (optional, for decoration)
Instructions
- Prepare the Pan: Line an 8×8-inch baking dish with parchment paper, ensuring some overhang on the sides for easy removal of the fudge once set.
- Melt the Base Ingredients: In a medium saucepan over low heat, combine the white chocolate chips and sweetened condensed milk. Stir continuously until the mixture is smooth and fully melted. Remove the pan from heat and stir in the vanilla extract to infuse flavor.
- Divide and Color: Transfer the melted fudge mixture evenly into three separate bowls. Add red food coloring to one bowl to create red fudge, green food coloring to another for green fudge, and leave the third bowl plain for the original white fudge.
- Pour and Marbelize: Pour the red fudge into the prepared baking pan first, followed by the plain fudge, then the green fudge on top. Use a knife or skewer to gently swirl the layers together, creating a beautiful marbled effect.
- Add Sprinkles: While the fudge is still warm and soft, sprinkle the top with holiday sprinkles if desired for added festive decoration and texture.
- Chill and Set: Place the baking dish in the refrigerator and chill for at least 2 hours, or until the fudge is completely firm. Use the parchment paper overhang to lift the fudge out and cut into 24 squares for serving.
Notes
- Make sure to stir constantly while melting to prevent the white chocolate from burning or seizing.
- If you want a smoother swirl effect, warm the food coloring slightly to help mix it evenly into the fudge.
- The fudge is best stored in an airtight container in the refrigerator for up to one week.
- You can substitute white chocolate chips with high-quality white chocolate bars chopped into small pieces for a richer flavor.
- Feel free to customize the sprinkles or omit them for a simple, classic fudge.
