
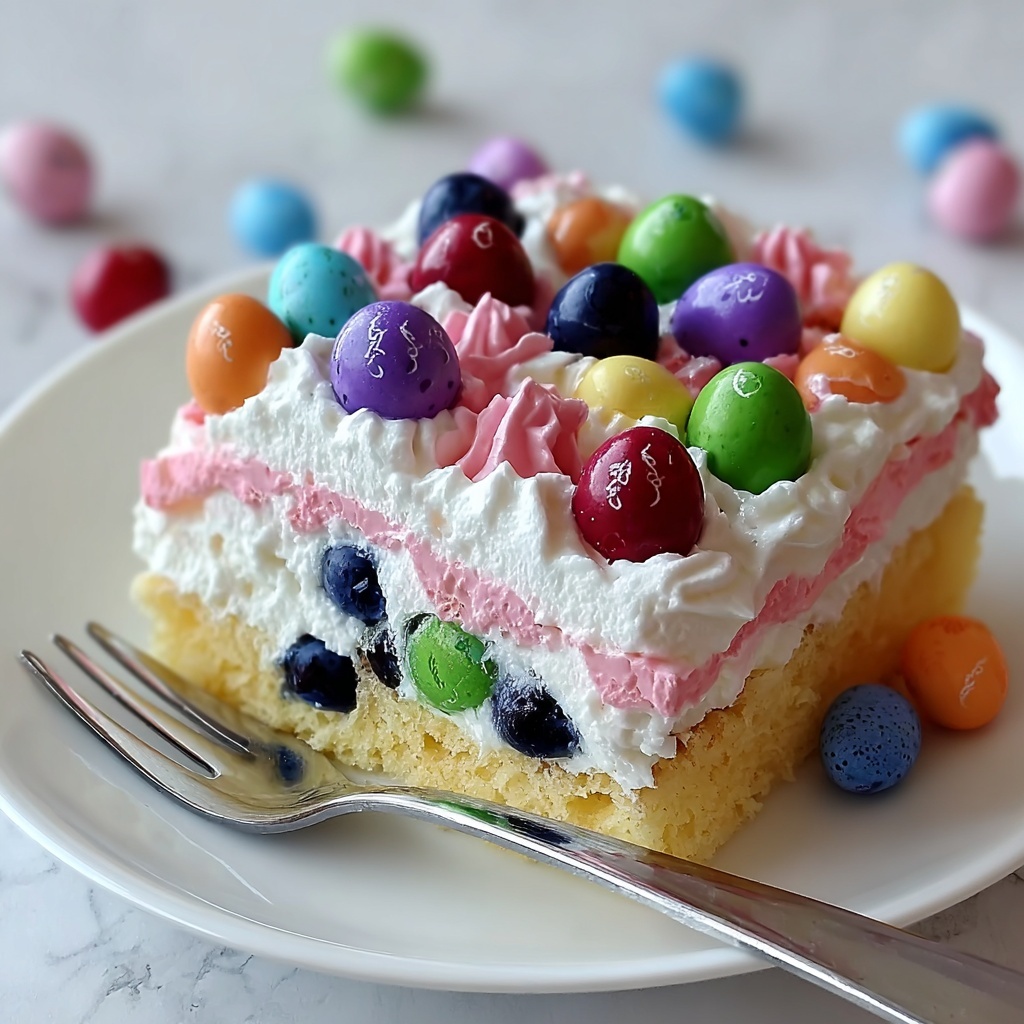
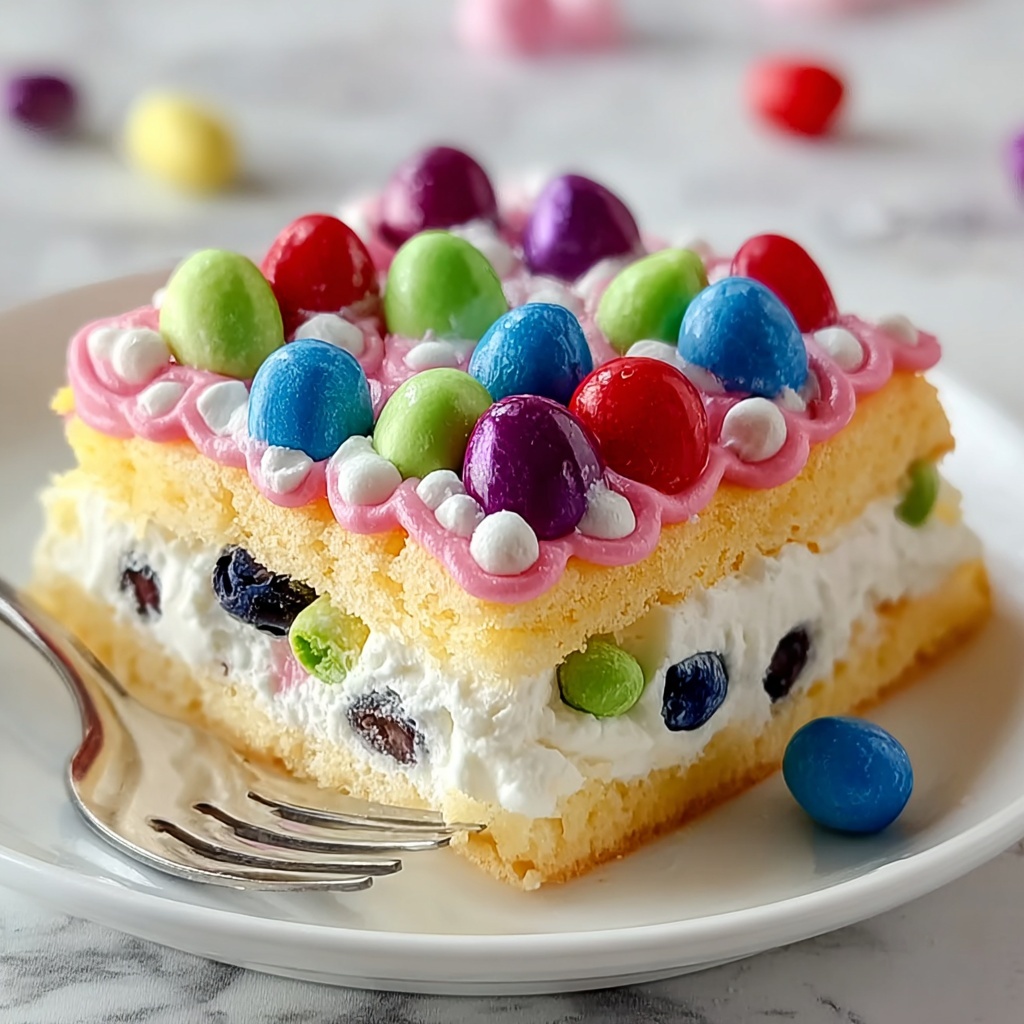
If you are looking for a vibrant and fun dessert to brighten up your holiday celebrations, look no further than this Delightful Easter Poke Cake Recipe. This cake combines the light fluffiness of a vanilla base with the colorful burst of flavored Jell-O poked deep into every slice, culminating in a creamy whipped topping and festive garnishes. It’s a show-stopping centerpiece that is as delightful to look at as it is to eat, making it a perfect treat for Easter or any joyful spring gathering.
Ingredients You’ll Need
Gathering the right ingredients is key to making this Delightful Easter Poke Cake Recipe come to life. Each component plays a special role in building layers of flavor, texture, and that beautiful pastel color palette that evokes the spirit of spring.
- White cake mix: Using your favorite vanilla or white cake mix ensures a moist, tender base that won’t overpower the other flavors.
- Eggs: Bind the cake mixture and contribute to the cake’s fluffy texture.
- Water: Helps hydrate the cake mix, balancing moisture for an ideal crumb.
- Vegetable oil: Adds richness without making the cake heavy.
- Jell-O box (pastel color/flavor): Choose strawberry, lime, or orange for an Easter-appropriate burst of sweet, tangy flavor and beautiful color.
- Boiling water: Needed to dissolve the Jell-O powder fully for smooth gel formation.
- Cold water: Cools down the Jell-O mixture to ensure it’s safe to pour over the cake without melting it.
- Cool Whip or whipped topping: Creates the light, creamy topping that balances the tang of the Jell-O and adds softness to each bite.
- Shredded coconut (optional): Adds a fun, grassy texture perfect for Easter presentations.
- Pastel sprinkles or mini candy eggs (optional): Provide whimsical, colorful finishing touches that make the dessert festive and inviting.
How to Make Delightful Easter Poke Cake Recipe
Step 1: Bake the Cake
Start by preheating your oven to 350°F (175°C) and prepping a 9×13-inch baking dish with grease and flour to prevent sticking. Follow the instructions on your chosen cake mix box exactly — mixing the eggs, water, and vegetable oil with the dry mix until smooth. Pour this batter into the pan and bake for about 25 to 30 minutes. Your cake is perfectly done when a toothpick inserted into the center comes out clean. Let the cake cool in its pan for 10 minutes so it firms up enough for the next step without drying out.
Step 2: Prepare the Jell-O Filling
While the cake cools, it’s the perfect time to make the magical Jell-O filling. Dissolve the Jell-O powder in one cup of boiling water, stirring continuously until every bit is melted and smooth. Then, add one cup of cold water to cool the mixture down. This simple, vibrant gel mixture will fill the holes we’ll poke and infuse the cake with juicy bursts of flavor.
Step 3: Poke the Cake
Using the handle of a wooden spoon or fork, poke about 20 to 30 holes evenly all over the cake. Be sure to press deep enough so the Jell-O can seep into the cake, but take care not to poke all the way through to the bottom. This step is crucial because these little wells trap the Jell-O, creating those irresistible pockets of sweet, colorful delight with every bite.
Step 4: Add the Jell-O Filling
Slowly pour the prepared Jell-O over the cake, letting it seep gently into the holes. Pouring carefully ensures the Jell-O seeps where it should and doesn’t overflow, soaking the entire cake. Once poured, refrigerate the cake for at least three hours to allow the Jell-O to fully set, locking in that brilliant jelly goodness.
Step 5: Prepare the Topping
After the Jell-O has solidified, it’s time to elevate the cake with a smooth, creamy layer of Cool Whip or your favorite whipped topping. Spread it evenly over the surface using a spatula — this not only adds richness but balances the Jell-O’s tang with its gentle sweetness.
Step 6: Garnish and Serve
To finish, sprinkle shredded coconut over the whipped topping for a charming grassy effect, and scatter pastel sprinkles or mini candy eggs for that festive Easter touch. Chill the cake until ready to serve, then slice and enjoy the delightful layers of flavor and texture.
How to Serve Delightful Easter Poke Cake Recipe
Garnishes
Garnishing your Delightful Easter Poke Cake Recipe is where you really get to have fun. The shredded coconut mimics fresh spring grass, while pastel sprinkles or mini candy eggs bring in crop-like bursts of color and whimsy. These simple decorations make the cake look festive and inviting, instantly putting everyone in a celebratory mood.
Side Dishes
This cake pairs wonderfully with light, refreshing sides. Consider serving it alongside fresh fruit platters, like berries or sliced tropical fruits, which complement the Jell-O’s fruity flavors. A simple mint tea or lemonade can also balance the dessert’s sweetness and complete your Easter meal with refreshing brightness.
Creative Ways to Present
For extra fun, you could slice the cake into bite-sized squares and serve them in mini cupcake liners for easy grab-and-go treats at Easter parties. Alternatively, decorate the cake with edible flowers or pastel-colored chocolate shards for an elegant look. The key is to highlight the cake’s cheerful colors and creamy textures to dazzle your guests.
Make Ahead and Storage
Storing Leftovers
Your Delightful Easter Poke Cake Recipe will keep beautifully in the fridge. Make sure to cover it tightly with plastic wrap or transfer slices to an airtight container to maintain freshness and prevent the whipped topping from drying out. It should stay delicious for up to 3 days.
Freezing
Freezing this cake is not recommended because the Jell-O’s delicate texture can become watery when thawed, and the whipped topping may lose its smoothness. If you want to preserve leftovers, stick to refrigeration to keep every part of the dessert just right.
Reheating
This special cake is best enjoyed chilled and does not require reheating. Serving it cold maintains the delightful contrast of the Jell-O filling and creamy topping, giving each bite a refreshing and joyful springtime experience.
FAQs
Can I use a homemade vanilla cake instead of a boxed mix?
Absolutely! Homemade vanilla cake works wonderfully and adds a personal touch. Just ensure it has a sturdy crumb so it can hold the Jell-O without falling apart.
What flavors of Jell-O work best for this recipe?
Pastel flavors like strawberry, lime, or orange are perfect for the Easter theme, but feel free to experiment with your favorites. Just pick a color that will create those beautiful, vibrant pockets throughout the cake.
Is there a way to make this recipe gluten-free?
Yes! Use a gluten-free vanilla cake mix and double-check that your Jell-O and topping are certified gluten-free. This way, everyone can enjoy this delightful treat guilt-free.
Can I make this cake the day before my Easter celebration?
Definitely! In fact, allowing the cake to chill overnight in the refrigerator helps the Jell-O fully set and flavors to meld, making the Delightful Easter Poke Cake Recipe even more delicious when served the next day.
What if I don’t have shredded coconut for garnish?
No worries at all! You can substitute with finely chopped green-tinted white chocolate, edible green sugar crystals, or simply use more pastel sprinkles. The key is to add texture and color for that festive touch.
Final Thoughts
This Delightful Easter Poke Cake Recipe is one of those joyful desserts that brings smiles with every bite. It’s easy to make, beautifully colorful, and full of fun textures that your family and friends will love. Whether you’re planning a big celebration or a simple springtime treat, this cake will brighten your table and your spirits. Give it a try, and let this cheerful cake become a cherished part of your Easter traditions!
Print
Delightful Easter Poke Cake Recipe
- Prep Time: 15 minutes
- Cook Time: 30 minutes
- Total Time: 3 hours 45 minutes
- Yield: 12 servings
- Category: Dessert
- Method: Baking
- Cuisine: American
Description
This Delightful Easter Poke Cake is a festive and colorful dessert perfect for spring celebrations. A moist vanilla cake is baked, then poked with holes to soak up a flavorful gelatin mixture. Topped with a creamy layer of whipped topping and garnished with shredded coconut and pastel sprinkles or mini candy eggs, this cake offers a delightful combination of textures and flavors that make it perfect for Easter or any cheerful occasion.
Ingredients
Cake:
- 1 box (15.25 oz) white cake mix (or your favorite vanilla cake mix)
- 3 large eggs
- 1 cup water
- 1/3 cup vegetable oil
Jell-O Filling:
- 1 (3 oz) box of Jell-O (pastel color/flavor like strawberry, lime, or orange)
- 1 cup boiling water
- 1 cup cold water
Topping and Garnish:
- 1 (8 oz) tub of Cool Whip or whipped topping
- 1/2 cup shredded coconut (optional, for garnish)
- 1/4 cup pastel sprinkles or mini candy eggs (optional, for garnish)
Instructions
- Bake the Cake: Preheat oven to 350°F (175°C). Grease and flour a 9×13-inch baking dish. Prepare the cake mix according to the box instructions with eggs, water, and vegetable oil. Pour batter into the pan and bake 25-30 minutes until a toothpick comes out clean. Let cool in pan for 10 minutes.
- Prepare the Jell-O Filling: Dissolve the Jell-O mix in 1 cup boiling water, stirring until fully dissolved. Add 1 cup cold water and stir. Let the mixture cool slightly.
- Poke the Cake: After the cake has cooled for 10 minutes, use a wooden spoon handle or fork to poke 20-30 holes all over the cake, deep enough to soak in Jell-O but not through the bottom.
- Add the Jell-O Filling: Slowly pour the cooled Jell-O evenly over the cake, filling the holes. Refrigerate for at least 3 hours until the Jell-O is set.
- Prepare the Topping: Spread a layer of Cool Whip or whipped topping over the set cake using a spatula, smoothing evenly.
- Garnish and Serve: Sprinkle shredded coconut to create a grass-like effect and top with pastel sprinkles or mini candy eggs for a festive touch. Slice and serve chilled.
Notes
- Ensure the cake is still warm but not hot before poking holes to avoid breaking the cake.
- Use flavored gelatins that complement the cake flavor for best results.
- Refrigerate the cake properly to allow the gelatin to set firmly.
- Optional garnishes can be adjusted to suit your preference or occasion.
- This cake is best enjoyed within 2-3 days of preparation for optimal freshness.


