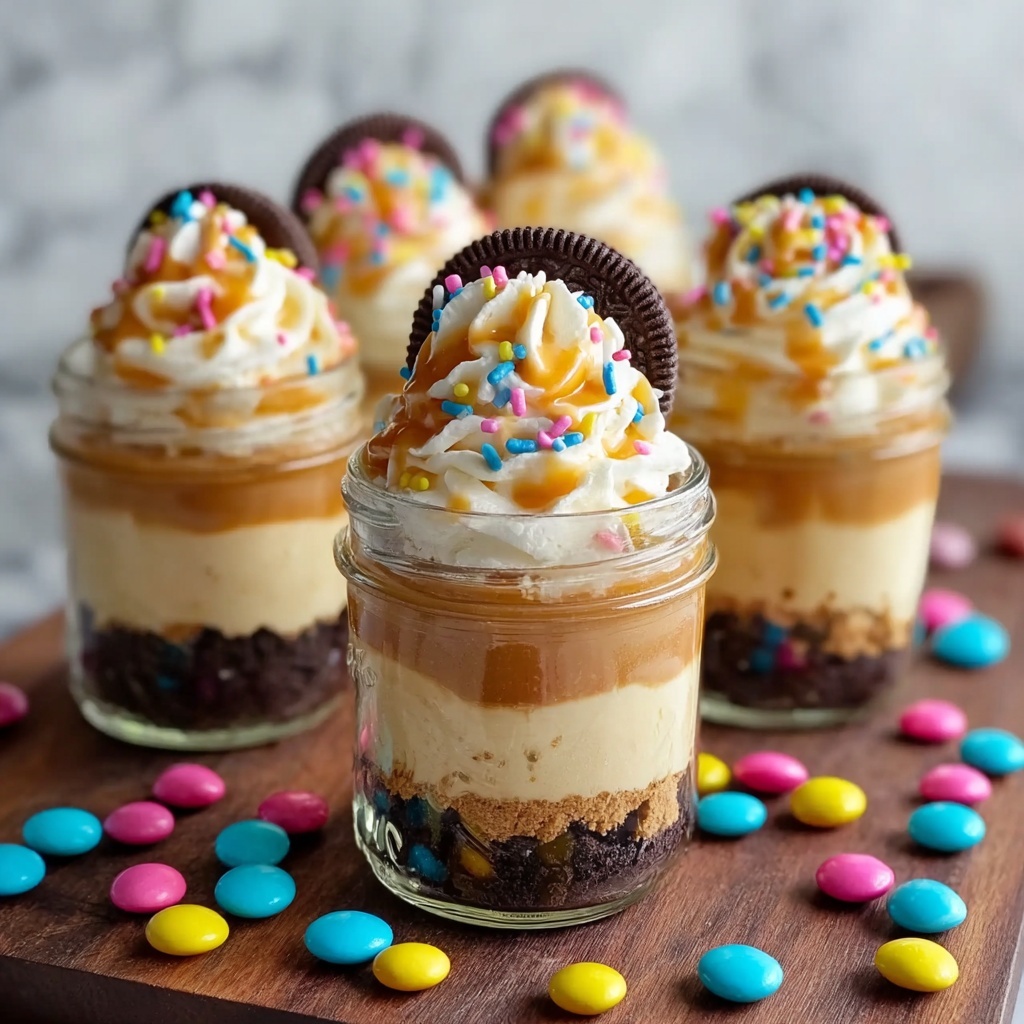
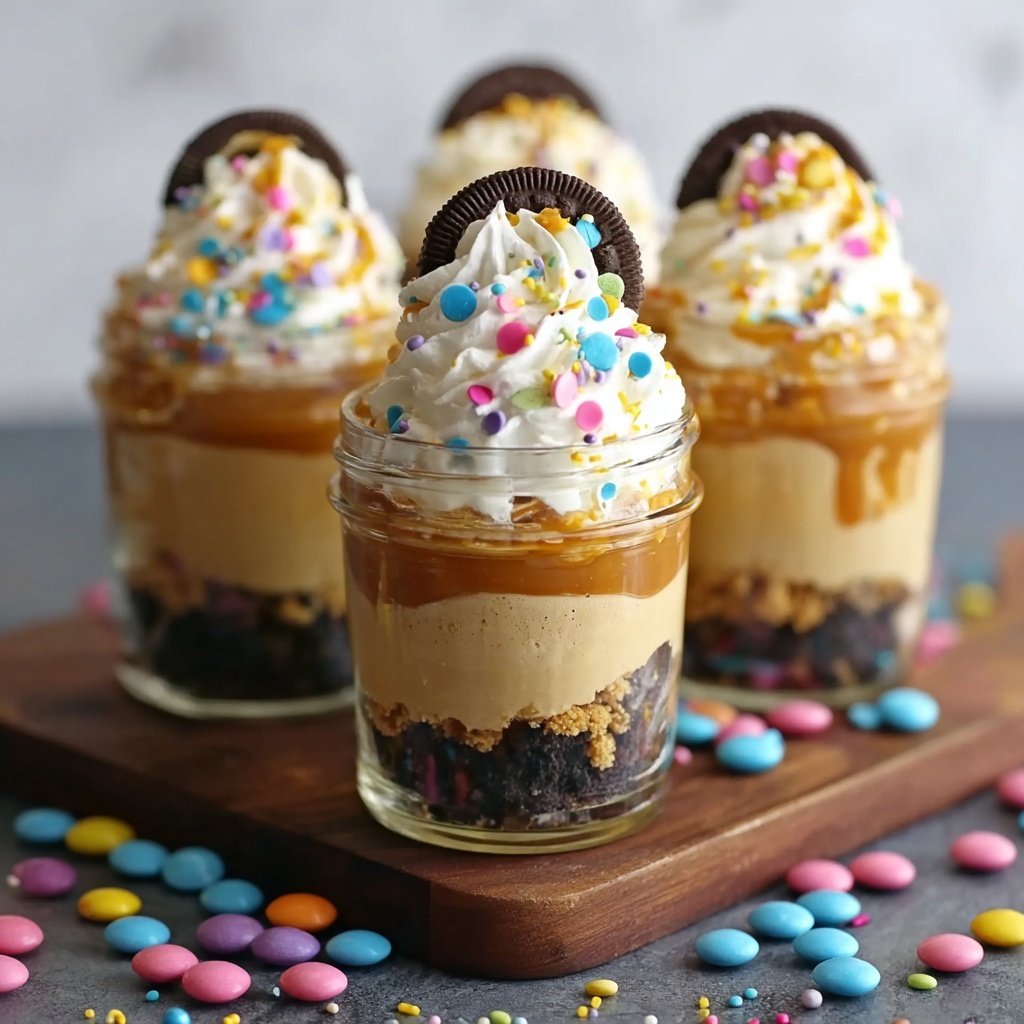
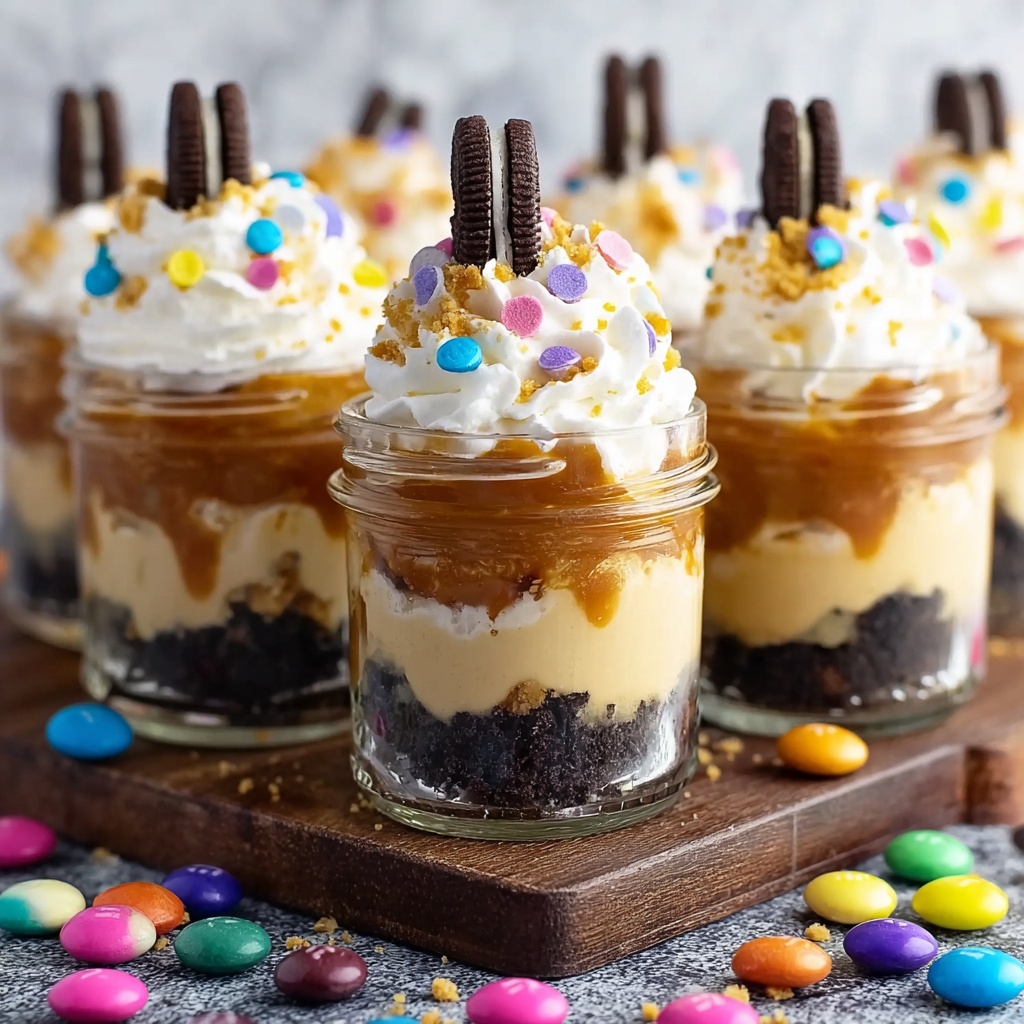
Imagine a charming dessert that’s as delightful to look at as it is to eat—a fun twist on a classic favorite that makes every bite feel special. The Cake in a Jar Recipe is exactly that: a wonderful way to enjoy moist, flavorful cake conveniently baked and served in its own little jar. It’s perfect for parties, gifts, or simply treating yourself, offering a blend of freshness, customization, and an inviting presentation that’s sure to brighten anyone’s day.
Ingredients You’ll Need
Gathering the right ingredients for this Cake in a Jar Recipe is straightforward and rewarding. Each component plays a vital role in creating the perfect texture, taste, and ease of baking right inside those cute jars.
- Box of cake mix (any flavor): The foundation of your cake, choose your favorite flavor to set the tone for your dessert.
- Water (1 cup): Essential for activating the mix and creating a tender crumb in the cake.
- Vegetable oil (1/3 cup): Adds moistness and richness, keeping the cake delightfully soft.
- Large eggs (3): Bind the ingredients together and provide structure for a perfect rise.
- Frosting (1/2 cup, any flavor): The sweet finishing touch that brings flavor and visual appeal, customizable to your liking.
- Mason jars (6-8 small): These serve as unique baking vessels and charming serving containers, adding a rustic, homely touch.
How to Make Cake in a Jar Recipe
Step 1: Prepare Your Jars and Oven
Start by preheating your oven to 350°F (175°C). Lightly grease the inside of each mason jar with cooking spray or butter to prevent sticking and ensure your cakes release easily after baking. This simple step guarantees a perfect texture and an effortless eating experience.
Step 2: Mix the Batter
In a large bowl, combine the cake mix, water, vegetable oil, and eggs. Follow the instructions on the cake mix box carefully to blend everything into a smooth batter. This mixture will form the heart of your jars and is surprisingly easy to prepare—don’t rush this step, as a well-mixed batter produces the best cakes!
Step 3: Fill the Jars
Pour the batter evenly into each jar, filling them only halfway. Leaving space for the cake to rise during baking is crucial because it prevents overflow and maintains an appealing shape. Plus, the visual layering later on looks fantastic!
Step 4: Bake and Test
Place the filled jars on a baking sheet for stability and bake for 25 to 30 minutes. To check if your cakes are done, insert a toothpick into the center; if it comes out clean, your cakes are perfectly baked. This method ensures moist yet fully-cooked cakes every time.
Step 5: Cool Completely
Once out of the oven, let the cakes cool thoroughly inside the jars. Cooling is key to prevent the frosting from melting and keeps your cake intact. This is when patience pays off for the best presentation and taste.
Step 6: Add the Frosting
Top each cooled jar cake with your chosen frosting. You can pipe it elegantly with a piping bag for a neat finish or spread it casually with a spoon for a charming, homemade look. For a stunning twist, layer frosting and cake alternately inside the jar, creating an eye-catching dessert ready to impress.
Step 7: Seal and Serve
Seal each jar with its lid to keep the cake fresh. These sealed jars make serving a breeze and are perfect for gift-giving, picnics, or simply enjoying a personalized treat wherever you go.
How to Serve Cake in a Jar Recipe
Garnishes
Enhance your Cake in a Jar Recipe with fresh garnishes like vibrant berries, a sprinkle of edible flowers, or a dusting of powdered sugar. Adding nuts or chocolate shavings can provide texture and visual contrast, making your dessert extra inviting.
Side Dishes
Pair your jar cakes with simple sides such as a scoop of vanilla ice cream, a dollop of whipped cream, or a warm cup of coffee or tea. These companions complement the rich sweetness and balance the flavors perfectly.
Creative Ways to Present
Take your Cake in a Jar Recipe to the next level by customizing jars with colorful ribbons, personalized tags, or arranging them in a beautiful crate or basket. Presenting them this way transforms an everyday dessert into a charming gift or centerpiece that surprises and delights.
Make Ahead and Storage
Storing Leftovers
After enjoying your delicious cake, store any leftovers in the sealed jars in the refrigerator. Keeping them sealed preserves moisture and flavor, and the jars make it easy to grab a quick treat whenever you want.
Freezing
You can absolutely freeze individual Cake in a Jar Recipe portions. Simply seal the jars well and wrap them with plastic wrap for extra protection. When ready to enjoy, thaw in the refrigerator overnight for a fresh-tasting dessert.
Reheating
To reheat, remove the lid and microwave the jar cake for 20-30 seconds or until warm. Be careful not to overheat to maintain the cake’s texture and avoid melting the frosting too much. Enjoying it slightly warm can bring new life to this delightful cake.
FAQs
Can I use homemade cake batter instead of boxed mix?
Absolutely! Homemade batter works beautifully with this recipe, and it’s a great way to personalize flavors and ingredients. Just make sure your batter isn’t too thick to pour into jars easily.
What size jars work best for the Cake in a Jar Recipe?
Small mason jars of about 6 to 8 ounces are ideal. They provide individual portions that bake evenly and look adorable when served.
How do I prevent the cake from sticking to the jar?
Greasing the jars well with butter or non-stick spray before filling is essential. It creates a light barrier that helps the cake come out easily if you want to eat it out of the jar or serve on a plate.
Can I make this cake gluten-free?
Yes, you can! Use a gluten-free cake mix and ensure your frosting and other ingredients are also gluten-free for a safe and tasty variation.
How long can I store the cakes in jars?
When refrigerated with the lid on, these cakes stay fresh for up to 3-4 days. For longer storage, freezing is the best option.
Final Thoughts
The Cake in a Jar Recipe is a charming, fun, and effortlessly delicious way to enjoy cake anytime you want. Whether you’re making these as party favors, gifts, or just because, they bring a special touch to dessert time that everyone appreciates. Dive in and create your own tasty jars of happiness—you won’t regret it!
Print
Cake in a Jar Recipe
- Prep Time: 10 minutes
- Cook Time: 30 minutes
- Total Time: 40 minutes
- Yield: 6-8 servings
- Category: Dessert
- Method: Baking
- Cuisine: American
Description
Delightful and convenient Cake in a Jar recipe that combines the ease of boxed cake mix with the charm of individual mason jar servings. Perfect for parties, gifts, or a fun dessert treat, this recipe guides you through baking moist, flavorful cakes directly in jars and topping them with your favorite frosting.
Ingredients
Cake Ingredients
- 1 box of cake mix (any flavor)
- 1 cup of water
- 1/3 cup of vegetable oil
- 3 large eggs
Frosting
- 1/2 cup of frosting (any flavor)
Additional
- 6–8 small mason jars (or any glass jars with lids)
- Cooking spray or butter (for greasing jars)
Instructions
- Preheat and Prepare Jars: Preheat your oven to 350°F (175°C). Lightly grease the inside of each mason jar with cooking spray or butter to prevent the cake from sticking during baking.
- Mix Cake Batter: In a large bowl, combine the cake mix, water, vegetable oil, and eggs. Mix well following the cake mix box instructions until the batter is smooth and uniformly blended.
- Fill the Jars: Pour the prepared cake batter into each greased mason jar, filling them about halfway to allow space for the cake to rise as it bakes.
- Bake the Cakes: Place the filled jars on a baking sheet to stabilize them. Bake in the preheated oven for 25-30 minutes. To check doneness, insert a toothpick into the center of a cake; if it comes out clean, the cakes are done.
- Cool the Cakes: Remove the jars from the oven and allow the cakes to cool completely inside the jars to avoid condensation and sogginess.
- Frost the Cakes: Once cooled, top each cake with about 1/2 cup of frosting. Use a piping bag for a neat finish or a spoon to spread the frosting evenly. For a layered look, alternate adding cake layers and frosting inside the jar.
- Seal and Serve: Place the lids on the jars to keep the cakes fresh. Serve these charming individual cake portions directly in the jars, making them convenient and visually appealing.
Notes
- Be sure not to overfill the jars to prevent batter overflow while baking.
- Use oven-safe jars to avoid cracking during baking.
- You can customize the cake and frosting flavors to suit any occasion or preference.
- Letting the cake cool completely before frosting ensures the frosting won’t melt.
- Store the jar cakes in the refrigerator if not consuming immediately, and bring to room temperature before serving for the best texture.

