
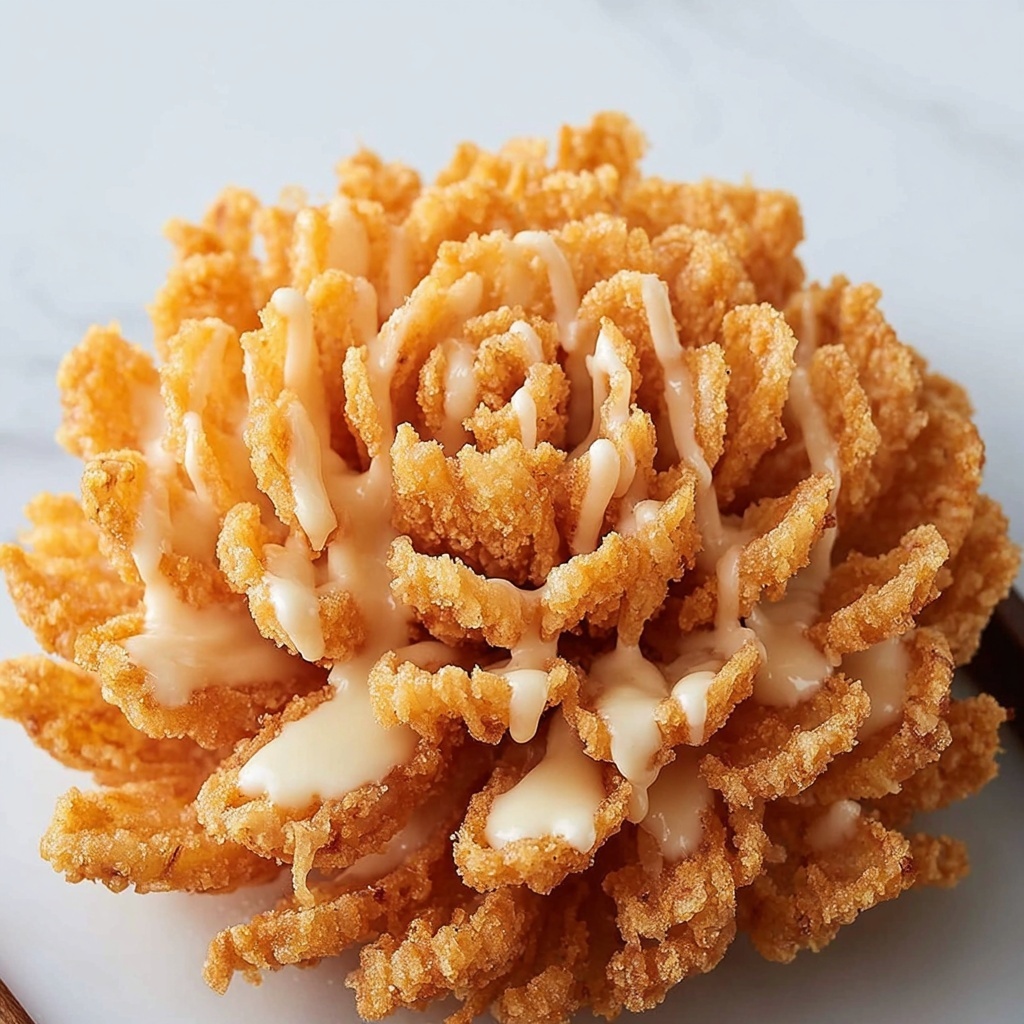
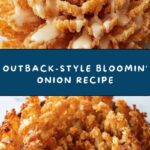
If you’ve ever been captivated by the crispy, golden petals of a blooming onion at your favorite steakhouse, then you’re in for a treat with this Outback-Style Bloomin’ Onion Recipe. This dish transforms a humble sweet onion into a show-stopping appetizer with a perfectly seasoned, crunchy coating that invites you to dive in petal by petal. It’s the ideal combination of sweet, spicy, and savory, delivering that crave-worthy restaurant-style indulgence right in your own kitchen. Get ready to impress your friends and family with a homemade version that’s every bit as satisfying as the original.
Ingredients You’ll Need
These ingredients are straightforward yet essential, each playing a key role in building the perfect texture, flavor, and color of your blooming onion. From the sweetness of the Vidalia onion to the well-balanced spices in the coating, every component contributes something special to this delicious appetizer.
- 1 large sweet onion (such as Vidalia): Choose one with a firm root to help keep the petals together while frying.
- 1 cup all purpose flour: The base for the crispy coating, ensuring a golden, crunchy finish.
- 2 tablespoons cornstarch: Adds extra crispiness, helping the coating stay perfectly crunchy.
- 1 teaspoon paprika: Brings a smoky, mildly sweet flavor and vibrant color.
- 1 teaspoon garlic powder: Infuses savory depth into the breading.
- 1/2 teaspoon onion powder: Enhances the onion flavor without adding moisture.
- 1/2 teaspoon cayenne pepper: Adds a subtle spicy kick, balancing the sweetness.
- 1 teaspoon salt: Elevates all the flavors beautifully.
- 1/2 teaspoon black pepper: Provides a warm, aromatic bite.
- 2 large eggs: Help the flour mixture adhere perfectly to the onion petals.
- 1 cup whole milk: Lightens the batter and binds the coating evenly.
- Vegetable oil for deep frying: Choose an oil with a high smoke point for that flawless golden crisp.
How to Make Outback-Style Bloomin’ Onion Recipe
Step 1: Prepare and Cut the Onion
Start by peeling your onion and slicing about half an inch off the top, but keep the root end intact—it’s the anchor that holds the onion together. Place the onion cut side down on your cutting board, then carefully make vertical cuts from the top down toward the root, creating 12 to 16 sections. The trick is not to cut through the root, so your onion fans open like a flower rather than coming apart.
Step 2: Open the Onion Petals
Gently flip the onion over and carefully separate each layer with your fingers. This is a delicate step where the onion transforms visually into that iconic blooming shape. Take your time and be gentle to keep those petals nice and intact.
Step 3: Mix the Coating
In a bowl, combine the flour, cornstarch, paprika, garlic powder, onion powder, cayenne pepper, salt, and black pepper. This dry mixture is what gives the Bloomin’ Onion its irresistible flavor and crunch.
Step 4: Prepare the Wet Batter
In a separate bowl, whisk the eggs and whole milk together until smooth. This mixture helps the dry coating stick between each onion petal for maximum crunch in every bite.
Step 5: Coat the Onion
First, dunk your opened onion into the dry flour mixture, making sure to get the seasoning deep between every petal. Next, dip it into the egg and milk mixture, then back into the flour mixture again. This double coating is the secret to getting a thick, crispy crust that holds together through frying.
Step 6: Chill the Coated Onion
Place your coated onion in the fridge for about 15 minutes. This step helps the coating set and stick to the onion for a flawless fry.
Step 7: Fry to Perfection
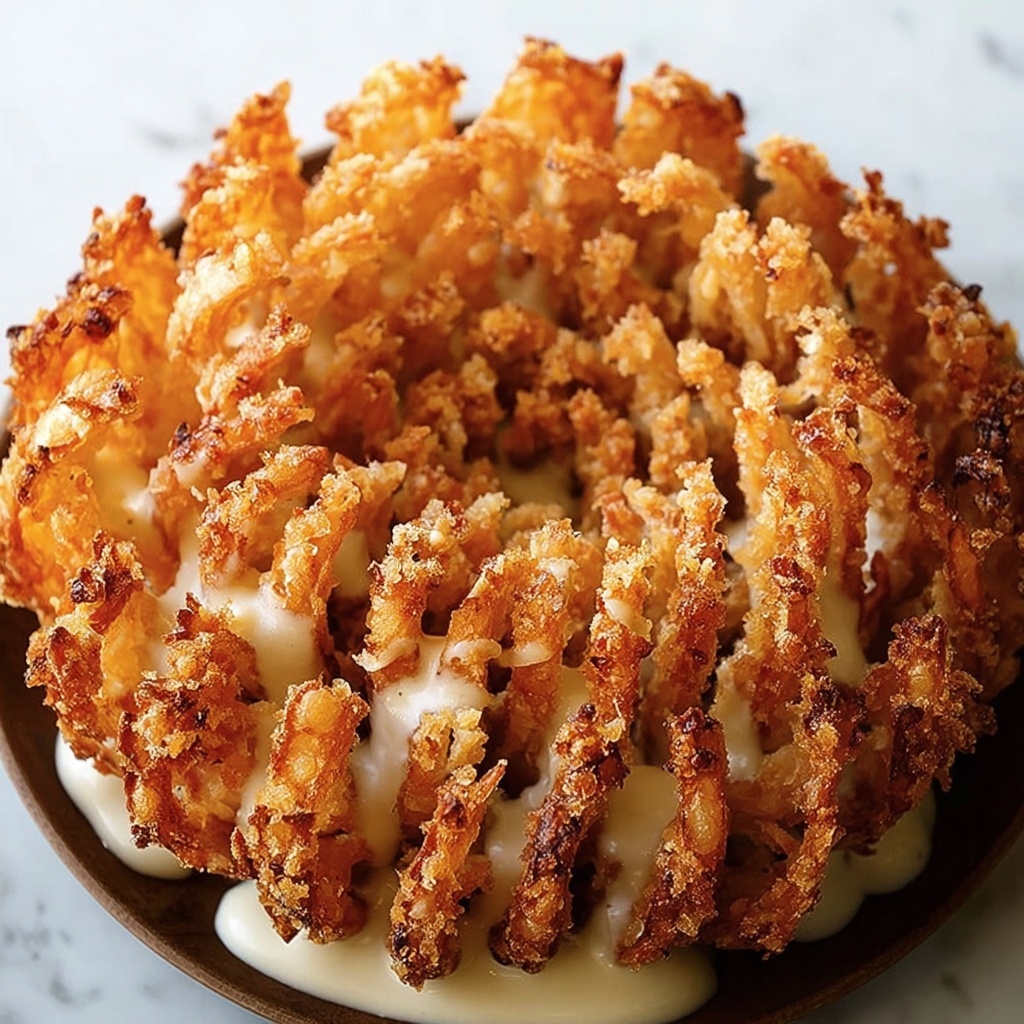
Heat the vegetable oil in a deep pot to 375°F. Carefully place the onion root side up into the hot oil and fry for 6 to 8 minutes until it’s golden brown and irresistibly crispy on the outside. Drain it on paper towels to remove excess oil, and get ready for the best part—eating!
How to Serve Outback-Style Bloomin’ Onion Recipe
Garnishes
A sprinkle of fresh chopped parsley or chives adds a pop of color and a fresh herbal aroma that contrasts beautifully with the rich, fried onion. You can also dust a little extra paprika on top for a touch of smoky warmth.
Side Dishes
This appetizer pairs wonderfully with light, refreshing sides like a crisp green salad or creamy coleslaw. For a hearty pairing, serve alongside grilled steaks or burgers to keep the Aussie steakhouse vibe alive in your meal.
Creative Ways to Present
Place your bloomin’ onion on a large platter with bowls of dipping sauces arranged around it. Think traditional spicy mayo-based dips, tangy barbecue sauce, or even a zesty horseradish dip to customize the experience for every guest. Serve with rustic wooden boards or quirky trays to add visual appeal.
Make Ahead and Storage
Storing Leftovers
If you manage to save any of your blooming onion, store leftovers in an airtight container in the refrigerator for up to 2 days. Keep the onion separate from any dipping sauce to avoid sogginess and maintain that delightful crunch.
Freezing
While freezing deep-fried bloomin’ onions isn’t ideal because it impacts the crisp texture, you can freeze the coated but unfried onion. Wrap it tightly and freeze for up to a month, then fry directly from frozen for fresh, crispy results.
Reheating
To bring leftover bloomin’ onions back to life, reheat them in a preheated oven at 375°F on a wire rack for about 10 minutes. This method helps retain the crispiness much better than microwaving.
FAQs
What type of onion is best for this recipe?
A large sweet onion like a Vidalia is ideal because it has a mild flavor and a sturdy root that holds the petals together while frying. Its natural sweetness pairs perfectly with the spicy coating.
Can I make this recipe gluten-free?
Absolutely! Substitute the all-purpose flour with a gluten-free flour blend and ensure your cornstarch and spices are gluten-free certified. This way, you can enjoy the Outback-Style Bloomin’ Onion Recipe without any worries.
What dipping sauces work best with a blooming onion?
A creamy, slightly spicy dipping sauce tends to be the classic pairing. A blend of mayonnaise, ketchup, horseradish, paprika, and cayenne pepper delivers that restaurant-style experience perfectly.
Is it possible to bake instead of deep fry?
The traditional Outback-Style Bloomin’ Onion Recipe is deep-fried to achieve that signature crunch. While baking can reduce oil use, it won’t give you quite the same texture or flavor. For best results, stick with frying or try air frying.
How can I ensure the onion stays together when frying?
Be careful to leave the root intact during slicing and choose an onion with a firm root end. Chilling the coated onion before frying also helps the batter set and stay in place.
Final Thoughts
There’s something truly magical about serving an Outback-Style Bloomin’ Onion Recipe, whether it’s for a special dinner or a fun weekend treat. It’s a dish that combines show-stopping presentation with crunchy, flavorful satisfaction in every bite. Give this recipe a try—you’ll be amazed at how easy it is to recreate this restaurant classic at home, and your friends will be begging for your secret!
Print
Outback-Style Bloomin’ Onion Recipe
- Prep Time: 20 minutes
- Cook Time: 8 minutes
- Total Time: 28 minutes
- Yield: 4 servings
- Category: Appetizer
- Method: Frying
- Cuisine: American
- Diet: Vegetarian
Description
This Outback-Style Bloomin’ Onion recipe creates a crispy, golden appetizer resembling a blooming flower made from a large sweet onion. Coated with a flavorful seasoned batter and deep-fried to perfection, it is a delightful crowd-pleaser served hot with a tangy dipping sauce.
Ingredients
Onion
- 1 large sweet onion (such as Vidalia)
Batter and Coating
- 1 cup all purpose flour
- 2 tablespoons cornstarch
- 1 teaspoon paprika
- 1 teaspoon garlic powder
- 1/2 teaspoon onion powder
- 1/2 teaspoon cayenne pepper
- 1 teaspoon salt
- 1/2 teaspoon black pepper
- 2 large eggs
- 1 cup whole milk
Frying
- Vegetable oil for deep frying
Instructions
- Prepare the onion: Peel the large sweet onion and slice approximately 1/2 inch off the top while keeping the root end intact. Place the onion cut side down and carefully make 12 to 16 vertical cuts from top downward towards the root, ensuring not to cut through the root so that the onion layers remain attached.
- Separate layers: Turn the onion over and gently pull apart the sections to create a flower-like bloom effect.
- Make the flour mixture: In a bowl, combine the all-purpose flour, cornstarch, paprika, garlic powder, onion powder, cayenne pepper, salt, and black pepper to create a seasoned flour mixture.
- Prepare egg wash: In a separate bowl, whisk together the eggs and whole milk until well combined.
- Coat the onion: Dip the onion into the seasoned flour mixture, making sure to get the coating in between the petals thoroughly. Then dip it into the egg wash, and again into the flour mixture for a double coating that adds extra crispiness.
- Chill: Place the coated onion in the refrigerator for about 15 minutes; this helps the batter stick better during frying.
- Heat oil: Preheat vegetable oil in a deep pot or fryer to 375°F (190°C).
- Deep fry the onion: Carefully lower the onion root side up into the hot oil and fry for 6 to 8 minutes, or until it turns golden brown and crispy on all sides.
- Drain and serve: Remove the fried onion from oil and place it on paper towels to drain excess oil. Serve immediately while hot with your favorite dipping sauce.
Notes
- Choose a large sweet onion with a firm root end to ensure the petals hold together during cutting and frying.
- A simple dipping sauce can be made by mixing mayonnaise, ketchup, horseradish, paprika, and a dash of cayenne pepper to complement the bold flavor of the onion.
- Be cautious while frying and ensure the oil temperature remains consistent for even cooking and crispiness.
- Use a deep pot large enough to fully submerge the onion to avoid uneven cooking.