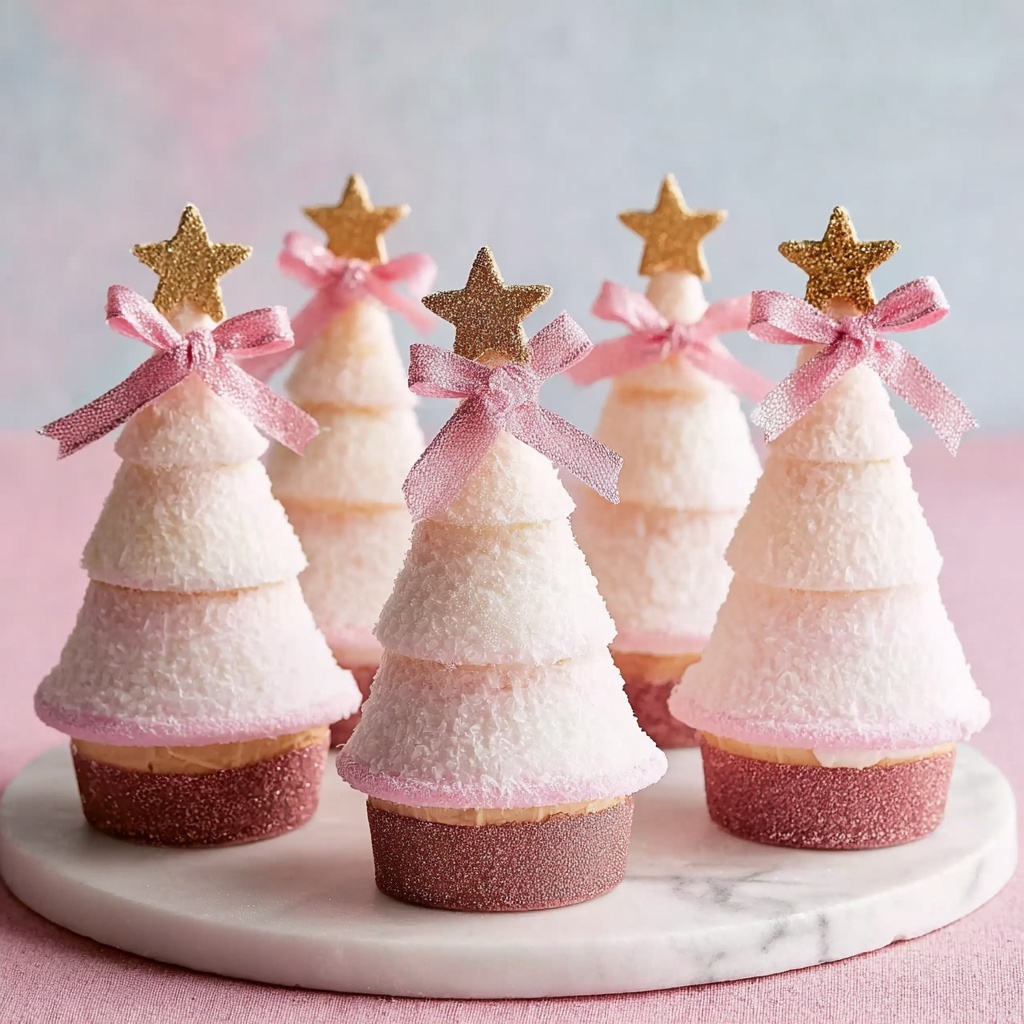
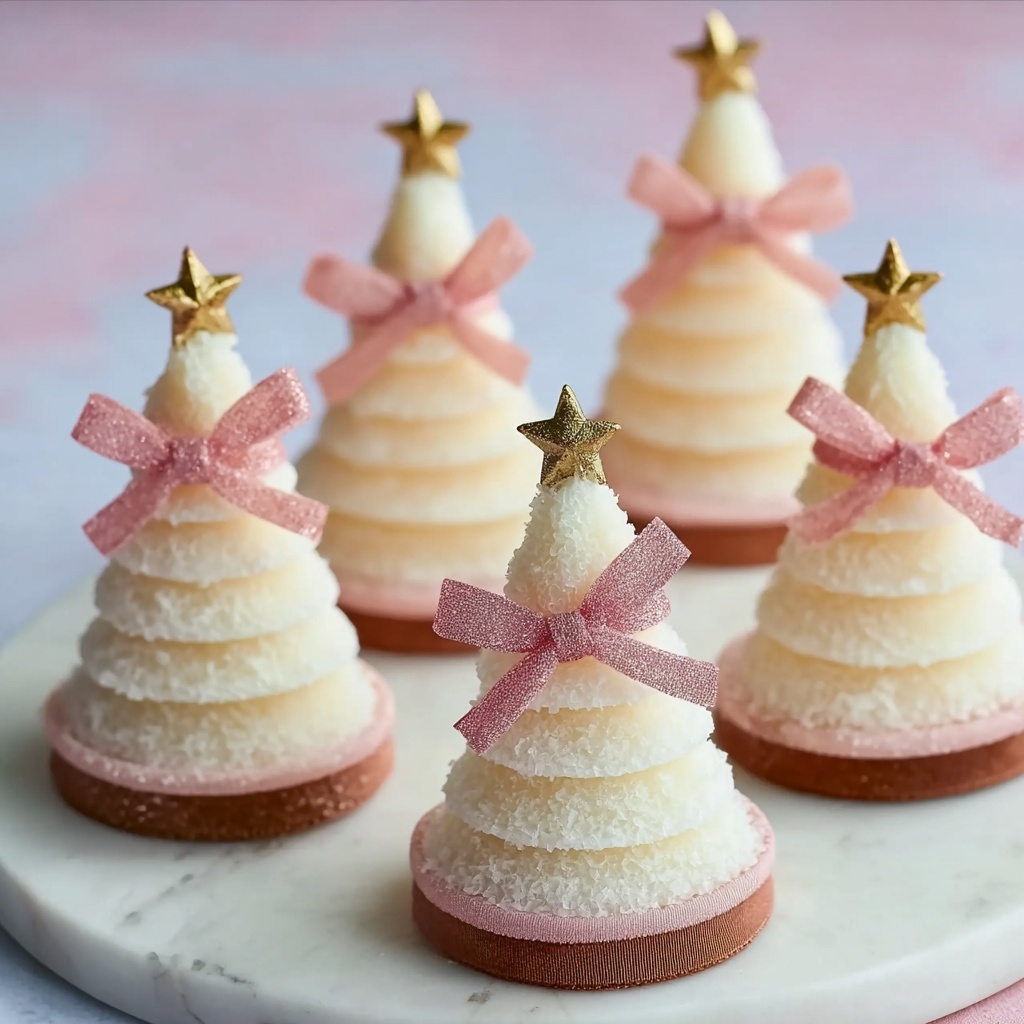
If you are looking to bring a burst of holiday cheer to your kitchen, the Coconut Ice Christmas Trees: Festive Fun for Family Treats Recipe is the perfect way to create a delicious and visually stunning sweet treat. This delightful dessert combines the creamy sweetness of coconut ice with the festive shape of Christmas trees, promising not only a joyful make-but also a tasty one that everyone from kids to adults will adore. The striking pink and white hues paired with shimmering edible decorations make it ideal for sharing at any family gathering during the holidays.
Ingredients You’ll Need
This recipe uses simple, straightforward ingredients that come together to create layers of flavor and texture, making it truly special. Each component has its role, from the smooth sweetness offered by the condensed milk to the light crunch of coconut and the festive pops of color and sparkle in the decorations.
- 500 grams Pure icing sugar: This forms the sweet base and gives the coconut ice its signature smooth texture.
- 1 teaspoon Cream of tartar: Helps stabilize the sugar mixture; optional but recommended for perfect consistency.
- 395 grams Sweetened condensed milk: Provides rich creaminess and binds the coconut together beautifully.
- 200 grams Desiccated coconut: Brings that unmistakable coconut flavor and a delightful chewiness.
- 1 teaspoon Vanilla essence: Adds a warm, aromatic depth to complement the coconut.
- A few drops Pink food coloring: Creates the lovely festive pink color for contrast; you can switch up colors if you prefer.
- 12 pieces Large waffle ice-cream cones: These serve as the sturdy tree bases, adding a crisp texture and whimsical tree shape.
- 200 grams White chocolate melts: Melted and piped on top as “tinsel” to finish the look and add extra sweetness.
- Gold and white cachous, edible gold stars: Perfect for sparkling decoration, bringing a magical holiday sparkle to each coconut ice tree.
How to Make Coconut Ice Christmas Trees: Festive Fun for Family Treats Recipe
Step 1: Preparing the Base Mixture
Begin by sifting the pure icing sugar together with the cream of tartar into a large bowl; this ensures your mixture will be silky smooth with no lumps, setting a perfect foundation for your coconut ice Christmas trees.
Step 2: Combining the Wet and Dry Ingredients
Mix in the sweetened condensed milk, desiccated coconut, and vanilla essence thoroughly. This blend forms a creamy, textured dough that’s rich, sweet, and utterly inviting—make sure every bit is combined evenly for consistent flavor throughout your treat.
Step 3: Coloring and Layering the Coconut Ice
Split your mixture into two equal parts. To one half, add a few drops of pink food coloring and stir gently until you achieve your desired shade. Crumble this pink batch over the white portion and lightly fold them together to create a marbled, festive look reminiscent of candy cane swirls and holiday cheer.
Step 4: Filling the Cones
Take each large waffle cone and carefully pack it full with the coconut ice mixture. This is where your creativity starts to come to life as these cones begin to take shape as charming and flavorful Christmas trees that will wow everyone.
Step 5: Chilling and Setting the Shapes
Place your filled cones upright in a secure spot inside the refrigerator for about 30 minutes to allow the mixture to set firmly. Once set, gently remove the coconut ice around the cones and then chill everything for another 30 minutes so the trees hold their form perfectly.
Step 6: Decorating the Trees
Melt the white chocolate melts until smooth and pour into a piping bag or a resealable plastic bag with a tiny corner snipped; then pipe delicate squiggles and lines over each tree to mimic sparkling tinsel. Finish with edible gold and white cachous and glittering stars for that classic, elegant holiday sparkle.
How to Serve Coconut Ice Christmas Trees: Festive Fun for Family Treats Recipe

Garnishes
These Coconut Ice Christmas Trees look charming enough on their own, but a sprinkle of extra edible glitter or small, colorful sprinkles can add even more festive joy. Fresh mint leaves or small berries placed around them on the platter bring pops of natural color and a refreshing contrast.
Side Dishes
Serve these trees alongside a warm cup of mulled tea or hot chocolate to complement the cool, sweet texture with something cozy and spiced. They also pair wonderfully with fruit platters featuring citrus slices or pomegranate seeds for a truly balanced holiday spread.
Creative Ways to Present
Arrange your coconut ice trees on a large wooden board decorated with fresh pine branches and cinnamon sticks for full Christmas spirit. Wrapping the cones in festive cupcake liners or placing them in mini flowerpots lined with green tissue paper can make them the centerpiece of your holiday table or a delightful edible gift.
Make Ahead and Storage
Storing Leftovers
Keep any leftover Coconut Ice Christmas Trees in an airtight container in the refrigerator. They hold well for up to 5 days, maintaining their fresh taste and texture. Just be sure to keep them chilled to prevent the coconut ice from softening too much.
Freezing
If you want to prepare these festive treats well in advance, freezing is a great option. Wrap each tree individually in plastic wrap and then place them in a freezer-safe container. They freeze nicely for up to 3 months. Thaw them gently in the fridge when you’re ready to enjoy.
Reheating
Since these are no-bake chilled treats, reheating is not necessary. Simply allow frozen ones to thaw completely in the fridge to preserve texture and flavor. Avoid room temperature thawing for too long to keep the coconut ice fresh and firm.
FAQs
Can I substitute the icing sugar with powdered sugar in this recipe?
Yes, powdered sugar can be used as a substitute for pure icing sugar in this recipe. It will still produce a smooth, sweet base for the coconut ice, so don’t worry if you don’t have icing sugar on hand.
Is cream of tartar essential in making coconut ice?
Cream of tartar helps to stabilize the mixture and improve texture, but it is not essential. If you don’t have it, the recipe will still work well without it, just be sure to mix thoroughly for the best results.
Can I use shredded coconut instead of desiccated coconut?
Absolutely! Shredded coconut gives a slightly different texture—more chewy and robust—compared to the finer desiccated version. Both work great and add lovely coconut flavor.
What can I use if I don’t have waffle ice-cream cones?
If large waffle cones aren’t available, regular cones can be used as a substitute, although the final shape might be a bit different. Just fill them gently to keep the festive appearance intact.
Can I make these Coconut Ice Christmas Trees in other colors?
Definitely! The pink coloring is traditional and festive, but you can swap in green, red, or even gold food coloring to match your holiday theme or personal preference. Just be creative and have fun with it!
Final Thoughts
These Coconut Ice Christmas Trees are not only a feast for the eyes but also a tasty tradition that brings together family and friends in the spirit of the holidays. The Coconut Ice Christmas Trees: Festive Fun for Family Treats Recipe is wonderfully inviting and easy enough for everyone to enjoy making and sharing. So go ahead and give this recipe a try—it’s guaranteed to brighten up your festive celebrations and add a special touch of sweetness to your holiday table.
Print
Coconut Ice Christmas Trees: Festive Fun for Family Treats Recipe
- Prep Time: 20 minutes
- Cook Time: 0 minutes
- Total Time: 1 hour 15 minutes
- Yield: 12 servings
- Category: Dessert
- Method: No-Cook
- Cuisine: Western
- Diet: Vegetarian
Description
These Coconut Ice Christmas Trees are a delightful and festive holiday treat that combines the creamy sweetness of coconut ice with the fun shape of ice-cream cones to create adorable edible Christmas trees. Perfect for family gatherings, these no-bake treats are easy to make and beautifully decorated with white chocolate and edible stars, adding a magical sparkle to your holiday dessert table.
Ingredients
Coconut Ice Mixture
- 500 grams Pure icing sugar (Can substitute with powdered sugar if needed.)
- 1 teaspoon Cream of tartar (Can be omitted if unavailable.)
- 395 grams Sweetened condensed milk (Use regular or low-fat based on preference.)
- 200 grams Desiccated coconut (Shredded coconut can be used for a different texture.)
- 1 teaspoon Vanilla essence (Substitute with almond extract for a slightly different taste.)
- A few drops Pink food coloring (Optional and can be swapped for other colors.)
Assembly and Decoration
- 12 pieces Large waffle ice-cream cones (Regular cones can work in a pinch.)
- 200 grams White chocolate melts (Milk chocolate can be a sweeter alternative.)
- Gold and white cachous, edible gold stars (Other edible glitter or sprinkles can also be used, as needed)
Instructions
- Prepare the dry ingredients: In a large bowl, sift together the pure icing sugar and cream of tartar to ensure a smooth blend free of lumps.
- Combine wet and dry ingredients: Stir in the sweetened condensed milk, desiccated coconut, and vanilla essence into the sifted dry ingredients. Mix until the mixture is well combined and forms a sticky, moldable texture.
- Add color: Divide the mixture into two equal parts. Add a few drops of pink food coloring to one half and crumble it over the white mixture. Gently fold both colors together to create a marbled effect, avoiding full mixing to keep a festive look.
- Fill the cones: Carefully spoon and pack the coconut mixture into each waffle ice-cream cone, shaping it to mimic a Christmas tree. Place the filled cones upright in the refrigerator and chill for about 30 minutes to set the mixture firmly.
- Chill the shaped trees: After the initial setting, remove the cones from the coconut ice and then refrigerate the shaped coconut ice alone for an additional 30 minutes to fully firm up the trees.
- Decorate: Melt the white chocolate melts gently using a double boiler or microwave in short bursts, stirring frequently until smooth. Pipe the melted white chocolate over the coconut ice trees to resemble festive tinsel. While the chocolate is still soft, decorate with gold and white cachous, edible gold stars, or other sprinkles to add sparkle and festive charm.
Notes
- Use powdered sugar if pure icing sugar is not available; it works as a suitable substitute.
- The cream of tartar can be left out but helps with texture and stability.
- Shredded coconut can be used for a different texture than desiccated coconut but may alter the consistency slightly.
- Pink food coloring is optional; feel free to use other colors like green or red for variety.
- Regular ice-cream cones can substitute waffle cones if necessary but may affect the aesthetic.
- Milk chocolate melts can be used instead of white chocolate for a sweeter finish.
- Be gentle when combining the colored mixture to maintain the marbled effect.
- Chilling times are important to allow the coconut ice to set properly and hold its shape.
- Allow white chocolate to cool slightly before piping to prevent melting the coconut ice.


