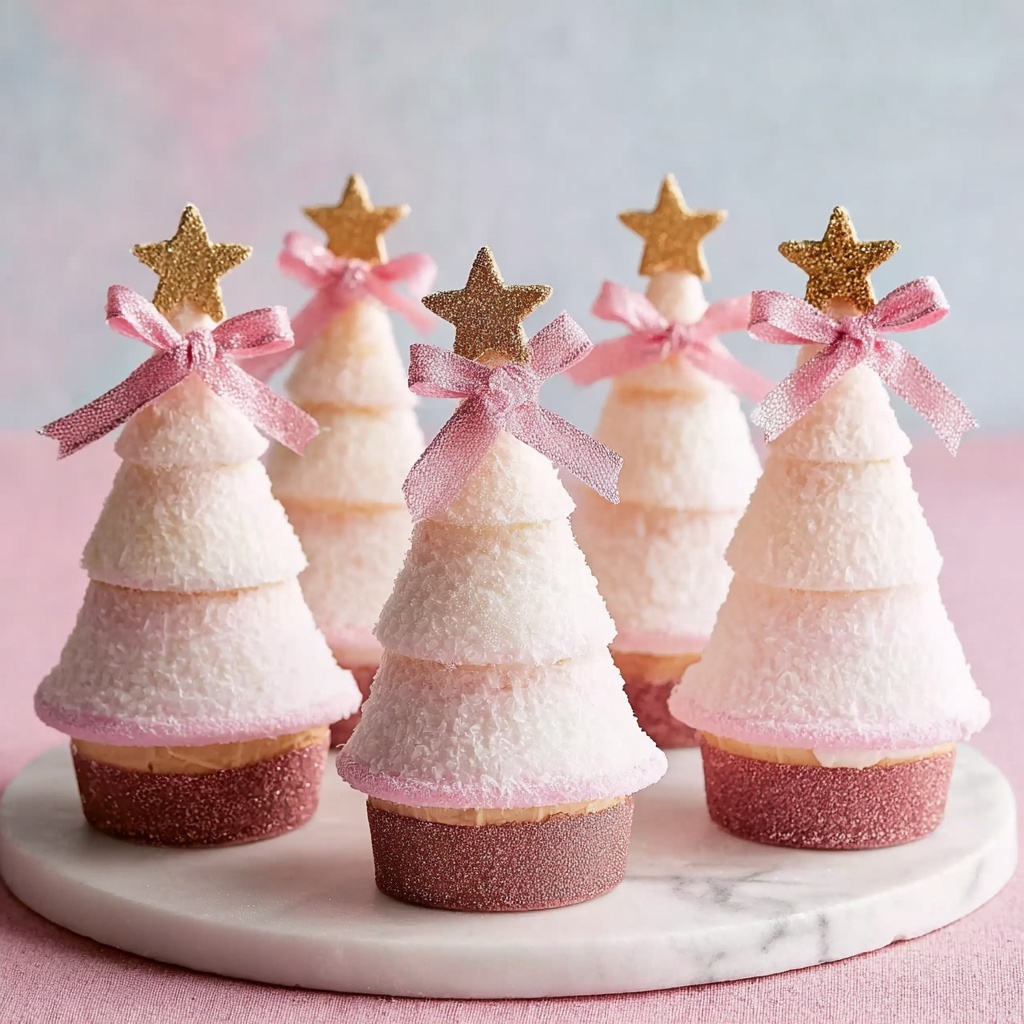
If you’re searching for a delightful, festive treat that brings joy and creativity to your holiday celebrations, look no further than Coconut Ice Christmas Trees: Festive Fun for Family Treats Recipe. These charming, cone-shaped coconut sweets are not only visually stunning but offer a deliciously sweet and creamy coconut flavor that’s perfectly balanced with a tender, melt-in-your-mouth texture. Combining the crunch of waffle cones with the softness of coconut ice and whimsical decorations, this recipe makes for an irresistible holiday centerpiece that kids and adults alike will adore. It’s a wonderful way to create lasting memories in the kitchen while sharing something truly special on Christmas day.
Ingredients You’ll Need
This recipe relies on simple, wholesome ingredients that come together beautifully to create both flavor and texture. Each component plays a crucial role in ensuring your Coconut Ice Christmas Trees look festive and taste delectable, from the smooth sweetness of icing sugar to the crispy cone base, creating layers of fun and flavor.
- 500 grams Pure icing sugar: Provides the sweet, smooth base for the coconut ice and ensures a perfect texture when sifted.
- 1 teaspoon Cream of tartar: Adds a subtle lift and helps maintain the structure, but can be omitted if needed.
- 395 grams Sweetened condensed milk: Brings creaminess and richness, binding the coconut and sugar into a luscious treat.
- 200 grams Desiccated coconut: Offers that authentic coconut texture and aroma essential for this festive delight.
- 1 teaspoon Vanilla essence: Infuses the mixture with warm, inviting flavor; almond extract is a great alternative for a twist.
- A few drops Pink food coloring: Adds a festive pop of color to half the mixture, giving a classic coconut ice look.
- 12 pieces Large waffle ice-cream cones: Create the shape and crunchy base for your coconut Christmas trees.
- 200 grams White chocolate melts: Perfect for piping delicate “tinsel” decorations that bring your coconut trees to life.
- Gold and white cachous, edible gold stars: These sprinkles add sparkle and holiday magic to your festive creations.
How to Make Coconut Ice Christmas Trees: Festive Fun for Family Treats Recipe
Step 1: Prepare the Coconut Ice Base
Start by sifting your pure icing sugar along with the cream of tartar into a large bowl. This ensures the mixture will be extra smooth, avoiding any lumps that might spoil the texture. Next, stir in the sweetened condensed milk, desiccated coconut, and vanilla essence until thoroughly combined. This blend will be thick, richly sweet, and the heart of your coconut ice.
Step 2: Divide and Color the Mixture
To get that signature look of pink and white swirls, divide your coconut mixture in half. Add a few drops of pink food coloring to one half and gently crumble it over the untouched white half. Then very carefully fold the two together, allowing the colors to swirl without fully blending. This gives your Christmas trees that beautiful marbled effect that feels truly nostalgic and festive.
Step 3: Fill the Cones
Take your large waffle ice-cream cones and carefully pack each one with the coconut mixture. Press the mixture firmly down the cone to fill it completely but avoid overpacking, which can make the cone fragile. Once filled, place the cones upright in the refrigerator and chill for about 30 minutes. This chilling step is essential as it helps the coconut ice firm up and hold shape around the cone.
Step 4: Set and Chill Again
After the initial chill, unwrap the cones from the coconut ice carefully so they retain their cone shape surrounded by coconut ice. Place the finished cones on a tray and refrigerate for another 30 minutes to ensure they are fully set before decorating. This patience pays off in sturdy, beautiful trees that won’t crumble easily.
Step 5: Decorate Your Christmas Trees
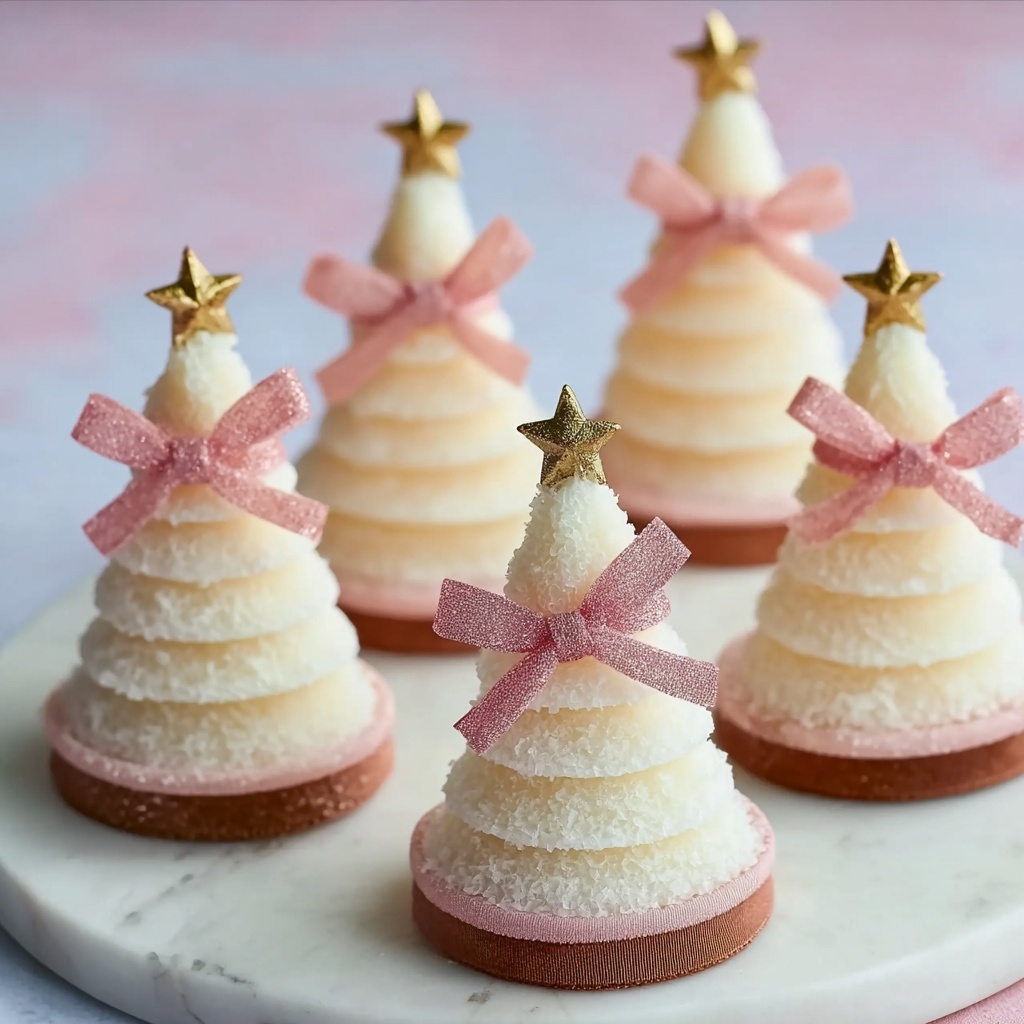
Now comes the fun part! Gently melt the white chocolate melts until smooth and pour into a piping bag. Use the chocolate to pipe delicate tinsel garlands over each tree, zigzagging from top to bottom. While the chocolate is still warm, sprinkle gold and white cachous or edible gold stars over the trees. The glittering sprinkles bring your Coconut Ice Christmas Trees: Festive Fun for Family Treats Recipe to life, making each tree sparkle with holiday cheer.
How to Serve Coconut Ice Christmas Trees: Festive Fun for Family Treats Recipe

Garnishes
For serving, these coconut ice trees look stunning on a festive platter garnished with fresh holly leaves or edible rose petals. A light dusting of icing sugar over the top creates a delicate snow effect. You might also add a few edible glitter flakes to make every bite feel magical and special for your guests.
Side Dishes
These treats pair wonderfully with warm beverages like spiced hot chocolate, mulled wine, or fragrant peppermint tea. For a lighter contrast, serve alongside a crisp fruit salad featuring citrus and pomegranate to balance the sweetness. The Coconut Ice Christmas Trees: Festive Fun for Family Treats Recipe truly shines best as part of a spread that enhances the holiday spirit.
Creative Ways to Present
Present your coconut ice Christmas trees perched upright in a large decorative bowl filled with sugar or edible glitter to mimic a snowy forest floor. You can also wrap each tree in clear cellophane tied with festive ribbon, turning them into charming edible gifts for friends and family. Displaying the trees grouped together creates an enchanting miniature Christmas tree grove that dazzles the eyes and hearts of all who see it.
Make Ahead and Storage
Storing Leftovers
If you have any Coconut Ice Christmas Trees leftover, store them in an airtight container in the refrigerator. They will stay fresh and maintain their texture for up to 5 days, making it easy to prepare ahead and enjoy throughout your holiday festivities.
Freezing
While freezing isn’t generally recommended because it can change the texture of both the coconut ice and the cones, you can freeze the coconut ice component separately if needed. To do this, shape the coconut ice into a block, wrap tightly, and freeze. Thaw in the refrigerator before molding with the cones and decorating.
Reheating
Since these are no-bake treats, reheating is not necessary. To enjoy the best texture and flavor, serve your Coconut Ice Christmas Trees chilled. Allow them to come to room temperature for a few minutes if preferred, to soften the coconut ice slightly without melting the cones.
FAQs
Can I substitute the condensed milk with something else?
Sweetened condensed milk is key to achieving the creamy, sweet consistency of coconut ice, but if you need a dairy-free option, try using coconut condensed milk or a thick coconut cream sweetened with powdered sugar. The texture will vary slightly but still be delicious.
What if I don’t have waffle cones?
Regular ice cream cones can work as a substitute for the base of these trees. The shape will still create the charming Christmas tree effect, though the texture might be less crunchy depending on the cone type.
Can children help make this recipe?
Absolutely! This recipe is perfect for a family cooking activity. Kids can help sift the sugar, stir the coconut mixture, and especially decorate the trees with chocolate and sprinkles, making for festive fun and learning in the kitchen.
How do I make the pink color without food coloring?
If you prefer to avoid artificial colors, try replacing the pink dye with beetroot powder or strawberry powder for a natural tint. They’ll add a gentle color and a hint of extra flavor to the coconut ice.
Are there vegan alternatives for this recipe?
Yes, vegan versions can be made by substituting condensed milk with a homemade coconut milk reduction or store-bought vegan condensed milk, and ensuring sprinkles and cones are vegan-friendly. The texture and taste will be slightly different but still festive and tasty.
Final Thoughts
Whipping up the Coconut Ice Christmas Trees: Festive Fun for Family Treats Recipe is such a joyous way to welcome the holiday season into your home. With its charming appearance, simple ingredients, and delicious texture, this recipe is sure to become a beloved tradition. So gather your ingredients, call in your loved ones, and dive into making these sweet, festive trees that celebrate the spirit of Christmas with every bite. You will not regret adding this to your holiday repertoire!
Print
Coconut Ice Christmas Trees: Festive Fun for Family Treats Recipe
- Prep Time: 30 minutes
- Cook Time: 0 minutes
- Total Time: 1 hour 15 minutes
- Yield: 12 servings
- Category: Dessert
- Method: No-Cook
- Cuisine: Western
- Diet: Vegetarian
Description
These Coconut Ice Christmas Trees are a delightful and festive treat perfect for holiday celebrations. Made from a creamy blend of condensed milk, desiccated coconut, and colorful icing sugar, these no-bake cones are decorated with white chocolate and edible gold stars, creating a fun family-friendly dessert that’s both visually appealing and delicious.
Ingredients
Base Mixture
- 500 grams Pure icing sugar (Can substitute with powdered sugar if needed.)
- 1 teaspoon Cream of tartar (Can be omitted if unavailable.)
- 395 grams Sweetened condensed milk (Use regular or low-fat based on preference.)
- 200 grams Desiccated coconut (Shredded coconut can be used for a different texture.)
- 1 teaspoon Vanilla essence (Substitute with almond extract for a slightly different taste.)
- A few drops Pink food coloring (Optional and can be swapped for other colors.)
Decoration and Assembly
- 12 pieces Large waffle ice-cream cones (Regular cones can work in a pinch.)
- 200 grams White chocolate melts (Milk chocolate can be a sweeter alternative.)
- Gold and white cachous, edible gold stars (Other edible glitter or sprinkles can also be used, as needed.)
Instructions
- Prepare the Coconut Ice Mixture: In a large bowl, sift together the pure icing sugar and cream of tartar for a smooth blend that is free of lumps.
- Combine Ingredients: Stir in the sweetened condensed milk, desiccated coconut, and vanilla essence until the mixture is thoroughly combined and has a consistent texture.
- Add Color and Marbling: Divide the coconut mixture in half. Tint one half with a few drops of pink food coloring, then crumble the pink mixture over the white portion and gently combine to create a marbled effect.
- Fill the Cones: Carefully fill each large waffle ice-cream cone with the coconut ice mixture, pressing gently to ensure it’s well packed. Place the filled cones upright in the refrigerator for about 30 minutes to allow them to set firmly.
- Chill Further: Once set, remove the cones from the coconut ice (loosening from the cone if possible) and chill for another 30 minutes to fully firm the trees.
- Decorate: Melt the white chocolate and pipe it onto the set coconut ice trees to mimic the look of tinsel. Finish by decorating with gold and white cachous, edible gold stars, or other edible glitter and sprinkles to enhance the festive look.
Notes
- For a different texture, shredded coconut can replace desiccated coconut.
- Cream of tartar can be omitted if unavailable, though it helps improve texture and stability.
- Adjust the food coloring according to desired color intensity or use other colors for variety.
- Milk chocolate melts can substitute white chocolate for a sweeter flavor.
- Ensure the cones are properly filled and packed to prevent the mixture from breaking when chilled.

