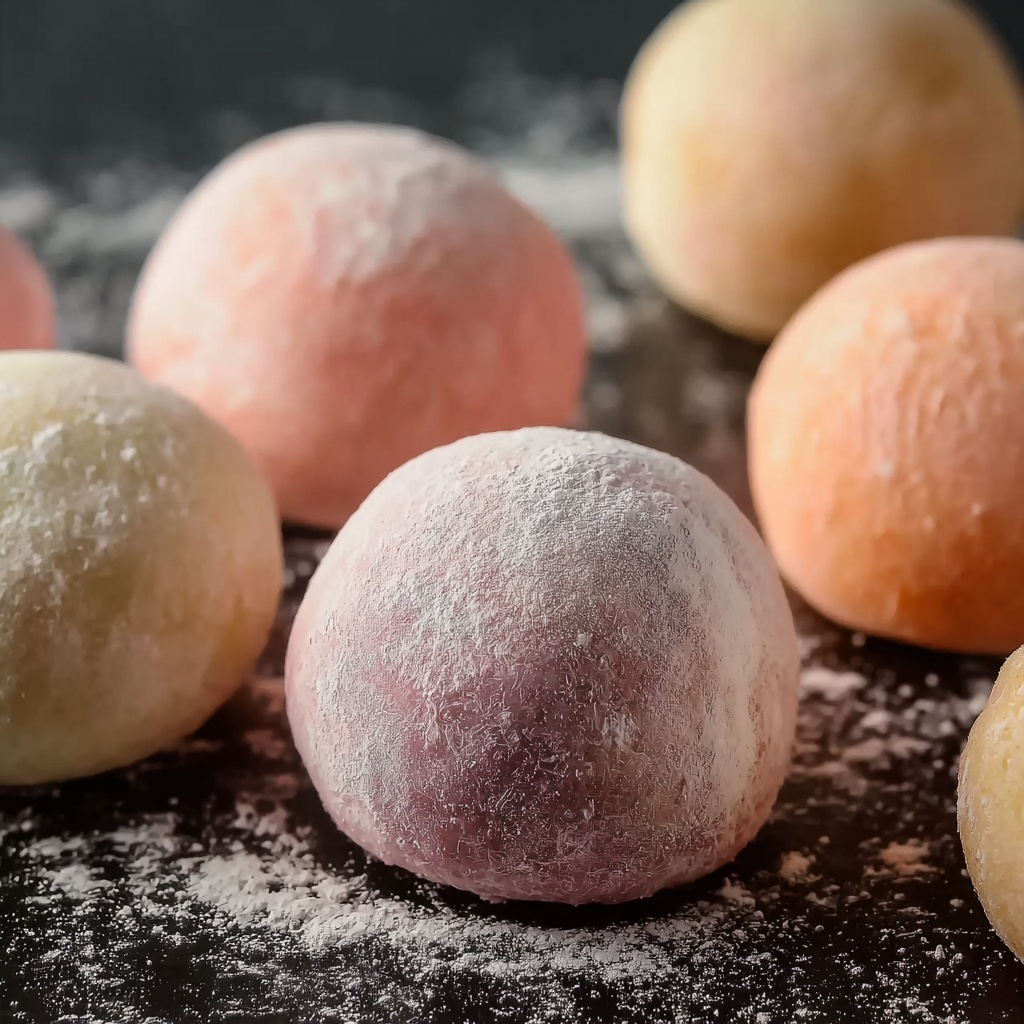
If you’ve ever wanted to try your hand at a classic Japanese treat that is delightfully soft, chewy, and downright addictive, then you’re in for a real treat with this Microwave Mochi: Soft and Chewy Japanese Rice Cake Recipe. Imagine tender, pillowy mochi that comes together in mere minutes using your microwave, with a subtle sweetness and endless possibilities for fillings and toppings. Whether you’re craving something traditional or wanting to experiment with fun twists, this recipe is a fast and fuss-free way to enjoy an authentic taste of Japan right at home.
Ingredients You’ll Need
These ingredients are wonderfully simple yet crucial for achieving that perfect mochi texture and flavor. Each component brings its own magic, from the sticky chew of glutinous rice flour to the gentle sweetness of sugar, and the dusting starch that keeps everything perfectly handled.
- 1 cup glutinous rice flour (mochiko): The heart of mochi, this flour creates the chewy, stretchy texture unique to this Japanese rice cake.
- 3/4 cup water: Combines with the rice flour to form the dough, ensuring the right balance of moisture and pliability.
- 1/4 cup granulated sugar: Adds a subtle sweetness that complements both plain and filled mochi perfectly.
- 1/4 cup cornstarch or potato starch (for dusting): Essential for preventing sticky hands and surfaces when shaping the mochi.
- 1/2 teaspoon vanilla extract (optional): Gives a lovely hint of warmth and fragrance to the dough.
- 1/2 cup sweet red bean paste or other filling (optional): The classic filling that adds richness and flavor contrast, though you can get creative here too.
How to Make Microwave Mochi: Soft and Chewy Japanese Rice Cake Recipe
Step 1: Mix Your Mochi Dough
Start by whisking together the glutinous rice flour, water, and sugar in a microwave-safe bowl until everything is smooth and free of lumps. If you’re using vanilla extract, stir it in now. This step ensures your mochi is evenly sweet and has the ideal consistency to cook evenly while microwaving.
Step 2: Microwave in Intervals
Cover the bowl loosely—think of a plate or microwave-safe wrap that lets steam escape but keeps moisture in. Microwave for 1 minute, then remove and stir vigorously. This breaks up any clumps that form as the dough starts thickening. Return the bowl to the microwave and cook in 30-second bursts, stirring each time, until your dough turns thick, sticky, and slightly translucent, usually around 2 to 3 minutes total. This is when the magic happens, transforming the batter into mochi dough.
Step 3: Dust and Transfer
Generously dust a clean surface with cornstarch or potato starch—this is your mochi playground. Carefully scrape the hot, sticky dough onto this surface, then sprinkle more starch on top. This keeps the dough from sticking to your hands and tools as you work.
Step 4: Cool, Flatten, and Cut
Let the dough cool just enough to handle safely, then flatten it out with your hands or a rolling pin dusted with starch. Cut the flattened dough into eight small portions—each one a blank canvas waiting to be molded into delicious mochi bites.
Step 5: Fill and Shape
If you’re using filling like sweet red bean paste, place a small dollop in the center of a piece. Pinch the edges together firmly to seal in the filling, then shape each piece into a smooth, round ball. Lightly dust off any excess starch before setting them aside for serving. If you want to skip filling, simply shape the natural dough into bite-sized balls—both options are equally delightful.
How to Serve Microwave Mochi: Soft and Chewy Japanese Rice Cake Recipe
Garnishes
Sprinkle toasted sesame seeds or a dusting of kinako (roasted soybean flour) on top for a nutty twist. A drizzle of sweet soy sauce or even a touch of matcha powder can add an elegant flair. These little finishes elevate the mochi, making it as beautiful as it is tasty.
Side Dishes
Pair your mochi with a cup of hot green tea or a refreshing bowl of fruit for a balanced snack or dessert experience. The rich sweetness of mochi contrasts perfectly with the gentle bitterness of tea, creating a harmonious classic Japanese pairing.
Creative Ways to Present
Try wrapping mochi pieces in edible leaves like sakura (cherry blossom leaves) for a traditional look or pair them with fresh fruit slices on a platter. You can also skewer small mochi balls to make it easy and fun to eat at parties or family gatherings. These creative touches turn simple mochi into a memorable centerpiece.
Make Ahead and Storage
Storing Leftovers
Mochi is best enjoyed fresh, but if you have leftover pieces, store them in an airtight container at room temperature for up to one day. Avoid refrigeration as it can dry out the chewy texture that makes mochi so special.
Freezing
You can freeze mochi to keep it longer—wrap each piece individually in plastic wrap and place them in a freezer-safe bag. Thaw at room temperature when ready. While freezing may soften some of the chewiness, it’s a handy way to enjoy mochi beyond the day it’s made.
Reheating
To refresh mochi after it’s been stored, gently microwave for 10-15 seconds to soften it up. If you’re reheating frozen mochi, allow it to thaw completely first to ensure even warming without drying out.
FAQs
Can I use regular rice flour instead of glutinous rice flour?
Regular rice flour won’t give you the chewy texture that mochi is famous for. Glutinous rice flour, or mochiko, is essential for that soft and stretchy bite.
Is this recipe gluten-free?
Yes! Since mochiko is made from glutinous rice, which contains no gluten, this recipe is naturally gluten-free—perfect for those with gluten sensitivities.
What fillings work well besides red bean paste?
You can get creative here—try ice cream, fresh fruit like strawberries, sweetened chestnut paste, or even a spoonful of chocolate for a fusion twist that’s sure to impress.
How sticky will the mochi be when handling?
Mochi is very sticky when warm, so be generous with starch dusting on your hands and surfaces to prevent it from adhering while shaping.
Can I make mochi without a microwave?
Absolutely! Traditional mochi is steamed or cooked on the stove, but this microwave version offers an incredibly quick and convenient method without compromising texture or flavor.
Final Thoughts
There’s something genuinely special about pulling together a batch of homemade mochi that’s both soft and chewy in just minutes. This Microwave Mochi: Soft and Chewy Japanese Rice Cake Recipe lets you dive into a beloved Japanese treat with ease and fun—perfect for sharing with family and friends or indulging in a little sweet solo moment. Give it a try and discover how accessible and rewarding mochi-making can be!
Print
Microwave Mochi: Soft and Chewy Japanese Rice Cake Recipe
- Prep Time: 10 minutes
- Cook Time: 3 minutes
- Total Time: 13 minutes
- Yield: 8 pieces
- Category: Dessert
- Method: Microwave
- Cuisine: Japanese
- Diet: Gluten Free
Description
This authentic Japanese mochi recipe features a chewy, sweet rice cake made from glutinous rice flour and sugar. Perfectly balanced with an optional sweet red bean paste filling, these delicate treats are quick to prepare using a microwave. Enjoy a traditional dessert that’s both gluten-free and customizable with various fillings.
Ingredients
Dough
- 1 cup glutinous rice flour (mochiko)
- 3/4 cup water
- 1/4 cup granulated sugar
- 1/2 teaspoon vanilla extract (optional)
For Dusting
- 1/4 cup cornstarch or potato starch
Filling (Optional)
- 1/2 cup sweet red bean paste or other filling (ice cream, fruit, or chocolate can be substituted)
Instructions
- Mix Ingredients: In a microwave-safe bowl, whisk together the glutinous rice flour, water, sugar, and vanilla extract (if using) until the mixture is smooth with no lumps.
- First Microwaving: Cover the bowl loosely and microwave for 1 minute. Remove and stir the mixture thoroughly to ensure even cooking.
- Continue Cooking: Microwave in 30-second intervals, stirring after each, until the dough thickens, becomes sticky, and slightly translucent. This step usually takes an additional 2 to 3 minutes total.
- Prepare Surface: Generously dust a clean surface with cornstarch or potato starch to prevent sticking, then transfer the hot mochi dough onto it.
- Dust and Cool: Sprinkle more starch on top of the dough to prevent sticking. Allow it to cool enough to handle safely but still warm for shaping.
- Shape Mochi: Flatten the dough and cut into 8 small portions. If using filling, place a small amount of sweet red bean paste in the center of each piece, then pinch the edges to seal and form smooth balls.
- Final Dusting and Serve: Lightly dust off any excess starch from the mochi balls before serving. Enjoy fresh for best texture.
Notes
- Work quickly while the dough is warm because it becomes harder to shape once cooled.
- You can substitute the traditional red bean paste filling with ice cream, fresh fruit, or chocolate for a variety of flavors.
- Store mochi in an airtight container at room temperature and consume within one day for optimal freshness.


