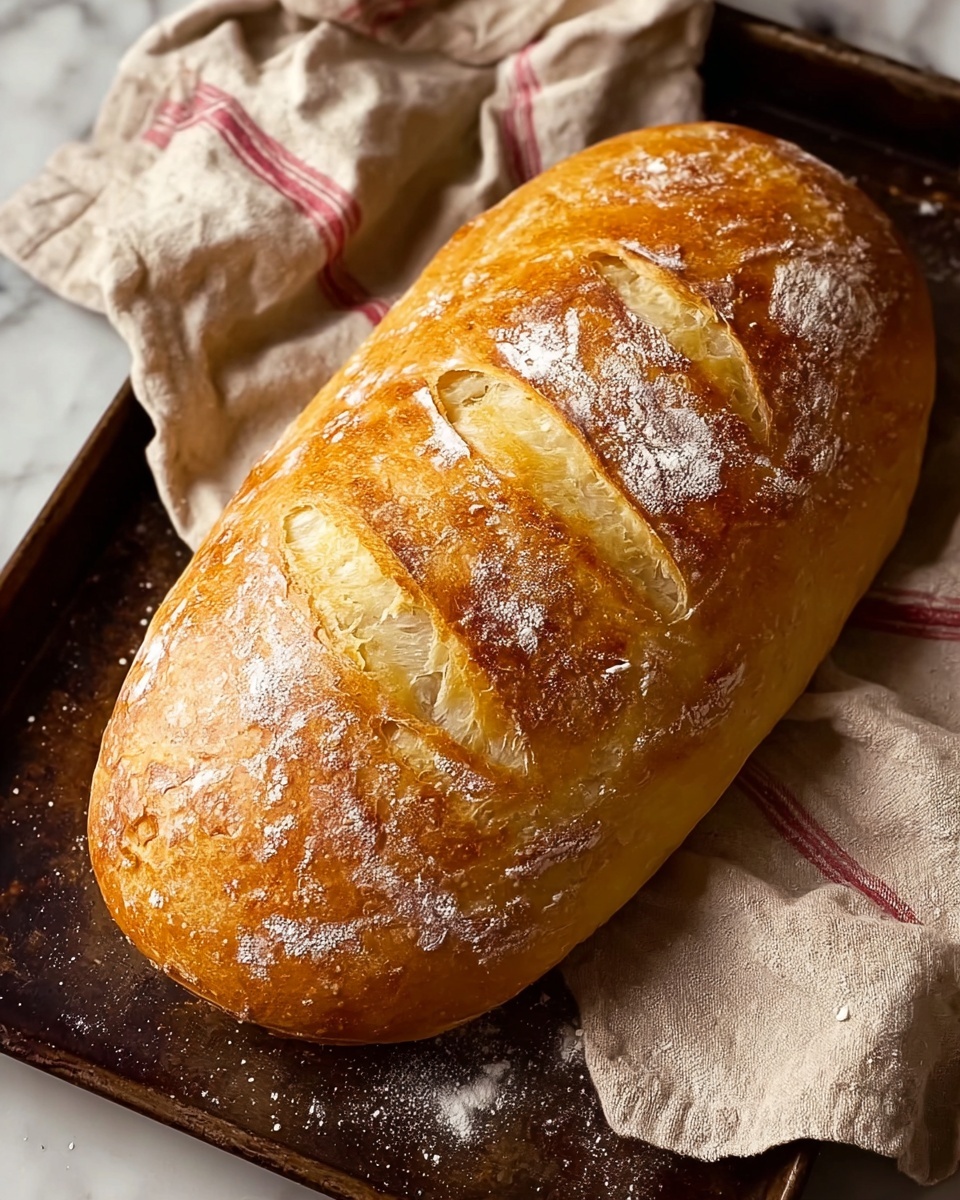
If you’ve ever dreamed of filling your kitchen with the irresistible aroma of fresh-baked bread, then this Italian Bread Recipe is just what you need to make that dream come true. This simple yet deeply satisfying loaf features a crisp, golden crust and a soft, chewy interior that’s perfect for everything from sandwiches to dipping in olive oil. With straightforward ingredients and a hands-on process that feels like a warm hug, this recipe captures the very essence of traditional Italian baking—trust me, once you try it, you’ll be making it again and again.

Ingredients You’ll Need
Every ingredient in this Italian Bread Recipe plays a vital role in creating its classic flavor and texture. The beauty lies in the simplicity—each staple ingredient contributes to that perfectly balanced rustic loaf.
- All-purpose flour: The main structure of the bread, providing that tender crumb with just enough chewiness.
- Sugar: Feeds the yeast and adds a hint of subtle sweetness to the crust.
- Salt: Enhances flavor and controls yeast fermentation for a perfectly risen loaf.
- Active dry yeast: The magic agent that makes the dough rise and gives the bread its airy texture.
- Warm water (110°F/45°C): Activates the yeast and hydrates the flour, crucial for dough development.
- Olive oil: Adds moisture and a hint of rich flavor, creating a tender crumb.
- Cornmeal: Used for dusting the baking surface, preventing the dough from sticking and adding a rustic crunch to the crust.
How to Make Italian Bread Recipe
Step 1: Activate the Yeast
Start by dissolving sugar and yeast in warm water, then let it sit for 5 to 10 minutes until it becomes foamy. This step is key because it tells you the yeast is alive and ready to give your bread the lift it needs.
Step 2: Mix the Dough
In a large bowl, combine the flour and salt. Pour in your foamy yeast mixture along with the olive oil and stir until a shaggy dough forms. This is where your bread starts to come together—don’t worry if it looks a little rough at this point.
Step 3: Knead to Perfection
Turn the dough onto a floured surface and knead it for about 8 to 10 minutes. This step develops gluten, which gives your bread that perfect chewy texture. The dough should become smooth and elastic, bouncing back when poked.
Step 4: First Rise
Place your dough in a greased bowl and cover it with a damp cloth. Let it rise in a warm spot for 1 to 2 hours until it’s doubled in size. This slow fermentation is what results in a light, airy loaf.
Step 5: Preheat the Oven
Set your oven to 375°F (190°C), ensuring it’s fully preheated to achieve that golden crust you’re aiming for.
Step 6: Shape and Prepare
Punch down the risen dough to release the air bubbles, then shape it into a loaf. Place it on a baking sheet sprinkled with cornmeal to prevent sticking and add an appealing crunch to the bottom crust.
Step 7: Final Rise and Scoring
Allow the dough to rise once more for 30 minutes. Before baking, use a sharp knife to slash the top—this isn’t just decorative, it helps the bread expand evenly in the oven.
Step 8: Bake Until Golden
Bake the loaf for 25 to 30 minutes, or until the crust is a beautiful golden brown and sounds hollow when tapped on the bottom. This hollow sound is the bread’s way of telling you it’s perfectly baked.
Step 9: Cool Before Slicing
Let your Italian bread cool completely on a wire rack before slicing. This resting step allows the crumb to set, ensuring each slice is tender yet holds together beautifully.
How to Serve Italian Bread Recipe

Garnishes
While this Italian Bread Recipe is delightful on its own, adding a drizzle of good-quality olive oil mixed with fresh herbs like rosemary or thyme can elevate your serving to a small celebration of flavors. A sprinkle of flaky sea salt on warm slices can also bring an irresistible savory touch.
Side Dishes
This bread excels alongside hearty soups such as minestrone or tomato basil, soaking up every last drop. It also pairs wonderfully with antipasto platters—think marinated olives, cheeses, and cured meats—which complements the rustic nature of the bread.
Creative Ways to Present
For a bit of flair, try hollowing out a loaf and filling it with your favorite dips or warm, cheesy spreads as a centerpiece. You can also slice it thick for bruschetta topped with juicy tomatoes and basil, turning a simple loaf into a festive appetizer.
Make Ahead and Storage
Storing Leftovers
Keep your leftover Italian bread in a paper bag or loosely wrapped in a clean kitchen towel to maintain the crust’s crispness while preventing the interior from drying out. Stored this way, it will stay fresh for 2 to 3 days.
Freezing
If you want to save your homemade bread for longer, wrap it tightly in plastic wrap and then foil to prevent freezer burn. It can be frozen for up to 3 months without losing its delightful texture.
Reheating
To revive frozen or day-old bread, sprinkle it lightly with water and warm it in a 350°F (175°C) oven for about 10 minutes. This simple trick will refresh the crust and soften the crumb, almost as if it had just come out of the oven.
FAQs
What makes this an authentic Italian Bread Recipe?
This recipe sticks to the traditional simplicity of Italian bread, using basic ingredients like flour, yeast, salt, and olive oil to create a loaf that balances flavor, texture, and rustic charm just like you’d find in Italy.
Can I use bread flour instead of all-purpose flour?
Absolutely! Bread flour has a higher protein content, which can give you a chewier texture and better rise, but all-purpose flour works beautifully too, making this recipe very forgiving.
How important is the water temperature when activating the yeast?
Water temperature is crucial; too hot can kill the yeast, while too cold slows the activation. Around 110°F (45°C) is the sweet spot to get that beautiful foaming action.
Can I make this bread without olive oil?
Olive oil adds moisture and flavor, but if you’re out, you can substitute with a neutral oil like vegetable or canola, though the authentic flavor will be slightly different.
Why do I need to slash the dough before baking?
Scoring the dough allows it to expand properly in the oven, preventing unwanted cracks and ensuring the loaf retains a beautiful shape with a lovely crust.
Final Thoughts
There’s something truly special about making your own Italian Bread Recipe from scratch—it’s not just bread, it’s a cozy experience that fills your home with warmth and love. Give this recipe a try, and I promise it will become a cherished baking ritual, perfect for sharing with friends and family at any table.
Print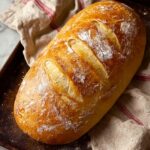
Italian Bread Recipe
- Prep Time: 25 minutes
- Cook Time: 30 minutes
- Total Time: 1 hour 45 minutes
- Yield: 12 servings
- Category: Bread
- Method: Baking
- Cuisine: Italian
Description
This classic Italian bread recipe yields a crusty, golden brown loaf with a soft, elastic interior. Perfect for sandwiches or as an accompaniment to any meal, the bread uses simple ingredients and traditional yeast fermentation for a flavorful and satisfying result.
Ingredients
Dry Ingredients
- 3 1/2 cups all-purpose flour
- 1 tablespoon sugar
- 2 teaspoons salt
- 1 tablespoon active dry yeast
Wet Ingredients
- 1 1/2 cups warm water (110°F/45°C)
- 1 tablespoon olive oil
Additional
- 1 tablespoon cornmeal (for dusting)
Instructions
- Activate Yeast: In a small bowl, dissolve sugar and yeast in warm water. Let sit for 5–10 minutes until the mixture becomes foamy, indicating that the yeast is active.
- Mix Dry Ingredients: In a large bowl, combine all-purpose flour and salt thoroughly to ensure even seasoning.
- Combine Dough: Add the yeast mixture and olive oil to the dry ingredients. Stir until the mixture starts to come together into a dough.
- Knead Dough: Turn the dough onto a floured surface and knead vigorously for 8–10 minutes until the dough is smooth and elastic, developing gluten structure.
- First Rise: Place the dough into a greased bowl, cover it with a damp cloth to maintain moisture, and let it rise in a warm place for 1 to 2 hours, or until it has doubled in size.
- Preheat Oven: Set your oven to 375°F (190°C) so it reaches the proper temperature by the time the dough has risen a second time.
- Shape Dough: Punch down the risen dough to release gases, shape it into a loaf, and place it on a baking sheet dusted with cornmeal to prevent sticking and add texture to the crust.
- Second Rise: Allow the loaf to rise for an additional 30 minutes to achieve a lighter crumb. Slash the top with a sharp knife to control expansion and create a decorative finish.
- Bake Bread: Bake the loaf for 25–30 minutes until the crust is golden brown and the bread sounds hollow when tapped on the bottom, indicating it’s fully baked.
- Cool: Transfer the bread to a wire rack and cool completely before slicing to avoid a gummy texture.
Notes
- Use warm water at approximately 110°F (45°C) to properly activate the yeast without killing it.
- Kneading develops gluten which gives the bread its chewy texture.
- Rising times may vary depending on room temperature; dough should double in size.
- Slashing the loaf before baking helps the bread expand evenly and creates a new crust texture.
- Allowing bread to cool fully helps set the crumb and makes slicing easier.
- Cornmeal dusting adds a subtle crunch and prevents sticking to the baking sheet.


