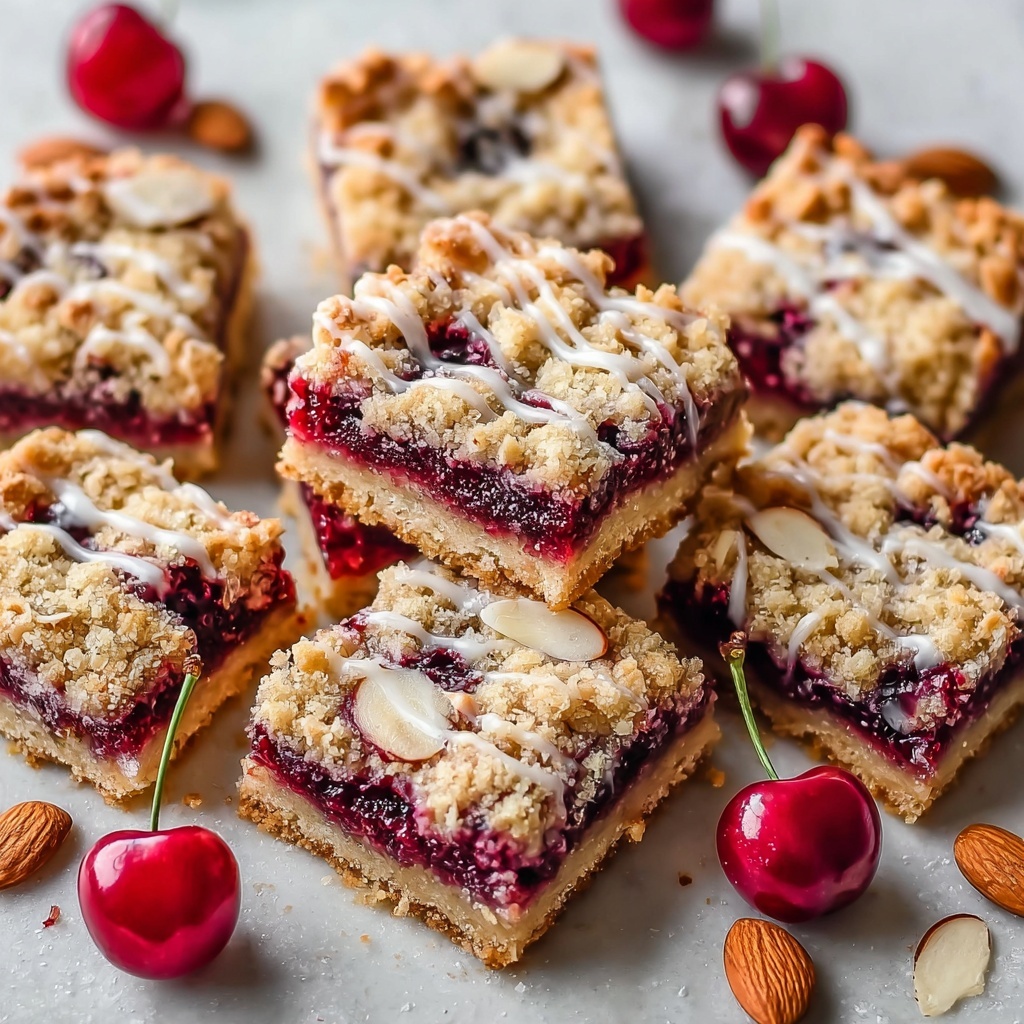
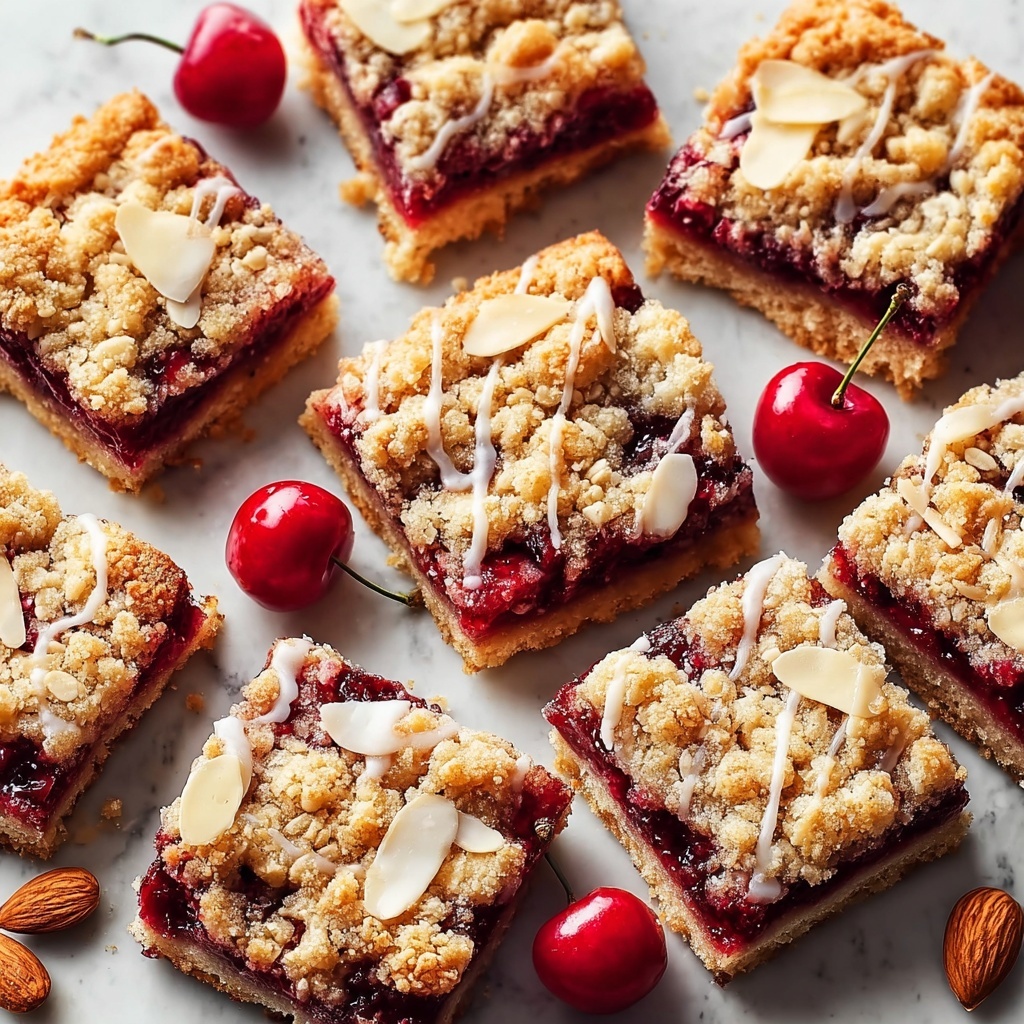
There’s something truly irresistible about a dessert that captures the juicy brightness of cherries combined with a zesty lemon touch, and that’s exactly what you get with this Cherry Pie Bars with Lemon Glaze Recipe. Imagine tender, buttery crust holding a luscious cherry filling, topped with a sweet and tangy glaze that sings with fresh lemon zest. It’s a perfect treat to brighten up any day, simple enough for a cozy weekend baking session but impressive enough to share at your next family gathering or party. I’m thrilled to walk you through every step so you can create these delightful bars from scratch and enjoy that perfect balance of sweet and tart in every bite.
Ingredients You’ll Need
These ingredients are delightfully straightforward yet essential to crafting those perfect cherry pie bars. Each one plays its role, from building the flaky crust to lending the cherry filling its glossy sheen, and finishing with a vibrant lemon glaze that ties it all together.
- 2 cups all-purpose flour: This forms the sturdy yet tender base and topping for the bars.
- 1/2 cup granulated sugar: Adds just the right sweetness in the crust and filling.
- 1/2 teaspoon salt: Balances flavors and enhances everything without being salty.
- 1 cup cold unsalted butter, cubed: Gives the crust a rich, flaky texture you’ll love.
- 1 large egg yolk: Binds the dough and adds richness.
- 2-3 tablespoons ice water: Helps bring the dough together without making it tough.
- 4 cups fresh or frozen sweet cherries, pitted: The star of the filling, juicy and flavorful.
- 3/4 cup granulated sugar: Sweetens the cherry filling beautifully.
- 1/4 cup cornstarch: Thickens the filling to keep it from running.
- 1 tablespoon fresh lemon juice: Gives the filling a bright, fresh pop.
- 1 teaspoon vanilla extract: Adds depth and warmth to the cherry mixture.
- 1/4 teaspoon almond extract (optional): A subtle hint that enhances the cherry flavor wonderfully.
- Pinch of salt: To balance the tartness of the cherries.
- 1 1/2 cups powdered sugar: For the lemon glaze’s smooth, sweet finish.
- 3-4 tablespoons fresh lemon juice: Gives glaze its tang and keeps it light.
- 1 tablespoon lemon zest: Packs a fresh citrus punch in the glaze.
- 2 tablespoons unsalted butter, melted: Adds silkiness and richness to the glaze.
How to Make Cherry Pie Bars with Lemon Glaze Recipe
Step 1: Prepare Your Pan and Oven
Begin by preheating your oven to 350°F (175°C). Line a 9×13-inch baking pan with parchment paper, leaving an overhang on the sides. Lightly grease the parchment with butter or cooking spray – this little trick will save you from tricky removals later and ensure your bars come out perfectly intact.
Step 2: Create the Crust Base
In a large bowl, whisk together the flour, sugar, and salt until evenly combined. Add the cold, cubed butter and use a pastry cutter or your fingers to blend it into the flour mixture until it looks like coarse crumbs with some pea-sized chunks of butter remaining. This contrast creates that wonderfully flaky texture. Next, mix the egg yolk with 2 tablespoons of ice water, then drizzle it over the flour mixture. Gently stir until the dough just comes together, adding up to 1 tablespoon more water if necessary; avoid over-mixing to keep the crust tender.
Step 3: Press and Pre-Bake the Crust
Take about 3/4 cup of the dough mixture and set it aside for the topping. Press the remaining dough firmly and evenly into your prepared pan, making sure it goes slightly up the sides. To get a smooth, compact layer, press it down using the bottom of a measuring cup. Bake for 15 minutes until the edges just begin to turn golden – this ensures a sturdy base that won’t get soggy under the cherry filling.
Step 4: Prepare the Cherry Filling
While the crust is baking, combine your cherries, sugar, cornstarch, fresh lemon juice, vanilla extract, almond extract (if using), and a pinch of salt in a large bowl. Toss everything gently until cherries are evenly coated and the cornstarch is dissolved. This mixture will look glossy and slightly thickened – that’s the filling magic ready to go on the crust.
Step 5: Assemble and Bake
Once your crust comes out of the oven, immediately spread the cherry filling over the warm base in an even layer. Then crumble the reserved dough topping over the cherries in rustic clusters. Slide the pan back into the oven and bake for 30 to 35 minutes until the top turns golden brown and the cherry filling bubbles deliciously at the edges.
Step 6: Cool Completely
This cooling stage is key to perfecting your Cherry Pie Bars with Lemon Glaze Recipe. Let the bars cool completely in the pan for at least 2 hours – this gives the fruit filling time to set so you can slice neat bars without any drips or soggy bottoms.
Step 7: Add the Lemon Glaze Finish
To make the glaze, whisk together powdered sugar, lemon juice, lemon zest, and melted butter until smooth and spreadable. It should be thick enough to coat the back of a spoon but still easy to drizzle. Pour it evenly over the cooled bars, then let it set for about 15 minutes before cutting into squares. That vibrant glaze adds the perfect zesty contrast to the sweet cherries and buttery crust.
How to Serve Cherry Pie Bars with Lemon Glaze Recipe

Garnishes
A simple dusting of powdered sugar or a few fresh mint leaves can elevate your bars beautifully. For a more indulgent touch, add a dollop of whipped cream or a scoop of vanilla ice cream – the creamy coolness pairs so well with the tang of lemon glaze and bright cherries.
Side Dishes
Serve these bars alongside a light salad or a refreshing fruit platter for a perfect balance if you’re offering them as part of a larger spread. They also make a delightful companion to a cup of strong coffee or a fruity iced tea, ideal for an afternoon treat or casual brunch.
Creative Ways to Present
Get creative by cutting the bars into bite-sized pieces for a dessert buffet or layering them in clear glass jars for a charming picnic dessert. Drizzle some extra lemon glaze on the serving plate or sprinkle chopped toasted almonds for an added crunch and flavor burst. These little touches make your Cherry Pie Bars with Lemon Glaze Recipe feel even more special.
Make Ahead and Storage
Storing Leftovers
Store your cherry pie bars in an airtight container at room temperature for up to two days. Beyond that, refrigeration is best to maintain freshness, especially because of the fruit filling and glaze. They’ll keep nicely for up to 5 days in the fridge.
Freezing
If you want to prepare ahead, freeze uncut bars wrapped tightly in plastic wrap and foil for up to 3 months. To thaw, simply move them to the fridge overnight and add the lemon glaze fresh after they’re thawed for the best texture and flavor.
Reheating
Warm individual bars in the microwave for about 15 seconds to bring back that freshly-baked feel; avoid reheating too long or you may soften the glaze. An oven reheat at 300°F for 5-7 minutes also works well to refresh the crust’s crispness without melting the glaze.
FAQs
Can I use frozen cherries for this recipe?
Absolutely! Frozen cherries work wonderfully and can be used straight from the freezer. Just be sure to thaw and drain any excess liquid to keep your filling from becoming too watery.
What if I don’t have almond extract?
Almond extract is optional and adds a subtle, nutty note that enhances the cherry flavor. If you don’t have it, you can simply leave it out; the bars will still be deliciously flavorful.
How do I prevent the crust from getting soggy?
Pre-baking the crust before adding the filling creates a sturdy base that resists sogginess. Also, letting the bars cool completely before cutting helps the filling set firmly for cleaner slices.
Can I make these bars gluten-free?
Yes, you can substitute a gluten-free all-purpose flour blend for the regular flour. Just make sure it includes xanthan gum or another binder to mimic the texture, and proceed as directed.
How long does the lemon glaze stay fresh?
The lemon glaze tastes best fresh but can be stored in the fridge for up to 3 days. If it thickens, give it a quick stir or a splash of lemon juice to loosen it back up before using.
Final Thoughts
If you’re craving a dessert that feels like a hug from the inside out, these Cherry Pie Bars with Lemon Glaze Recipe will be your new favorite. The joyful combination of sweet cherries, buttery crust, and fresh lemon glaze is pure magic that’s surprisingly simple to create. I encourage you to give this recipe a try and watch how it brightens your kitchen and your taste buds. Happy baking, my friend!
Print
Cherry Pie Bars with Lemon Glaze Recipe
- Prep Time: 20 minutes
- Cook Time: 50 minutes
- Total Time: 3 hours including cooling
- Yield: 16 servings
- Category: Dessert
- Method: Baking
- Cuisine: American
Description
These Cherry Pie Bars with Lemon Glaze combine a buttery, crumbly crust with a luscious cherry filling and a tangy lemon glaze. Perfect for summer gatherings or anytime you crave a fruity, homemade dessert bar that’s easy to cut and serve.
Ingredients
Crust
- 2 cups all-purpose flour
- 1/2 cup granulated sugar
- 1/2 teaspoon salt
- 1 cup cold unsalted butter, cubed
- 1 large egg yolk
- 2–3 tablespoons ice water
Cherry Filling
- 4 cups fresh or frozen sweet cherries, pitted
- 3/4 cup granulated sugar
- 1/4 cup cornstarch
- 1 tablespoon fresh lemon juice
- 1 teaspoon vanilla extract
- 1/4 teaspoon almond extract (optional)
- Pinch of salt
Lemon Glaze
- 1 1/2 cups powdered sugar
- 3–4 tablespoons fresh lemon juice
- 1 tablespoon lemon zest
- 2 tablespoons unsalted butter, melted
Instructions
- Prepare Your Pan and Oven: Preheat your oven to 350°F (175°C). Line a 9×13-inch baking pan with parchment paper, leaving some overhang for easy removal. Lightly grease the parchment with butter or cooking spray to prevent sticking.
- Create the Crust Base: In a large bowl, whisk together flour, sugar, and salt. Add the cold, cubed butter and use a pastry cutter or your fingers to work it into the flour until it resembles coarse crumbs with some pea-sized pieces. Mix egg yolk with 2 tablespoons ice water, drizzle over the mixture, and gently stir to bring the dough together. Add additional water if needed, but avoid overworking.
- Press and Pre-Bake the Crust: Reserve about 3/4 cup of the crust mixture for the topping. Press the remaining dough firmly into the prepared pan, going slightly up the sides for an even layer. Use a measuring cup bottom to compact and level the crust. Bake for 15 minutes until edges begin to turn golden.
- Prepare the Cherry Filling: While the crust bakes, combine cherries, sugar, cornstarch, lemon juice, vanilla extract, almond extract (if using), and a pinch of salt in a large bowl. Toss well to coat cherries evenly and dissolve cornstarch. The mixture should appear glossy and slightly thickened.
- Assemble and Bake: Remove the pre-baked crust from the oven. Spread the cherry filling evenly over the hot crust. Crumble the reserved crust mixture over the filling, creating rustic clusters. Return the pan to the oven and bake for 30-35 minutes until topping is golden brown and filling is bubbling around edges.
- Cool Completely: Allow the bars to cool in the pan for at least 2 hours. This resting time is essential for the filling to set, ensuring clean slices and preventing soggy bottoms.
- Add the Lemon Glaze Finish: Whisk powdered sugar, lemon juice, lemon zest, and melted butter until smooth. The glaze should be thick yet spreadable. Drizzle evenly over the cooled bars and let it set for 15 minutes before cutting and serving.
Notes
- Use frozen cherries if fresh are not in season; thaw and drain excess liquid before using.
- For easier removal, allow the bars to cool completely and use the parchment overhang to lift them out of the pan.
- Adjust lemon juice in glaze to taste for desired tartness.
- Store bars in an airtight container at room temperature for up to 3 days or refrigerate for longer freshness.
- Optional almond extract adds a subtle nutty flavor but can be omitted for allergy sensitivities.


