
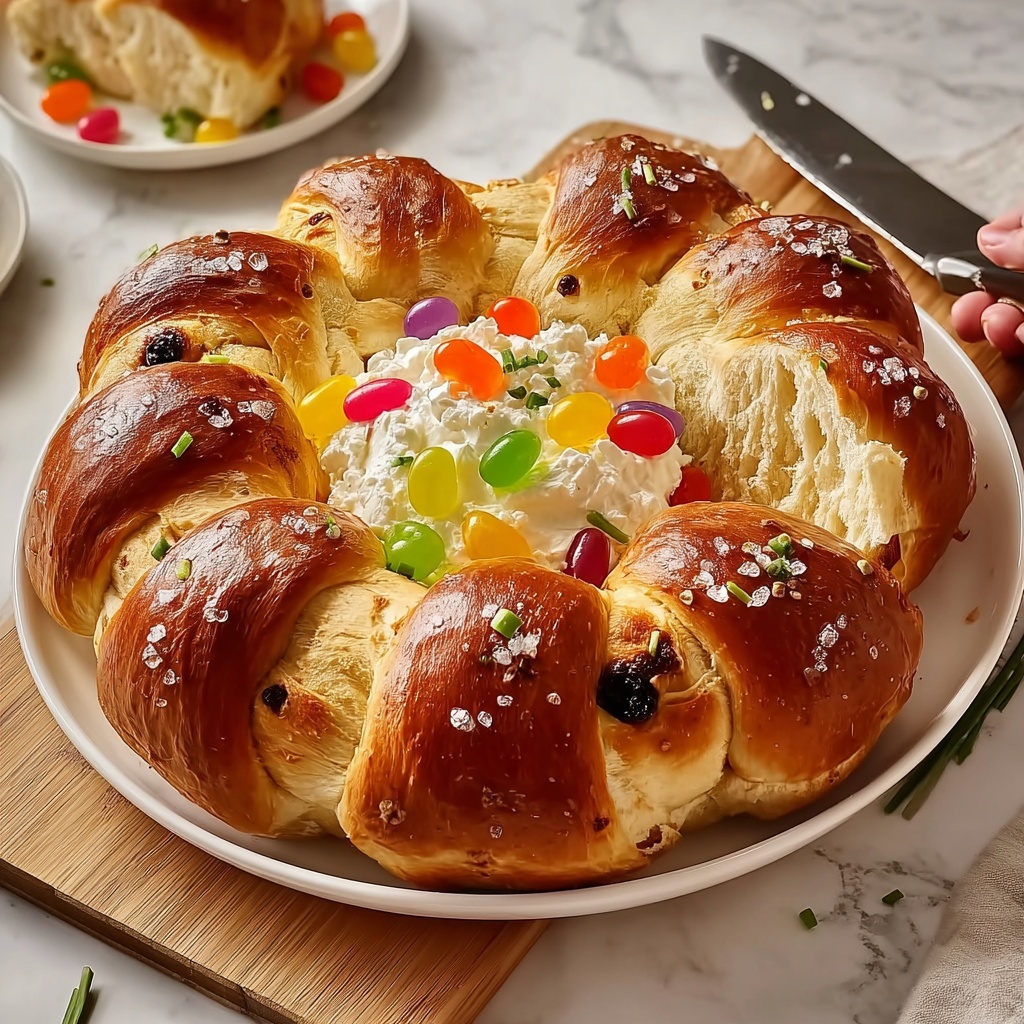
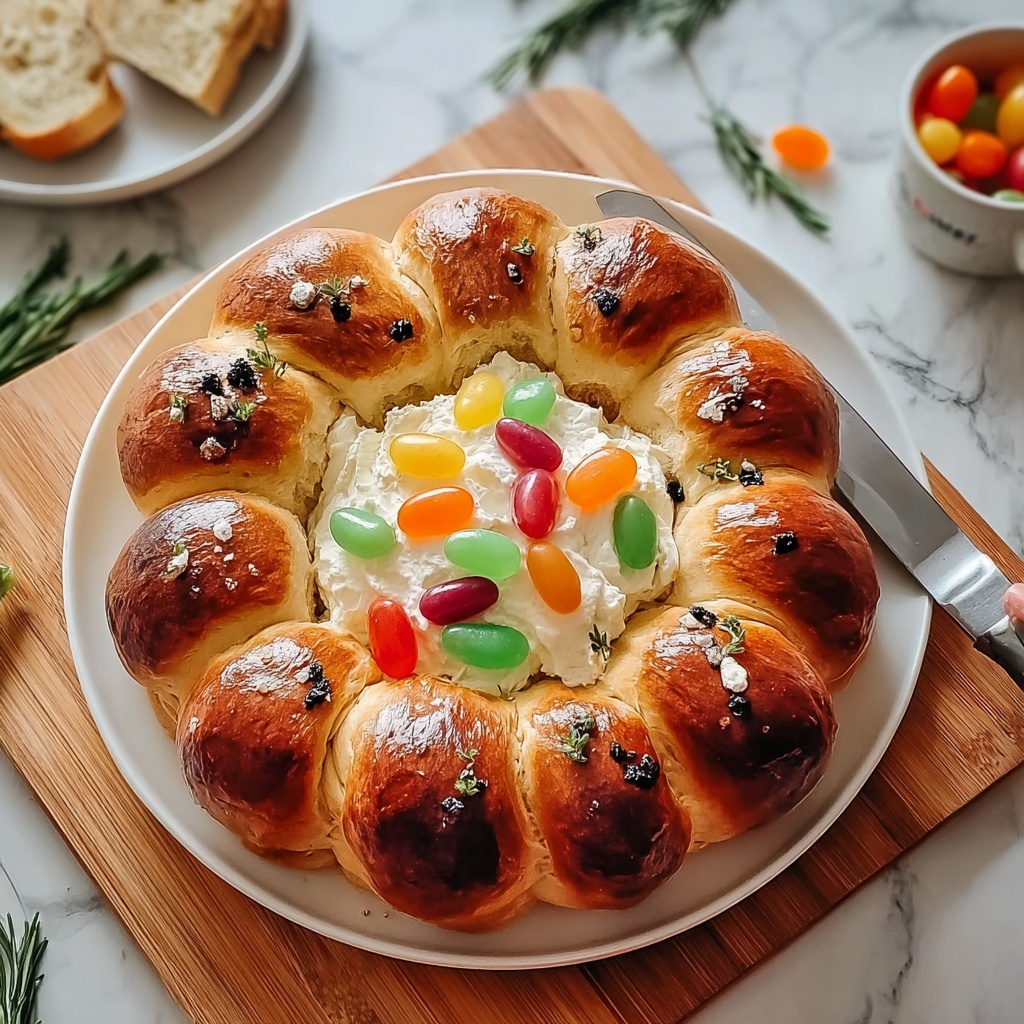
If you are searching for a delightful, charming treat to bring joy and warmth to your Easter celebrations, look no further than this irresistible Easter Bunny Bread Recipe. Soft, fluffy, and beautifully shaped into an adorable bunny, this bread is not only a feast for the eyes but also a comforting and delicious homemade staple that fills the kitchen with delightful aromas. Whether you’re a seasoned baker or just looking to try something fun and creative, this recipe offers a perfect blend of simple ingredients and heartwarming tradition to make your holiday extra special.
Ingredients You’ll Need
Gathering the right ingredients is the foundation of any great bread, and this Easter Bunny Bread Recipe keeps it simple yet essential. Each item plays a crucial role in creating a tender crumb, beautiful texture, and rich flavor that will have everyone asking for seconds.
- 4 cups all-purpose flour: The backbone of your bread, providing structure and softness.
- 2 ¼ tsp active dry yeast: The magical leavening agent that gives your bunny that perfect rise and fluffiness.
- ¼ cup sugar: Adds a touch of sweetness to balance the bread’s flavor perfectly.
- 1 tsp salt: Enhances all the other flavors, making your bread taste complete.
- 1 cup warm milk (110°F/43°C): Important to activate the yeast and keep the dough moist and tender.
- ½ cup unsalted butter, melted: Brings richness and a lovely buttery finish to the bread’s crumb.
- 2 large eggs: Adds moisture, structure, and a beautiful golden color to the final loaf.
How to Make Easter Bunny Bread Recipe
Step 1: Activate the Yeast
Start by combining warm milk, sugar, and yeast in a bowl. The warmth of the milk awakens the yeast, encouraging it to bubble and froth within a few minutes. This bubbling is your first sign that the dough will rise beautifully, so be patient and let it do its magic.
Step 2: Combine Dry Ingredients
While the yeast mixture is developing, whisk together the flour and salt in a separate bowl. These dry ingredients form the dough’s base, and mixing them first helps ensure even distribution of the salt, which is key for flavor balance and gluten development.
Step 3: Mix Wet and Dry Ingredients
Gradually add the yeast mixture, melted butter, and eggs to the dry ingredients. Mix them until a shaggy dough begins to form. This initial mix will look rough but don’t worry — it’s a good sign that your dough is coming together just right.
Step 4: Knead Until Smooth and Elastic
Transfer your dough to a floured surface and knead for 8 to 10 minutes. This is hands-on fun that transforms the dough’s texture, making it smooth and elastic. If the dough feels sticky, sprinkle a little additional flour as you knead, just enough to keep it manageable.
Step 5: First Rise
Place your kneaded dough into a greased bowl and cover it with a damp cloth or plastic wrap. Let it rest in a warm spot until it doubles in size — usually between 1 and 2 hours. This rising time is when your dough becomes light and airy, a key to that fluffy texture everyone loves.
Step 6: Shape the Bunny
Once risen, punch down the dough gently to release excess air. Shape one larger piece into a cute oval for the bunny’s body. Then use smaller pieces to fashion the ears and feet. This step adds your personal touch, turning simple bread dough into a charming Easter centerpiece.
Step 7: Bake to Golden Perfection
Preheat your oven to 350°F (175°C). Place the shaped bunny on a lined baking sheet and bake for 25 to 30 minutes until the bread turns a beautiful golden brown. The baking time locks in the flavors and finishes the bread with a slightly crisp exterior while staying soft within.
How to Serve Easter Bunny Bread Recipe
Garnishes
Dress up your Easter Bunny Bread with a dusting of powdered sugar or brush the surface gently with melted butter right out of the oven for a glossy finish. Adding a few edible flowers or colorful sprinkles around the bunny on your serving plate can create a festive, playful presentation kids will adore.
Side Dishes
This bread is incredibly versatile alongside many dishes. Pair your Easter Bunny Bread with fresh fruit spreads, honey, or homemade jams to enhance the sweetness. It also makes a fantastic accompaniment to soups and salads for a light Easter lunch or brunch that feels special and inviting.
Creative Ways to Present
Consider placing your Easter Bunny Bread on a rustic wooden board with pastel napkins for a charming table setting. You can also hollow out a small section in the bunny’s body and fill it with a colorful egg salad or herbed cream cheese dip — an adorable, edible centerpiece that blends taste and creativity!
Make Ahead and Storage
Storing Leftovers
To keep your Easter Bunny Bread fresh, store leftovers in an airtight container or tightly wrapped in plastic wrap at room temperature. It stays good for about two to three days and remains wonderfully soft, perfect for snacking.
Freezing
If you want to extend the freshness, freezing is a great option. Wrap your bunny bread tightly in plastic wrap and then in aluminum foil before placing it in the freezer. It can be frozen for up to one month without losing flavor or texture.
Reheating
When ready to enjoy again, thaw the bread at room temperature and warm it gently in a 300°F oven for 10 minutes. This refreshes the bread’s soft texture and revives that delightful just-baked aroma.
FAQs
Can I use whole wheat flour instead of all-purpose flour?
Absolutely! Whole wheat flour can add a nutty flavor and a bit more density. For best results, substitute half of the all-purpose flour with whole wheat to maintain a light texture in your Easter Bunny Bread Recipe.
Is it necessary to let the dough rise twice?
This recipe uses one main rise after kneading, which is enough to get that fluffy and airy texture. However, shaping the bunny right after the rise helps maintain the shape during baking.
Can I add decorations to the bread before baking?
Yes, you can use small pieces of dough to create eyes, nose, or a tail on your bunny, or sprinkle sesame seeds or poppy seeds for texture. Just be gentle so as not to collapse the dough.
How do I know when the bread is fully baked?
The Easter Bunny Bread Recipe is done when the bread is golden brown and sounds hollow when tapped on the bottom. Using a thermometer and checking for an internal temperature of around 190°F can also give you confidence that it’s perfectly baked.
Can this bread be made dairy-free?
Yes, you can substitute the melted butter with a dairy-free alternative like coconut oil or vegan margarine, and use almond or oat milk warmed to 110°F. The texture will remain soft, and the flavor will still be delightful.
Final Thoughts
This Easter Bunny Bread Recipe is more than just a bread—it’s a joyful experience, a festive centerpiece, and a delicious way to celebrate with loved ones. It’s simple enough to bake with kids and special enough to impress anyone at your Easter table. So why wait? Grab your ingredients and start baking this charming bunny today. Your spring celebrations will be all the sweeter for it!
Print
Easter Bunny Bread Recipe
- Prep Time: 20 minutes
- Cook Time: 30 minutes
- Total Time: 1 hour 50 minutes
- Yield: 12 servings
- Category: Bread
- Method: Baking
- Cuisine: American
- Diet: Vegetarian
Description
This charming Easter Bunny Bread recipe yields a soft, golden loaf perfect for celebrating the holiday. Made from a classic enriched yeast dough, it’s shaped into an adorable bunny with ears and feet, making it a fun and festive centerpiece for your Easter table.
Ingredients
Dough Ingredients
- 4 cups all-purpose flour
- 2 ¼ tsp active dry yeast
- ¼ cup sugar
- 1 tsp salt
- 1 cup warm milk (110°F/43°C)
- ½ cup unsalted butter, melted
- 2 large eggs
Instructions
- Activate Yeast: In a bowl, mix warm milk, sugar, and yeast; let sit for 5 minutes until the mixture becomes bubbly, indicating that the yeast is active.
- Combine Dry and Wet Ingredients: In another bowl, whisk together the flour and salt. Gradually add the yeast mixture, melted butter, and eggs, stirring until a shaggy dough forms.
- Knead the Dough: Transfer the dough to a floured surface and knead for 8-10 minutes until it becomes smooth and elastic, developing the gluten necessary for a good rise.
- First Rise: Place the dough in a greased bowl, cover it with a damp cloth, and let it rise in a warm spot for 1-2 hours, or until it doubles in size.
- Shape the Bunny: Punch down the risen dough to release air. Shape a large portion into an oval to create the bunny’s body, and form smaller pieces to make the ears and feet. Assemble the parts on a lined baking sheet.
- Bake: Preheat the oven to 350°F (175°C). Bake the shaped bunny bread for 25-30 minutes until it turns golden brown on top and sounds hollow when tapped.
Notes
- Ensure the milk is not too hot to prevent killing the yeast—110°F (43°C) is ideal.
- You can brush the baked bread with melted butter for a shiny, softer crust.
- For added decoration, consider using raisins or chocolate chips for eyes and nose.
- Let the bread cool completely on a wire rack before serving for best texture.


