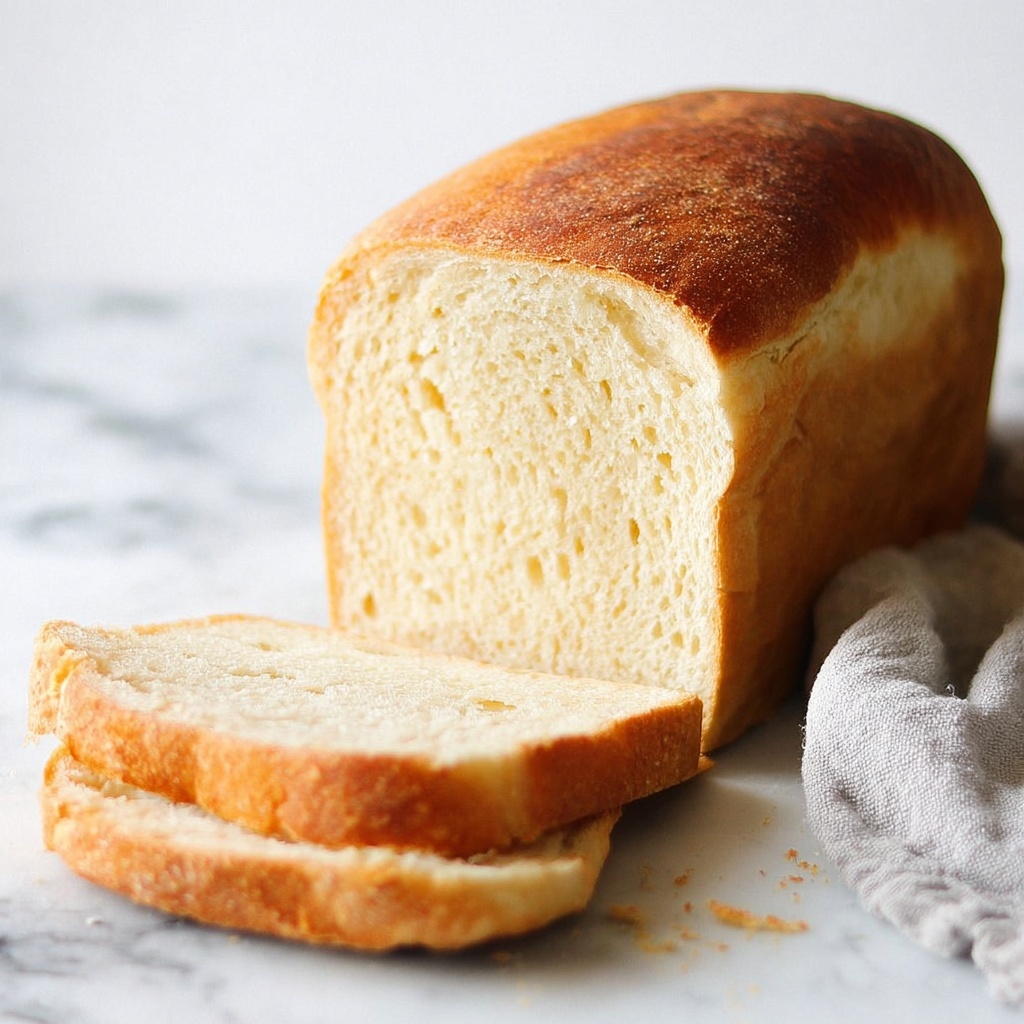
If you have ever dreamed of baking the perfect loaf of bread that fills your home with warmth and comforting aromas, look no further than Grandma’s Perfect Homemade Bread Recipe. This timeless classic is a beautifully simple and satisfying loaf that brings the softest crumb and the most golden crust right to your kitchen. Whether you’re new to bread baking or a seasoned pro, this recipe offers a dependable, rewarding experience that captures the loving essence of homemade goodness. The balance of ingredients and gentle steps make it just right for baking that perfect loaf every single time.
Ingredients You’ll Need
The beauty of Grandma’s Perfect Homemade Bread Recipe lies in its straightforward ingredients list. Each component plays a key role in creating the ideal texture, flavor, and color — from the warmth of the water activating the yeast to the subtle richness from olive oil that keeps the crumb tender.
- 2 ½ cups warm water: Essential for hydrating the yeast and flour, helping the dough rise beautifully.
- ¼ cup sugar: Feeds the yeast and adds just a touch of sweetness to the bread.
- 1 ¼ teaspoon salt: Balances the flavors and strengthens the gluten structure in the dough.
- 1 Tablespoon dry active yeast: The magical leavening agent that makes the dough rise to fluffy perfection.
- 5 cups all-purpose flour: The foundation of your bread, providing enough structure for a soft yet sturdy crumb.
- 2 Tablespoons olive oil: Adds a lovely richness and keeps the bread moist with a tender crust.
How to Make Grandma’s Perfect Homemade Bread Recipe
Step 1: Proof the Yeast and Mix the Dough
Start by combining the warm water, sugar, salt, and dry active yeast in your stand mixer bowl. Let the yeast work its magic by bubbling up for about 5 minutes — this proofing step is crucial to ensure a lively rise later. Next, with your dough hook attachment ready, add the flour one cup at a time. Watch the ingredients come together into a soft, cohesive dough. This gentle incorporation keeps the bread light and airy.
Step 2: Knead and Let the Dough Rise
Turn your dough onto a floured surface and knead until it’s silky smooth and elastic — this develops the gluten that gives the bread its structure and chew. Form the dough into a ball, coat your mixing bowl with olive oil, and nestle the dough inside. Cover it up snugly and let it rise until it doubles in size, which usually takes between one to one and a half hours. This patient rise is what creates that delightful soft crumb you’ll love.
Step 3: Shape, Place, and Rise Again
Once risen, grease and flour two 9×5 inch loaf pans. Punch the dough gently to release built-up air, then divide it into two equal portions. Roll each piece into a loaf shape that fits just right in your pans. Set the dough in the pans, cover, and give it another hour to skyrocket in size. This second rise makes sure your loaves bake up fluffy and full.
Step 4: Bake to Golden Perfection
Preheat your oven to 350 degrees Fahrenheit and bake the loaves for 30 to 35 minutes. You’ll know they’re done when the tops are beautifully golden and the bread sounds hollow when tapped. Once out of the oven, allow the loaves to cool for about 10 minutes — this brief rest lets the crumb set perfectly, making slicing a breeze.
How to Serve Grandma’s Perfect Homemade Bread Recipe
Garnishes
While Grandma’s Perfect Homemade Bread Recipe is utterly delicious on its own, a light brush of melted butter right after baking brings out its golden crust’s shine and adds a rich flavor. Sprinkle a pinch of coarse sea salt or herbs like rosemary for an elegant touch that elevates each slice into a treat.
Side Dishes
This bread pairs wonderfully with almost anything! Think homemade soups, stews, or a spread of cheeses and charcuterie. It’s also perfect for your favorite sandwiches or simply toasted with jam in the morning — making every meal feel special and comforting.
Creative Ways to Present
For a fun family gathering or an inviting brunch, slice the bread thickly and serve in a rustic basket lined with a warm linen cloth. You can also cube leftover bread for croutons or bread pudding, turning Grandma’s Perfect Homemade Bread Recipe into other delightful dishes that keep your kitchen buzzing with delicious aromas.
Make Ahead and Storage
Storing Leftovers
If you find yourself with extra bread (which does happen!), wrap it tightly in plastic wrap or store in an airtight container at room temperature. It stays fresh for about two days, perfect for enjoying with your evening meal or quick breakfast toast.
Freezing
To enjoy your homemade bread longer, slice it and freeze in a zip-top bag. This way, you can take out just what you need. The bread maintains its delicious flavor and texture when thawed, so you always have a taste of Grandma’s Perfect Homemade Bread Recipe ready when you want it.
Reheating
When you’re ready for that fresh-baked feeling, simply warm slices in a toaster or in a 350-degree oven for 5 to 10 minutes. This revives the crust’s crunch and the bread’s soft interior, making every bite as delightful as the first.
FAQs
Can I use bread flour instead of all-purpose flour?
Absolutely! Bread flour has a higher protein content, which can give your loaf extra chewiness and a taller rise — a great option if you want a slightly heartier texture.
Is it necessary to proof the yeast first?
Proofing ensures your yeast is active and ready to work, which helps your bread rise properly. Skipping this step can result in dense bread, so it’s best to allow the yeast to bubble and foam before mixing.
Can I make this bread without a stand mixer?
Yes! If you don’t have a stand mixer, simply use a large bowl and a sturdy spoon to mix, then knead the dough by hand on a floured surface. It’s a bit more work, but just as rewarding.
How do I know when the bread is fully baked?
Your bread should be golden brown on top and sound hollow when tapped on the bottom. If you have a kitchen thermometer, aim for an internal temperature of about 190-200°F for the perfect loaf.
Can I add herbs or seeds to the dough?
Definitely! Adding rosemary, thyme, or seeds like sesame and poppy can add fantastic flavor and texture. Just mix them in with the flour during the first mixing step.
Final Thoughts
There’s something truly special about baking bread from scratch, and Grandma’s Perfect Homemade Bread Recipe has a way of making that magic feel effortless. With simple ingredients and steps that anyone can follow, you’ll have warm, soft, and golden loaves that bring comfort and joy to your table. I encourage you to give this recipe a try, savor the process, and share your homemade loaf with those you love — because nothing says home quite like the smell of freshly baked bread.
Print
Grandma’s Perfect Homemade Bread Recipe
- Prep Time: 15 minutes
- Cook Time: 30 minutes
- Total Time: 2 hours 45 minutes
- Yield: 16 slices (2 loaves)
- Category: Bread
- Method: Baking
- Cuisine: American
Description
Grandma’s Perfect Homemade Bread is a classic, tender loaf crafted from simple ingredients and careful rising times. This recipe yields two golden-brown loaves with a soft texture and a slightly sweet flavor, perfect for sandwiches, toast, or enjoying fresh out of the oven.
Ingredients
Wet Ingredients
- 2 ½ cups warm water
- 2 Tablespoons olive oil
Dry Ingredients
- ¼ cup sugar
- 1 ¼ teaspoon salt
- 1 Tablespoon dry active yeast
- 5 cups all-purpose flour
Instructions
- Proof the yeast: In a stand mixer, combine 2 ½ cups warm water, ¼ cup sugar, 1 ¼ teaspoon salt, and 1 Tablespoon dry active yeast. Let the mixture sit for about 5 minutes until the yeast bubbles and activates.
- Mix the dough: Using the dough hook on your stand mixer, gradually add 5 cups of all-purpose flour, one cup at a time, until a soft dough forms.
- Knead the dough: Transfer the dough to a floured surface and knead until smooth and elastic. Form into a ball, then lightly grease a large bowl with 2 tablespoons of olive oil. Place the dough in the bowl, cover it, and allow it to rise until it doubles in size, about 1 to 1 ½ hours.
- Prepare for second rise: Grease and flour two 9×5 inch loaf pans. Punch down the dough to release air, lay it on a flat surface, and divide it into two equal pieces. Roll each piece into a loaf shape and place them into the prepared pans. Cover and let rise again until doubled, approximately 1 to 1 ½ hours.
- Bake the bread: Preheat your oven to 350°F (175°C). Bake the loaves for 30 to 35 minutes or until the tops are golden brown. Remove from the oven and allow the bread to cool in the pans for 10 minutes before slicing.
Notes
- Warm water should be around 110°F (43°C) to properly activate the yeast without killing it.
- You can substitute olive oil with vegetable or canola oil if preferred.
- Allowing the dough to rise sufficiently ensures a light and fluffy loaf.
- Check bread doneness by tapping the bottom; a hollow sound indicates it is fully baked.
- For softer crust, cover the bread with a clean towel while cooling.


