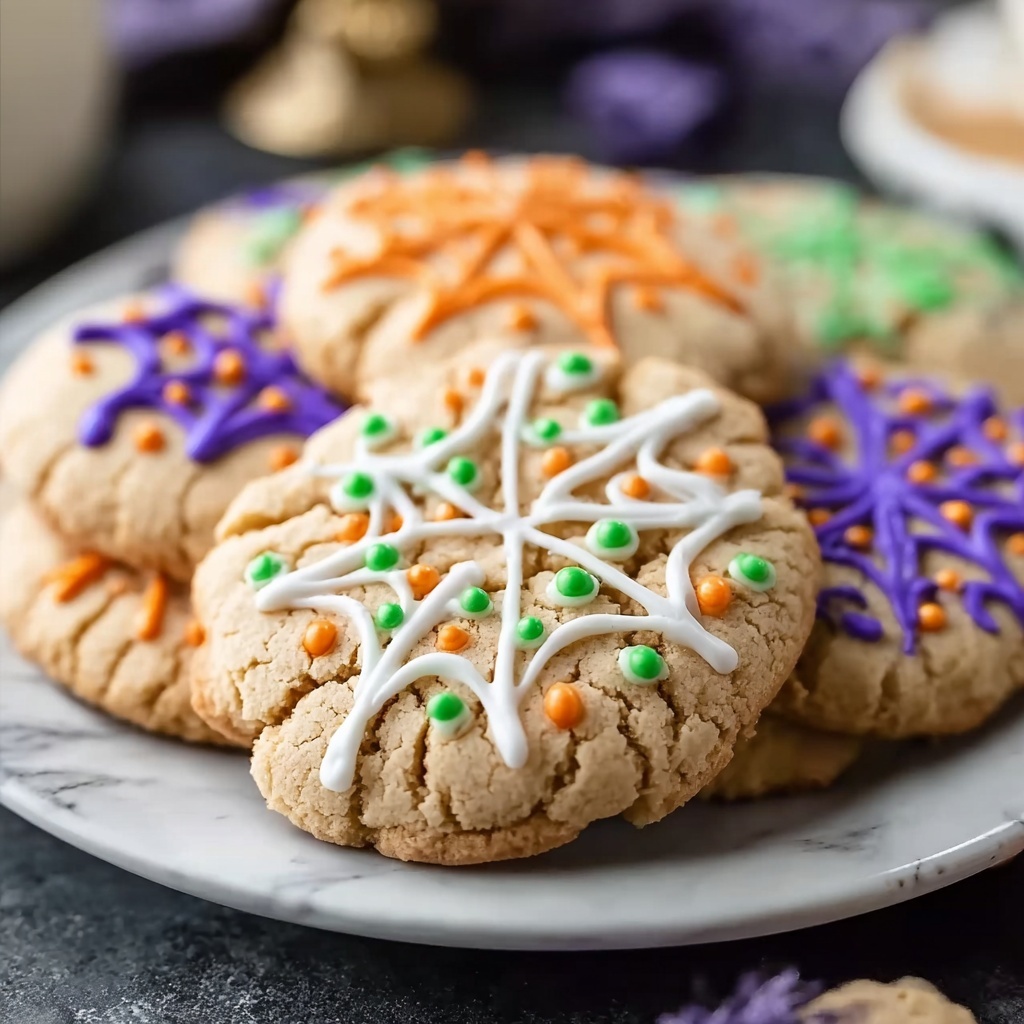
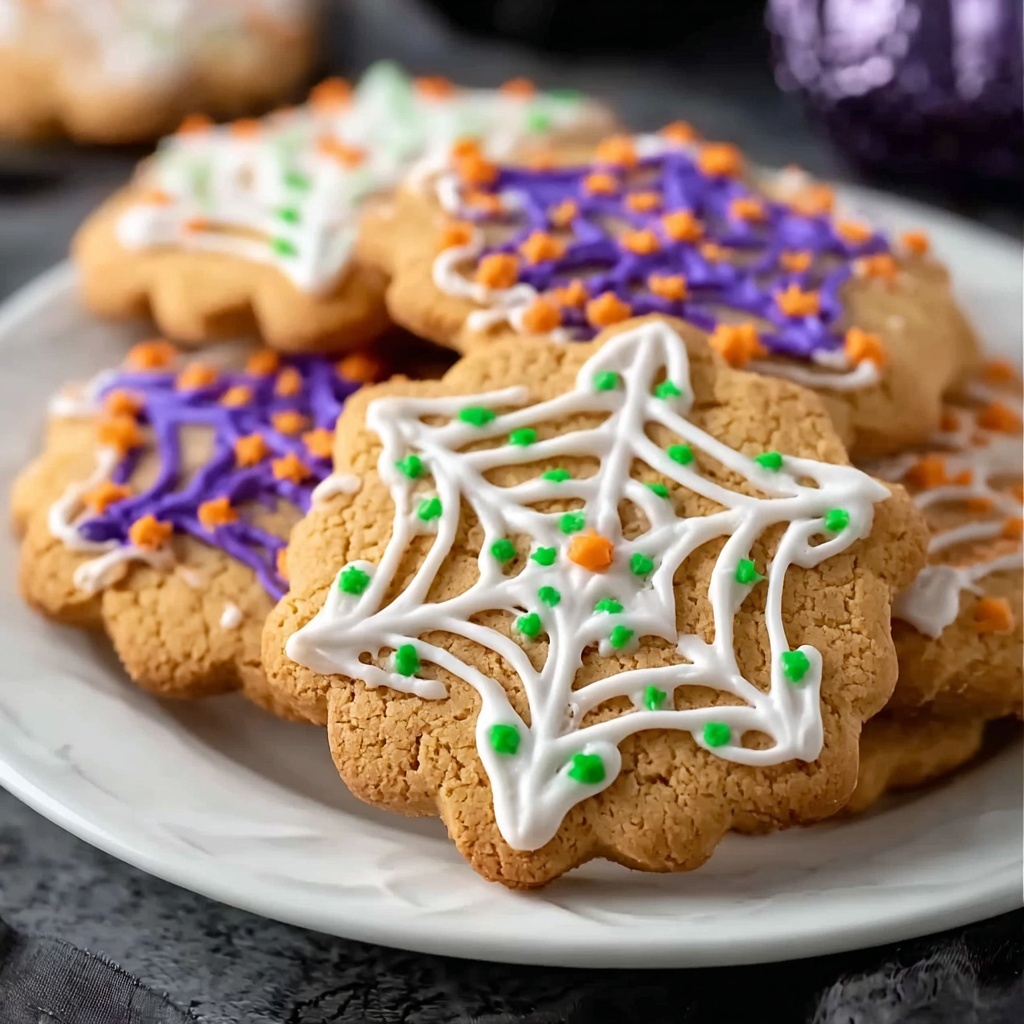
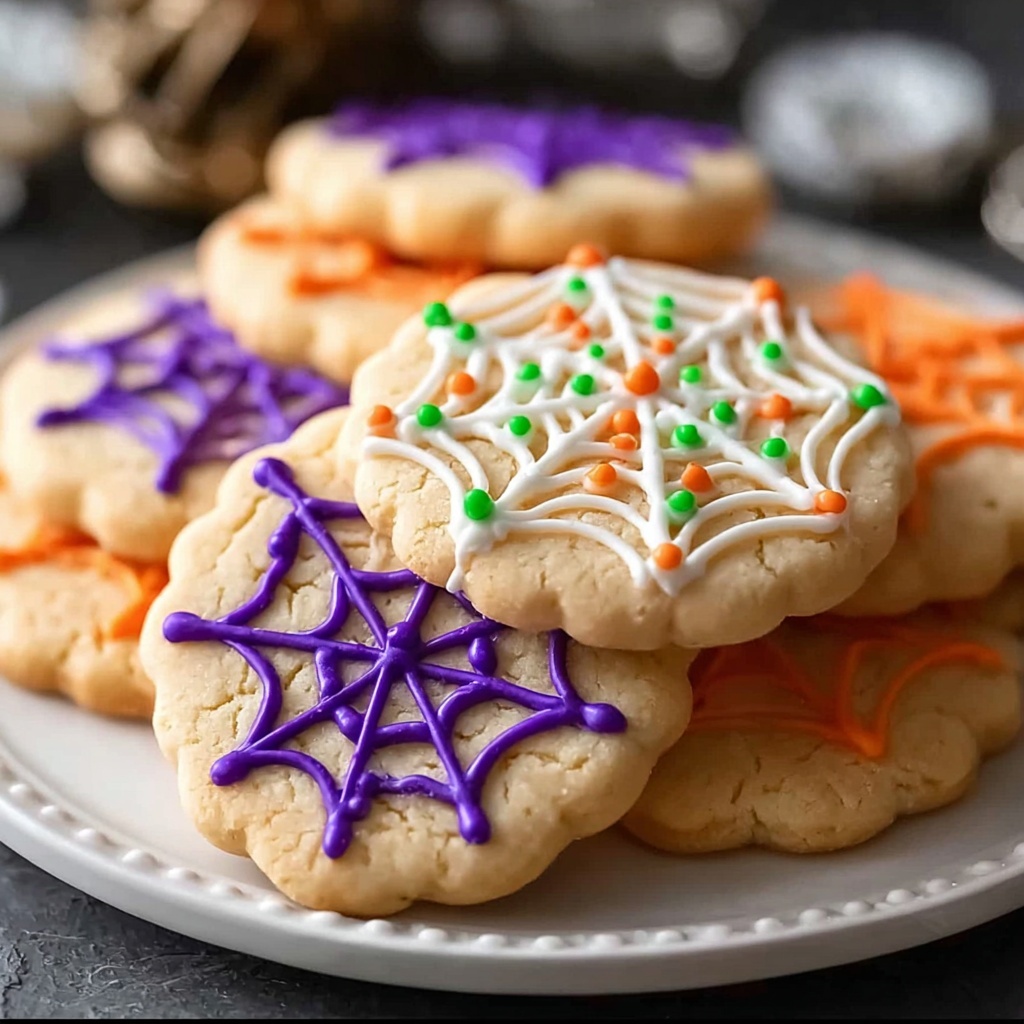
Get ready to dive into a burst of color and flavor with this enchanting Hocus Pocus Cookies Recipe. These delightful treats bring together a festive swirl of green, orange, and purple dough, studded with creamy white chocolate chips and dressed in fun Halloween sprinkles. Whether you’re baking for a spooky party or just craving something whimsically delicious, this recipe combines classic cookie comforts with a magical twist that will surely captivate both kids and adults alike.
Ingredients You’ll Need
This Hocus Pocus Cookies Recipe relies on simple yet essential ingredients that build the perfect texture and vibrant appearance. Each component plays a crucial role, from the rich, creamy butter that adds tenderness to the bursts of color from gel food coloring that make these cookies truly pop.
- Butter, 1 ½ cups softened: Provides a creamy base that keeps the cookies tender and rich.
- White sugar, 2 cups: Sweetens while helping create that coveted soft, chewy texture.
- Large eggs, 3: Bind the dough and add moisture for a perfect cookie crumb.
- Vanilla extract, 3 tsp: Enhances the flavor, giving warmth and depth to the dough.
- Cornstarch, 1 ½ tsp: Adds a tender bite and a delicate crumb.
- Baking soda, 1 ½ tsp: Leavens the dough for the right rise and fluffiness.
- Salt, ¾ tsp: Balances sweetness and elevates all other flavors.
- Cake flour, 2 cups: Creates a soft, fine crumb essential for a smooth texture.
- All-purpose flour, 2 ½ cups: Provides structure and chewy bite to the cookies.
- Orange, green, and purple gel food coloring: Brings the signature Halloween spirit and vibrant color.
- White chocolate chips, 2 cups: Melt into creamy pockets of sweetness in every bite.
- Halloween sprinkles: Add festive crunch and a rainbow of color on the edges.
How to Make Hocus Pocus Cookies Recipe
Step 1: Prepare Your Baking Surface
Start by lining a baking sheet with parchment paper to keep your colorful cookies from sticking and ensure even baking. This simple step makes all the difference when it’s time to transfer those magical treats off the tray.
Step 2: Cream Butter and Sugar
Using a stand mixer, beat the softened butter and white sugar together until the mixture is light, fluffy, and pale. This process incorporates air that will help create cookies with a tender and soft texture that melts in your mouth.
Step 3: Add Eggs and Vanilla
One at a time, add the eggs to the creamed mixture, making sure each egg is fully incorporated before adding the next. Then, stir in the vanilla extract to infuse the dough with a rich, cozy aroma that feels like a warm hug from the inside out.
Step 4: Combine Dry Ingredients
In a separate bowl, whisk together cake flour, all-purpose flour, cornstarch, baking soda, and salt. This step ensures that every ingredient is evenly distributed, giving your cookies consistent texture and lift without any clumps.
Step 5: Mix Dry Ingredients Into Wet
Gradually add the flour mixture to the butter mixture, stirring gently just until combined. Avoid overmixing to keep your cookies tender and prevent them from becoming tough or dense.
Step 6: Divide and Color the Dough
Split the dough into three equal portions. Add green gel coloring to one, orange to another, and purple to the last. Knead each dough portion until the color is vivid and uniform—watching those hues blend gives you a sneak peek at the magical cookies to come.
Step 7: Shape and Decorate Cookies
Scoop out two teaspoons of each colored dough, press the colors together gently, and roll into balls. Flatten them slightly, then roll the edges in Halloween sprinkles for a crunchy, festive finish. Press white chocolate chips into the surface to add pockets of creamy sweetness in every bite.
Step 8: Chill Before Baking
Refrigerate your cookie dough balls for 30 minutes. This chilling step helps the cookies hold their shape during baking and improves the flavors as they meld together.
Step 9: Preheat the Oven
Set your oven to 400°F (200°C) so it’s nice and hot when you’re ready to bake. Hot ovens encourage a lovely golden edge while keeping the centers soft and tender.
Step 10: Bake and Cool
Bake the cookies for 12-14 minutes or until the edges turn golden. Remove from the oven and let them cool on a wire rack. Cooling is key to letting the cookies set and avoid breakage when you reach for your first bite.
How to Serve Hocus Pocus Cookies Recipe
Garnishes
These cookies are already a feast for the eyes, but for extra flair, sprinkle a few edible glitter or use themed cookie cutters to add shapes. A dusting of powdered sugar can give a frosty, magical feel perfect for the Halloween season.
Side Dishes
Serve your Hocus Pocus Cookies Recipe alongside a glass of cold milk, a cup of warm spiced cider, or a fun pumpkin spice latte. The cozy beverages contrast beautifully with the sweet, colorful cookies, making the experience complete.
Creative Ways to Present
Try stacking these cookies with slices of cheesecake in between for a spooky dessert tower, or pack them in colorful cellophane bags tied with ribbon for enchanting party favors. Using a Halloween-themed plate or platter elevates the mood instantly.
Make Ahead and Storage
Storing Leftovers
Keep any leftover Hocus Pocus Cookies Recipe in an airtight container at room temperature for up to one week. This keeps their edges crisp and the centers soft, ready for snacking whenever a craving strikes.
Freezing
You can freeze unbaked dough balls for up to three months by placing them on a baking sheet, freezing until solid, then transferring to a freezer-safe bag. Bake straight from frozen, adding a couple of extra minutes to the baking time. Baked cookies also freeze well in sealed containers.
Reheating
Warm your cookies in the oven at 300°F for about 5 minutes to freshen them up and revive that just-baked softness. Avoid microwaving, which can make them tough and rubbery.
FAQs
Can I use regular food coloring instead of gel?
While regular food coloring will work, gel food colors are more concentrated and won’t affect the dough’s consistency. You’ll get richer, more vibrant colors with gel, which is key for the festive look of the Hocus Pocus Cookies Recipe.
What if I don’t have cake flour?
If you don’t have cake flour on hand, you can make a substitute by replacing two tablespoons of each cup of all-purpose flour with cornstarch. This trick helps maintain the light texture essential for these cookies.
Can I make these cookies vegan?
Yes! Substitute the butter with a vegan margarine or coconut oil, use flax or chia egg replacements, and ensure your white chocolate chips are dairy-free. The colors and fun won’t be compromised at all.
Why do I need to chill the dough before baking?
Chilling lets the dough firm up so the cookies keep their shape without spreading too much in the oven. It also helps the flavors meld, producing a deeper, more satisfying taste.
How do I store decorated cookies to prevent sprinkles from falling off?
Let the cookies cool completely before storing in a container with parchment paper layers. Keeping them in a cool, dry place prevents sprinkles from melting or sticking, preserving their festive crunch.
Final Thoughts
Baking the Hocus Pocus Cookies Recipe is like inviting a bit of magic into your kitchen that everyone will want to taste. These cookies aren’t just colorful and fun—they’re delightfully soft, packed with flavor, and perfect for any spooky celebration or cozy fall day. So, grab your mixing bowl and let your creativity run wild with these enchanting treats that turn any baking day into a little spell of joy.
Print
Hocus Pocus Cookies Recipe
- Prep Time: 30 minutes
- Cook Time: 14 minutes
- Total Time: 44 minutes
- Yield: 24 cookies
- Category: Dessert
- Method: Baking
- Cuisine: American
Description
These festive Hocus Pocus Cookies are a fun and colorful treat perfect for Halloween celebrations. Made with a soft and fluffy butter base, the dough is divided and dyed in vibrant orange, green, and purple hues, then combined with white chocolate chips and festive sprinkles for a spooky yet sweet twist. These cookies are baked to golden perfection, resulting in a delightful combination of chewy and crisp textures.
Ingredients
Dry Ingredients
- 1 ½ tsp cornstarch
- 1 ½ tsp baking soda
- ¾ tsp salt
- 2 cups cake flour
- 2 ½ cups all-purpose flour
Wet Ingredients
- 1 ½ cups butter, softened
- 2 cups white sugar
- 3 large eggs
- 3 tsp vanilla extract
Additions and Decorations
- Orange, green, and purple gel food coloring
- 2 cups white chocolate chips
- Halloween sprinkles
Instructions
- Prepare Baking Sheet: Line a baking sheet with parchment paper to prevent sticking and ensure easy cleanup after baking.
- Cream Butter and Sugar: Using a stand mixer, beat the softened butter and white sugar together until the mixture becomes light and fluffy, incorporating air for a tender cookie texture.
- Add Eggs and Vanilla: Add the eggs one at a time to the creamed mixture, beating well after each addition. Stir in the vanilla extract to infuse the dough with flavor.
- Mix Dry Ingredients: In a separate bowl, whisk together cake flour, all-purpose flour, cornstarch, baking soda, and salt to evenly distribute the leavening agents and seasoning.
- Combine Wet and Dry: Gradually add the dry flour mixture to the butter mixture, mixing until just combined to avoid overworking the dough.
- Divide and Color Dough: Split the cookie dough into three equal parts. Color each portion with gel food coloring—one orange, one green, and one purple. Knead each piece until the color is uniform throughout.
- Form Cookies: Scoop 2 teaspoons from each colored dough and press the three different colors together. Roll into balls, flatten slightly, and roll the edges in Halloween sprinkles. Press white chocolate chips into the dough balls for extra sweetness and texture.
- Chill Dough: Refrigerate the formed dough balls for 30 minutes to help them set and maintain shape during baking.
- Preheat Oven: Heat the oven to 400°F (200°C) for proper baking temperature.
- Bake Cookies: Place the dough balls on the prepared baking sheet and bake for 12-14 minutes or until the edges turn golden brown. Remove from oven and cool on a wire rack completely before serving.
Notes
- Using gel food coloring prevents the dough from becoming too wet compared to liquid food coloring.
- Chilling the dough helps the cookies hold their shape during baking and enhances flavor development.
- For even baking, ensure cookie dough balls are uniform in size.
- Store cookies in an airtight container at room temperature for up to 5 days to maintain freshness.

