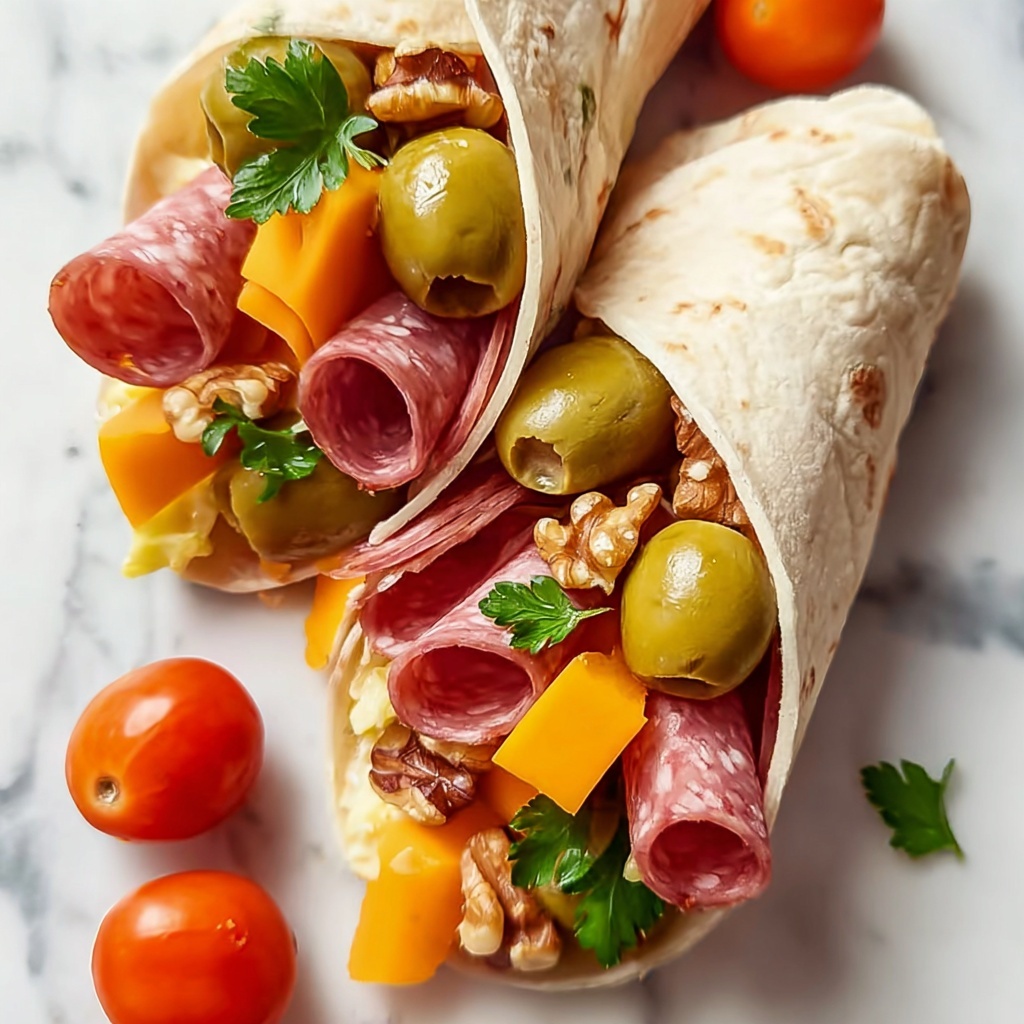
If you’re looking to impress guests with a festive, eye-catching snack that’s as fun to eat as it is to look at, the Holiday Charcuterie Cones Recipe is your new go-to. Imagine the perfect blend of savory meats, creamy cheeses, fresh veggies, and crunchy nuts all tucked neatly inside a charming cone—these little bundles are portable flavor parties that bring holiday cheer in every bite. Whether for an intimate gathering or a large celebration, these cones make charcuterie approachable, mess-free, and downright irresistible.
Ingredients You’ll Need
The beauty of this recipe lies in its simplicity and the balance of textures and flavors. Each ingredient is carefully chosen to create a colorful, delicious, and satisfying treat that’s easy to assemble and sure to wow.
- Cone-shaped waffle or paper cone: This holds all the goodies together, making the charcuterie presentation playful and portable.
- Sliced salami (50g): Adds a rich, slightly spicy bite that’s a classic charcuterie staple.
- Sliced prosciutto (50g): Offers a delicate, melt-in-your-mouth texture and a touch of elegance.
- Cheddar cheese, cubed (50g): Brings a sharp, tangy flavor and a sturdy texture to the cone.
- Brie cheese, cubed (50g): Introduces creamy softness that pairs beautifully with the meats.
- Olives (1/4 cup): Adds a briny pop that brightens each bite and balances richness.
- Cherry tomatoes (1/4 cup): Provide juicy sweetness and a vibrant splash of color.
- Mixed nuts (1/4 cup): Give a satisfying crunch that contrasts with the softer ingredients.
- Fresh herbs for garnish: A fresh, aromatic finish that lifts the entire flavor profile.
How to Make Holiday Charcuterie Cones Recipe
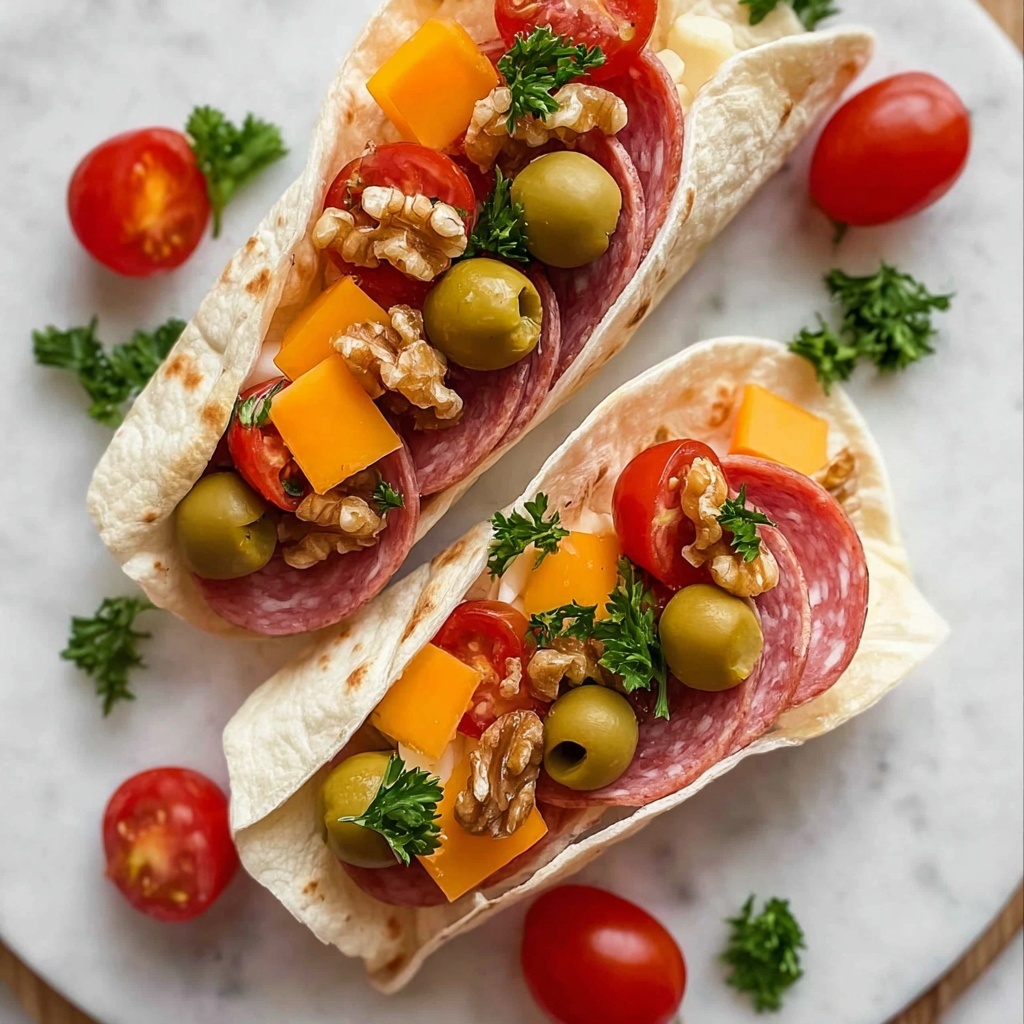
Step 1: Prepare Your Cone
Start with a cone-shaped waffle or paper cone. If you’re using a waffle cone, line it with parchment paper to prevent any oils or moisture from compromising the crispness. This preparation ensures your cone stays intact and the ingredients don’t seep out, keeping each bite perfect.
Step 2: Layer the Meats
Begin by placing the sliced salami at the bottom of the cone. This not only creates a flavorful base but also acts as a sturdy layer to hold everything else. Next, add the prosciutto, draping it delicately—it adds richness and a silky texture that’s irresistible.
Step 3: Add the Cheeses
Alternate between cubed cheddar and brie cheeses to create an enticing mix of flavors and textures. The cheddar’s sharpness beautifully contrasts the creamy, buttery brie, making each mouthful multilayered and satisfying.
Step 4: Include Fresh Elements
Incorporate the olives and cherry tomatoes next. Olives bring a salty, bright flavor, while the cherry tomatoes add juicy sweetness and a burst of freshness—both are essential for keeping the cone vibrant and well-balanced.
Step 5: Add Crunch with Nuts
A handful of mixed nuts sprinkled on top seals the deal by introducing a wonderful crunch that contrasts with the softness around it. This textural play keeps the eating experience exciting from start to finish.
Step 6: Garnish and Finish
Top your Holiday Charcuterie Cones with fresh herbs. Whether it’s rosemary, thyme, or parsley, this final touch not only adds visual appeal but also a fragrant lift, making the cones feel extra special and festive.
Step 7: Serve or Store
These cones are best enjoyed fresh for optimal texture, but if you need to prepare ahead, refrigerate them until you’re ready to serve to keep everything crisp and fresh.
How to Serve Holiday Charcuterie Cones Recipe
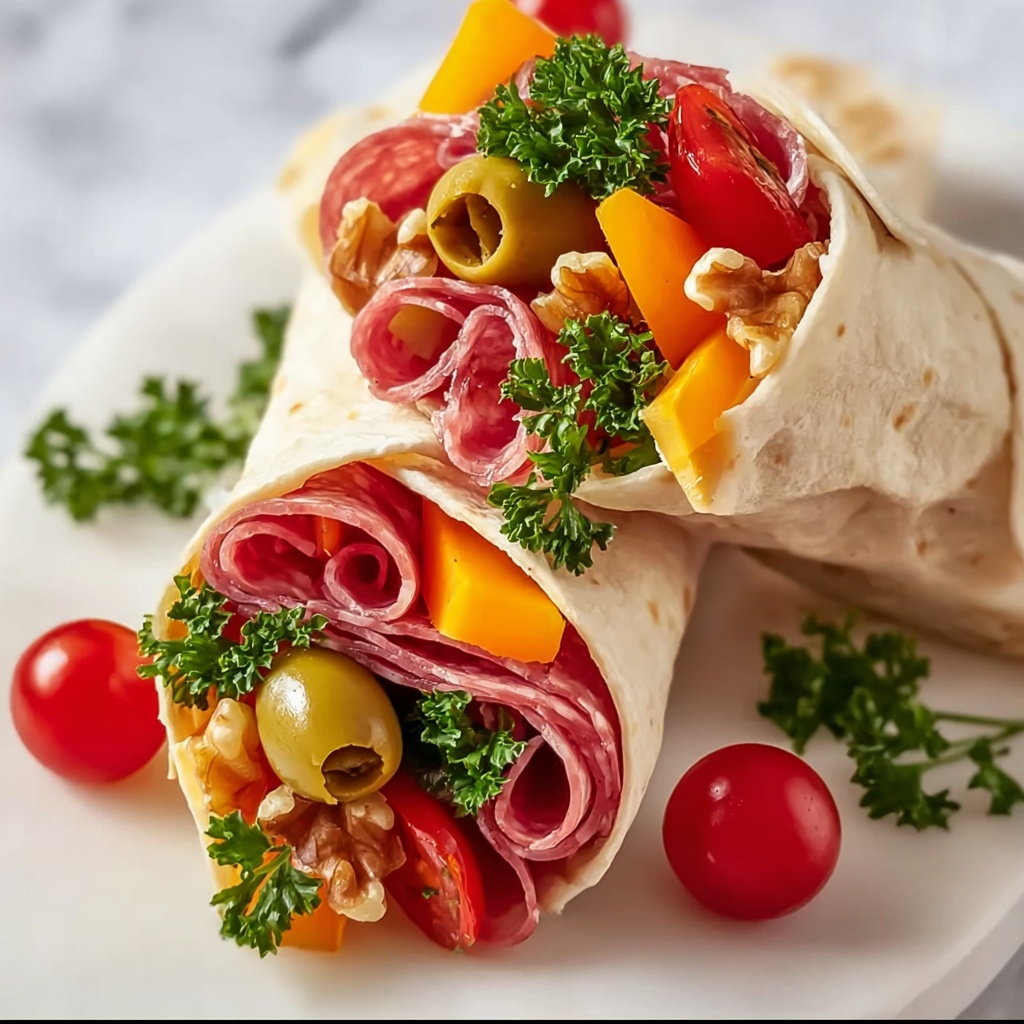
Garnishes
Fresh herbs like rosemary sprigs or small basil leaves are perfect garnishes. They add a lovely fragrance and a pop of green that makes the cones look as delightful as they taste. A light drizzle of honey or balsamic glaze can also introduce extra flavor depth.
Side Dishes
Although the cones are quite filling and flavorful on their own, pairing them with a simple green salad or some crusty bread can round out your spread beautifully. A light, crisp white wine or sparkling beverage also complements the mixed flavors wonderfully.
Creative Ways to Present
For a touch of holiday magic, place the cones standing upright in a decorative vase or tin filled with uncooked rice or beans to keep them stable. You can also line them up on a wooden board with sprigs of pine for a rustic festive display that doubles as charming décor.
Make Ahead and Storage
Storing Leftovers
If you have any leftover cones, wrap them tightly in plastic wrap or store them in airtight containers in the refrigerator. However, fresh veggies and nuts may lose some crunch over time, so they’re best enjoyed within a day.
Freezing
This recipe isn’t really suitable for freezing due to the variety of fresh ingredients, particularly the cheeses and tomatoes, which can change texture and flavor after thawing. It’s best to prepare and enjoy them fresh.
Reheating
Since there are many cold ingredients and delicate textures, reheating is not recommended for this recipe. These cones are meant to be eaten chilled or at room temperature to fully savor the mix of flavors and contrasts.
FAQs
Can I customize the meats and cheeses in the Holiday Charcuterie Cones Recipe?
Absolutely! Feel free to swap out salami and prosciutto for your favorites like ham, turkey, or even vegetarian options. Similarly, choose cheeses you love—gouda, manchego, or blue cheese can work wonderfully.
What if I don’t have waffle cones? Are there alternatives?
Paper cones are a fantastic alternative, and you can even make cones from parchment paper or sturdy lettuce leaves for a fresh twist. The important part is having something to hold and contain all the ingredients neatly.
How far in advance can I assemble the cones?
For the best taste and texture, assemble the cones the day you plan to serve them. If you need to prepare in advance, make the cones but add fresh ingredients like tomatoes and herbs just before serving to maintain freshness.
Can these cones be made gluten-free?
Yes! Simply use gluten-free waffle cones or paper cones that are certified gluten-free. All the fillings are naturally gluten-free, just double-check the packaging of each ingredient to be safe.
What drink pairings go well with these Holiday Charcuterie Cones?
Crisp white wines such as Sauvignon Blanc or sparkling wines like Prosecco highlight the flavors beautifully. If you prefer non-alcoholic options, sparkling water with a splash of cranberry juice is festive and refreshing.
Final Thoughts
The Holiday Charcuterie Cones Recipe is a wonderful way to add excitement and ease to your festive food lineup. They’re playful, delicious, and make sharing flavors effortless. Once you try them, you’ll find these cones becoming a new favorite at every holiday party—so go ahead, mix, layer, and enjoy the celebration in every bite!
Print
Holiday Charcuterie Cones Recipe
- Prep Time: 10 minutes
- Cook Time: 0 minutes
- Total Time: 15 minutes
- Yield: 4 servings
- Category: Appetizer
- Method: No-Cook
- Cuisine: American
Description
These Holiday Charcuterie Cones are a festive and fun way to serve a variety of meats, cheeses, and accompaniments in a portable, visually appealing cone. Perfect for parties or casual gatherings, they combine the savory flavors of salami and prosciutto with creamy cheddar and brie cheeses, fresh olives, cherry tomatoes, crunchy mixed nuts, and fresh herbs for garnish. Ready in just 15 minutes, these cones are an easy and elegant appetizer everyone will adore.
Ingredients
Meats
- 50g sliced salami
- 50g sliced prosciutto
Cheeses
- 50g cheddar cheese, cubed
- 50g brie cheese, cubed
Fresh Produce & Add-ins
- 1/4 cup olives
- 1/4 cup cherry tomatoes
- 1/4 cup mixed nuts
- Fresh herbs for garnish
Other
- 1 cone-shaped waffle or paper cone
- Parchment paper (optional, for lining the cone if using waffle cone)
Instructions
- Prepare the cone: Line your cone-shaped waffle or paper cone with parchment paper if you are using a waffle cone to prevent moisture from the ingredients from soaking through the cone.
- Layer the meats: Begin by placing the sliced salami at the bottom of the cone, followed by the sliced prosciutto, arranging them to fill the shape evenly.
- Add the cheeses: Alternate adding cubed cheddar and brie cheeses on top of the meats to create a balanced flavor and texture throughout the cone.
- Incorporate fresh elements: Insert olives and cherry tomatoes into the cone to add freshness and vibrant color.
- Add crunch: Sprinkle a handful of mixed nuts into the cone to provide a delightful crunch that contrasts with the creamy cheeses and tender meats.
- Garnish: Top the cone with fresh herbs of your choice, such as parsley or basil, to enhance the aroma and presentation.
- Serve: Serve the charcuterie cones immediately for optimal freshness, or refrigerate until ready to serve. They make an excellent portable appetizer for parties and gatherings.
Notes
- Using parchment paper inside waffle cones helps keep them from getting soggy.
- You can customize the meats and cheeses according to your preferences or seasonal availability.
- These cones are best served fresh but can be refrigerated for up to 2 hours before serving.
- For a vegan alternative, substitute meats and cheeses with plant-based options.
- Use nuts with no added salt or sugar if you want to control sodium and sweetness levels.


