
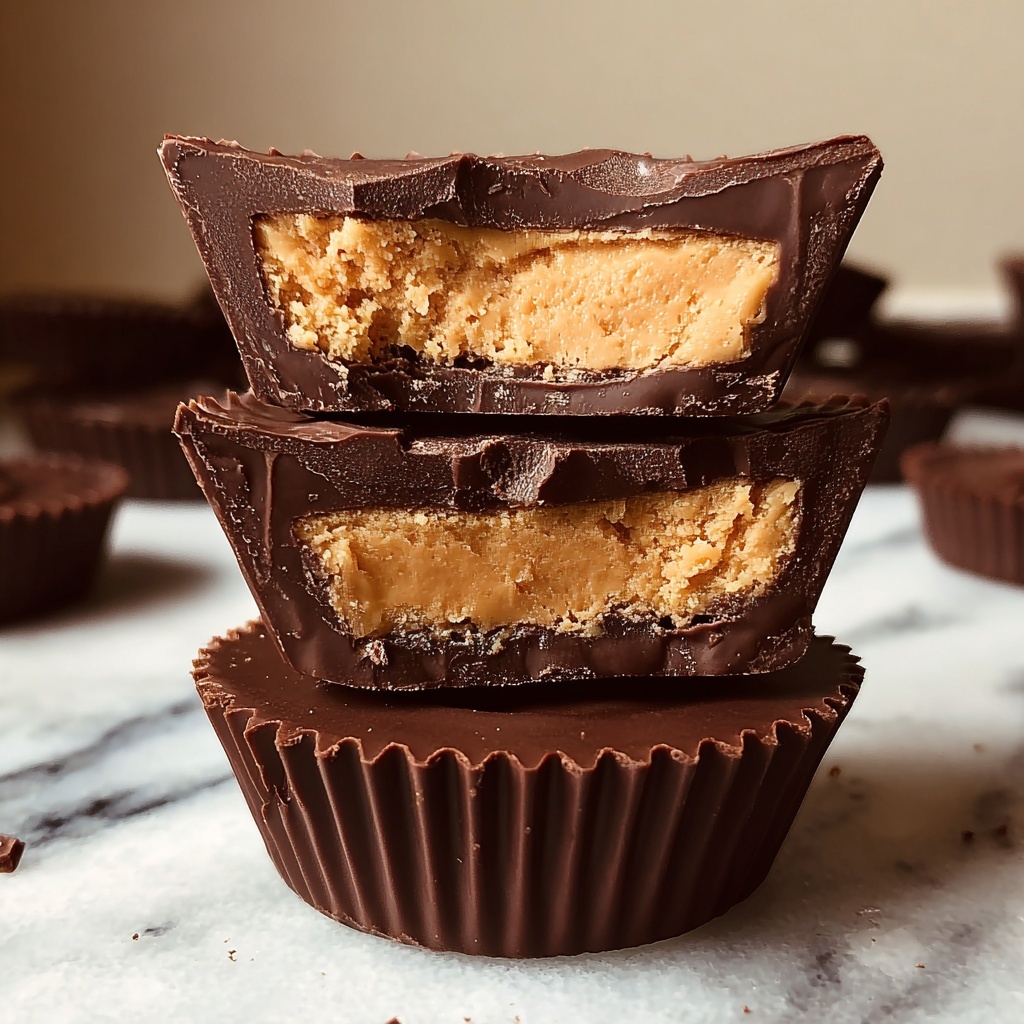
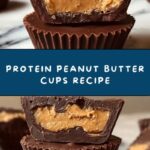
If you’re craving a dessert that satisfies your sweet tooth while packing a punch of nutrition, this Protein Peanut Butter Cups Recipe is exactly what you need. Combining rich dark chocolate, creamy peanut butter, and a boost of protein powder, these cups are a perfect guilt-free treat. Whether you want a pre- or post-workout snack, or just a delightful bite to brighten your day, these protein peanut butter cups deliver indulgence and nourishment in every bite.
Ingredients You’ll Need
The beauty of this Protein Peanut Butter Cups Recipe is how simple yet purposeful each ingredient is. Every element brings its own magic — from the smooth melt of dark chocolate to the creamy protein-packed peanut butter filling.
- Dark chocolate chips: Use high-quality chips for the best rich and glossy coating.
- Coconut oil: Helps melt the chocolate perfectly and adds subtle tropical notes.
- Natural peanut butter: Opt for smooth, unsweetened to keep the texture creamy and the flavor pure.
- Protein powder (vanilla or chocolate): Adds extra nutrition without compromising taste or texture.
- Maple syrup: A natural sweetener that enhances the filling’s flavor with a touch of warmth.
- Sea salt: Just a pinch to balance sweetness and elevate the overall flavor profile.
How to Make Protein Peanut Butter Cups Recipe
Step 1: Melt the Chocolate Base
Start by gently melting the dark chocolate chips together with the coconut oil until you get a smooth, glossy mixture. This step sets the foundation for your cups, creating a luscious chocolate shell that will harden beautifully after chilling.
Step 2: Prepare Your Muffin Tin
Line a muffin tin with paper liners to make removal easy later on. Spoon a generous layer of the melted chocolate into each liner, creating the perfect sturdy base for your peanut butter layer. Pop them into the freezer to let the chocolate set firmly before moving on.
Step 3: Make the Peanut Butter Filling
While the bases chill, mix together the natural peanut butter, your choice of protein powder, and maple syrup. This trio blends into a creamy, flavorful filling that’s both sweet and packed with muscle-loving protein.
Step 4: Layer the Filling
Spoon the peanut butter and protein filling carefully on top of the chilled chocolate bases. Aim for an even layer so every bite has the perfect balance of chocolate and peanut butter.
Step 5: Seal and Sprinkle
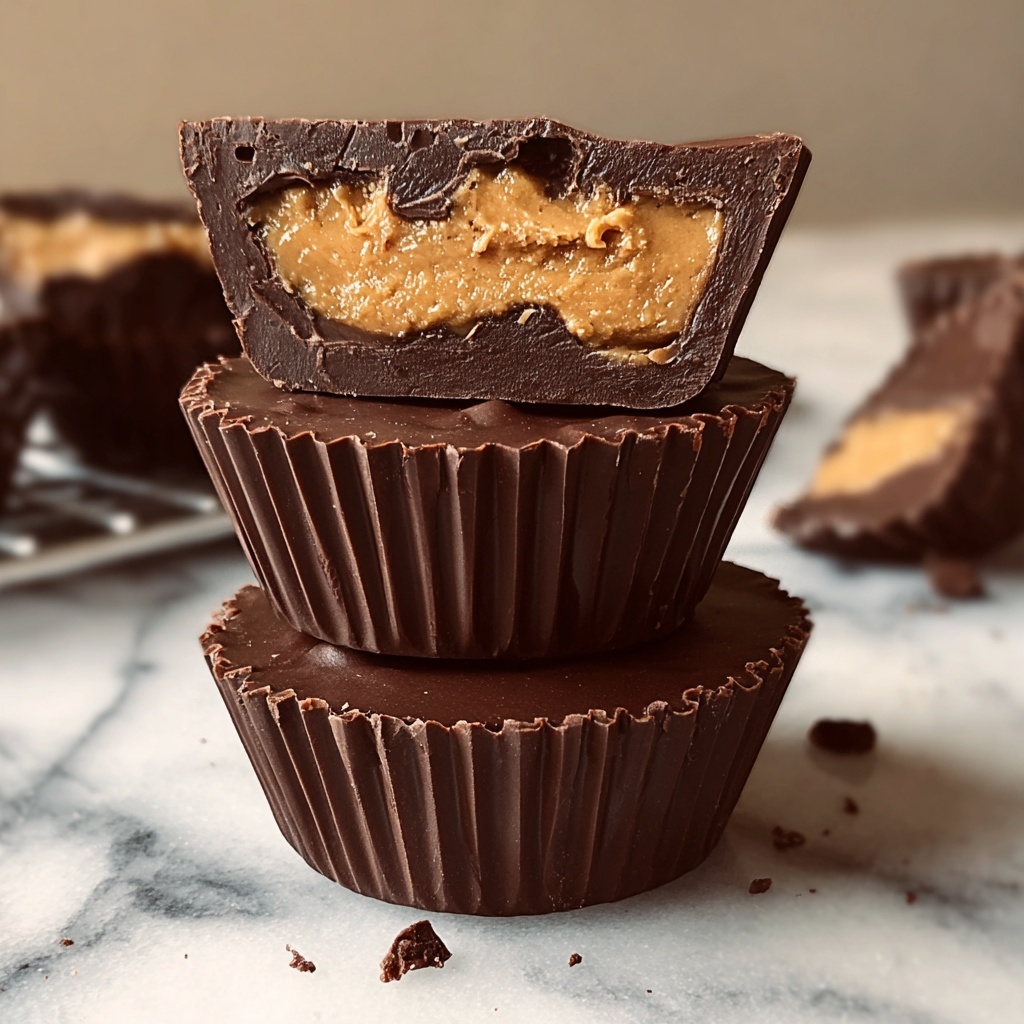
Cover each cup with the remaining melted chocolate to seal in the filling. Before chilling again, sprinkle a tiny pinch of sea salt on top of each cup to enhance and contrast the sweet flavors beautifully.
Step 6: Final Chill and Enjoy
Freeze your peanut butter cups until they’re fully firm. Once set, they’re ready to enjoy, storing easily for snacking whenever the craving hits.
How to Serve Protein Peanut Butter Cups Recipe
Garnishes
Try a light dusting of crushed peanuts or a drizzle of melted dark chocolate for an extra special touch. Fresh berries on the side can add a pop of color and tartness, balancing the richness.
Side Dishes
These cups are perfect paired with a hot cup of coffee or a refreshing glass of almond milk. For a fuller dessert plate, add some fresh fruit or Greek yogurt to complement the protein boost.
Creative Ways to Present
Place your Protein Peanut Butter Cups Recipe in mini decorative cupcake liners and arrange them in a pretty box for a thoughtful gift. You can also layer them in a dessert parfait glass with granola and berries, turning a snack into an elegant treat.
Make Ahead and Storage
Storing Leftovers
Keep your protein peanut butter cups in an airtight container in the refrigerator to maintain their firmness and freshness. They’ll stay delicious for up to one week stored this way.
Freezing
For longer storage, freeze these cups in a sealed container with parchment paper between layers to prevent sticking. When frozen properly, they can last up to a month without losing flavor or texture.
Reheating
Since these are best enjoyed chilled or slightly softened, avoid microwaving. Instead, let them sit at room temperature for 5–10 minutes before eating to enjoy that perfect melt-in-your-mouth texture.
FAQs
Can I use a different nut butter?
Absolutely! Almond butter or cashew butter can be tasty alternatives, though they’ll slightly alter the flavor and texture of your peanut butter cups.
What type of protein powder works best?
Vanilla and chocolate protein powders both work beautifully here. Choose your favorite kind, whether whey, plant-based, or collagen, depending on your dietary needs.
Is coconut oil necessary?
Coconut oil helps the chocolate melt smoothly and harden with a glossy finish, but you can substitute with another mild-flavored oil if needed, keeping in mind it may slightly change texture.
Can I make these cups nut-free?
To make a nut-free version, try sunflower seed butter instead of peanut butter. The texture and protein content will stay great while keeping the recipe allergy-friendly.
How do I avoid the filling from being crumbly?
Make sure to mix the peanut butter, protein powder, and maple syrup well so the filling is smooth and holds together nicely. Using a creamy peanut butter helps significantly.
Final Thoughts
This Protein Peanut Butter Cups Recipe is truly a winner for any occasion, providing a delicious and wholesome way to indulge. Once you try making these at home, you’ll love how easy they are and how satisfying every bite feels. Give them a go and watch them become your new favorite treat to fuel your day with a little extra joy and protein!
Print
Protein Peanut Butter Cups Recipe
- Prep Time: 15 minutes
- Cook Time: 10 minutes
- Total Time: 55 minutes
- Yield: 12 servings
- Category: Snack
- Method: Freezing
- Cuisine: American
- Diet: Low Fat
Description
Delicious and healthy Protein Peanut Butter Cups made with rich dark chocolate, natural peanut butter, protein powder, and a touch of maple syrup. Perfect as a high-protein snack or treat that is easy to prepare and freezer-friendly.
Ingredients
Chocolate Base
- 1 cup dark chocolate chips
- 1 tablespoon coconut oil
Peanut Butter Filling
- 1/2 cup natural peanut butter
- 1 scoop protein powder (vanilla or chocolate)
- 2 tablespoons maple syrup
Topping
- Sea salt, for sprinkling
Instructions
- Melt Chocolate: In a microwave-safe bowl or over a double boiler, melt the dark chocolate chips together with the coconut oil until the mixture is smooth and glossy.
- Prepare Tin: Line a muffin tin with paper liners and spoon a small amount of the melted chocolate into the bottom of each liner, spreading evenly to form the base layer.
- Freeze Chocolate Base: Place the muffin tin in the freezer to allow the chocolate base to set firmly, about 10-15 minutes.
- Make Filling: While the base sets, combine the natural peanut butter, protein powder, and maple syrup in a bowl. Mix thoroughly until well blended and smooth.
- Assemble Cups: Remove the muffin tin from the freezer. Spoon the peanut butter mixture evenly over the chilled chocolate bases.
- Top with Chocolate: Pour the remaining melted chocolate over the peanut butter filling in each cup, covering the filling completely.
- Sprinkle Salt and Freeze: Lightly sprinkle sea salt on top of each cup. Return the muffin tin to the freezer and chill until the cups are fully firm, approximately 20-30 minutes.
- Enjoy: Once set, remove the protein peanut butter cups from liners and enjoy as a tasty, protein-packed snack.
Notes
- Use natural peanut butter without added sugar or oils for a healthier option.
- Vanilla or chocolate flavored protein powder can be used depending on your taste preference.
- Store the peanut butter cups in an airtight container in the freezer for up to two weeks.
- For a softer texture, allow cups to sit at room temperature for a few minutes before eating.
- Sprinkling sea salt enhances the flavor contrast between sweet and savory.
