
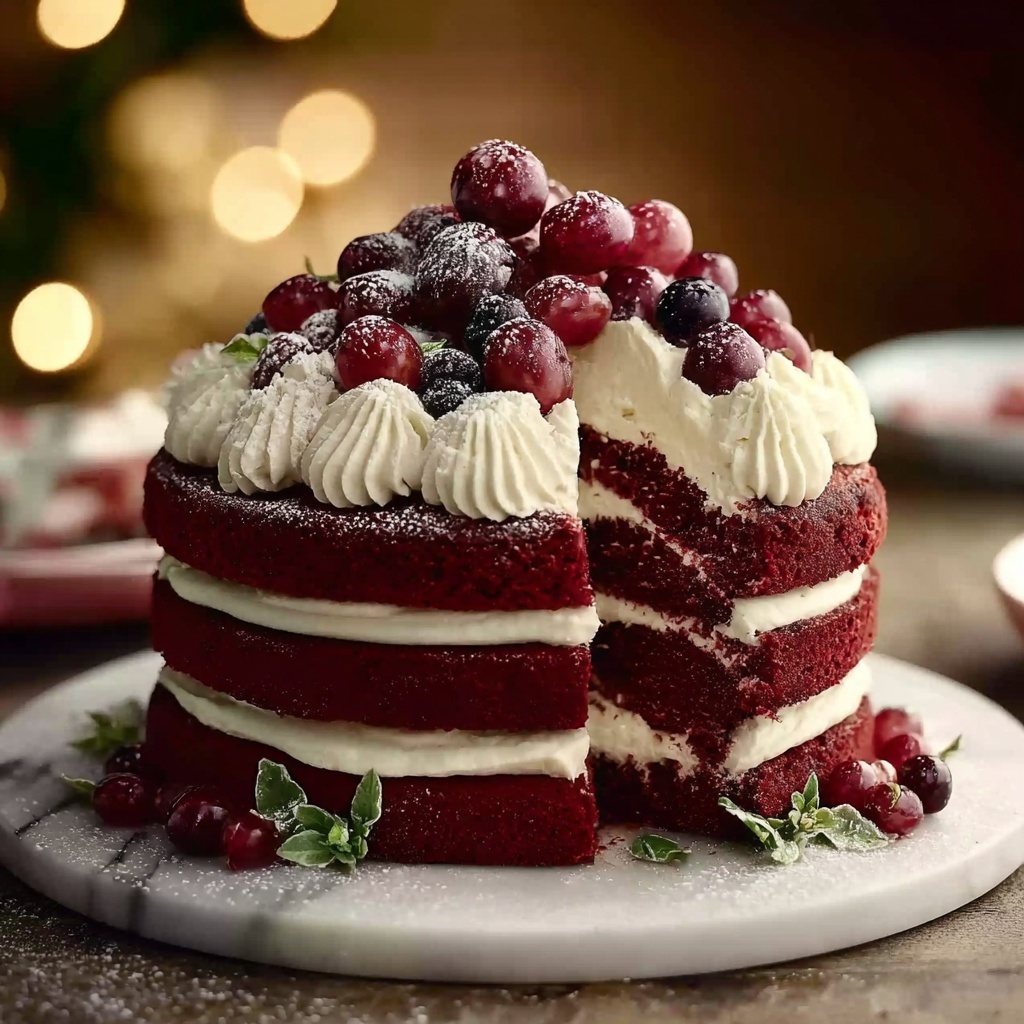
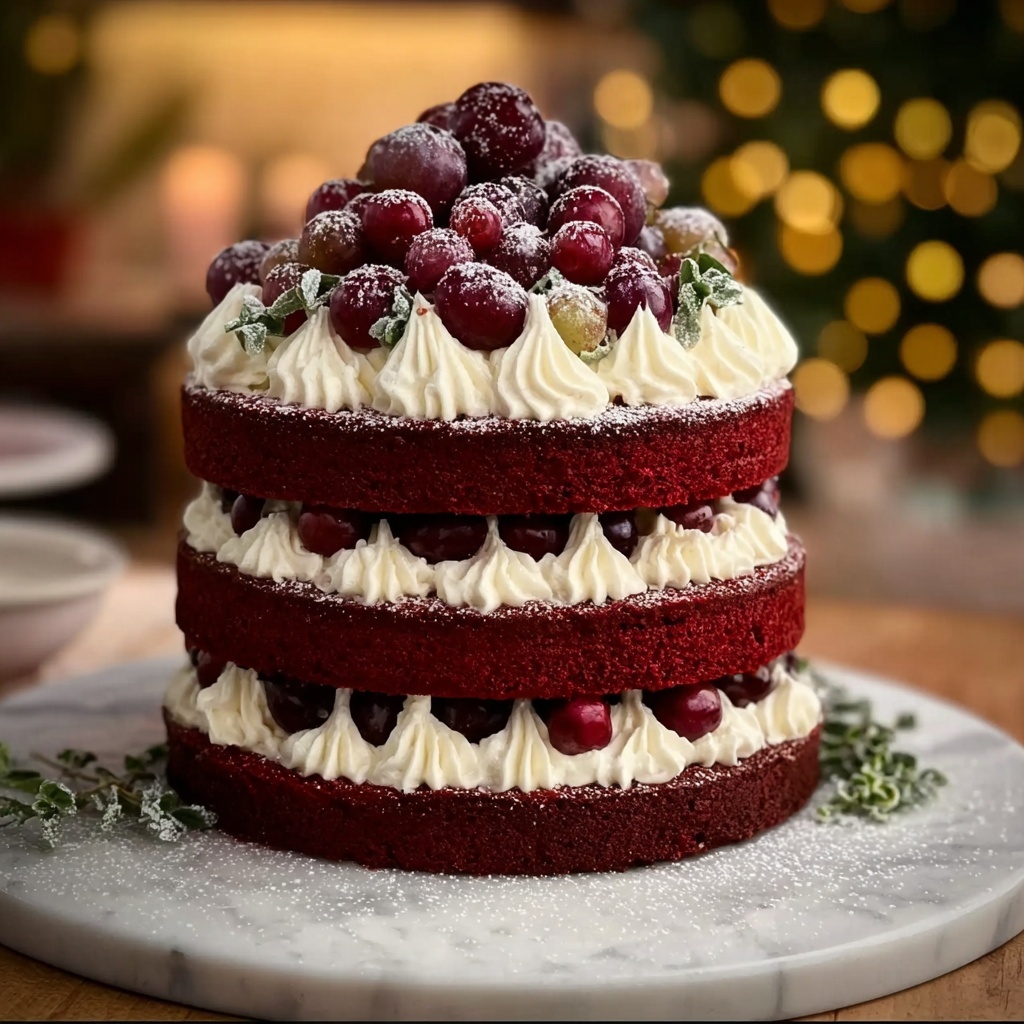
If you are looking for a show-stopping dessert that will wow your guests and satisfy a sweet tooth, this Red Velvet Tree Cake Recipe is exactly what you need. It’s a vibrant, festive treat boasting the perfect balance of rich red velvet flavor and smooth, tangy cream cheese frosting. From the moment you slice into this striking tree-shaped cake, with its moist crumb and luscious frosting, you’ll know why this recipe is a holiday favorite that deserves a place in your baking repertoire all year round.
Ingredients You’ll Need
The beauty of this Red Velvet Tree Cake Recipe lies in its simple yet well-chosen ingredients. Every component plays a crucial role—whether it’s the tangy buttermilk creating tender crumb or the cocoa powder adding depth to the red velvet flavor, this cake balances color, texture, and taste flawlessly.
- All-purpose flour: Provides structure and body to the cake.
- Baking powder and baking soda: These leavening agents help the cake rise perfectly fluffy.
- Salt: Enhances overall flavor and balances sweetness.
- Cocoa powder: Adds that signature mild cocoa flavor essential to red velvet.
- Vegetable oil: Keeps the cake moist and tender.
- Granulated sugar: Sweetens the batter and contributes to texture.
- Eggs: Bind the ingredients and provide structure and richness.
- Vanilla extract: Adds warmth and depth of flavor.
- Buttermilk: Brings moisture and a slight tang, enhancing the cake’s tenderness.
- Red food coloring: Gives the iconic vibrant red hue that defines the cake’s appearance.
- White vinegar: Reacts with baking soda to help the cake rise and intensify flavor.
- Cream cheese: Key ingredient in the frosting, offering tangy creaminess.
- Unsalted butter: Adds richness and smooth texture to frosting.
- Powdered sugar: Sweetens and thickens the frosting beautifully.
- Salt (for frosting): Balances the sweetness, making the frosting just right.
- Green sprinkles or edible glitter: Perfect for decorating the cake into a festive tree.
- Piping gel or melted white chocolate (optional): Adds a snowy sparkle effect to bring your tree to life.
How to Make Red Velvet Tree Cake Recipe
Step 1: Preparing Your Oven and Pan
Begin by preheating your oven to 350°F (175°C). While it heats, generously grease and flour a tree-shaped cake pan if you have one on hand. If not, regular round pans work just as well; simply stack and carve them later.
Step 2: Mixing the Dry Ingredients
Whisk together the all-purpose flour, baking powder, baking soda, salt, and cocoa powder in a medium bowl. This step ensures that your dry ingredients are evenly combined, preventing clumps or pockets in the batter.
Step 3: Creaming the Wet Ingredients
In a large bowl, beat together the vegetable oil and granulated sugar until light and fluffy—this helps aerate the batter. Then, add the eggs one at a time, making sure each is fully incorporated before adding the next. Stir in the vanilla extract for that classic flavor lift.
Step 4: Combining the Buttermilk Mixture
In a separate bowl, mix the buttermilk, red food coloring, and white vinegar. This vibrant blend adds both moisture and a subtle tang, highlighting the rich taste of red velvet cake.
Step 5: Bringing It All Together
Gradually add your dry ingredients to the wet mixture, alternating with the buttermilk blend. Start and end with the dry ingredients, mixing just until combined after each addition. Over-mixing could make the cake dense, so be gentle here.
Step 6: Baking Your Cake
Pour the batter into your prepared cake pan(s), smoothing out the surface. Bake for 30 to 35 minutes or until a toothpick inserted in the center comes out clean. Keep an eye on it during the last five minutes for that perfect bake.
Step 7: Cooling the Cake
Allow the cake to cool in the pan for 10 minutes before turning it out onto a wire rack. This helps the cake set and prevents any breakage. Let it cool completely before frosting to ensure the cream cheese frosting doesn’t melt.
Step 8: Crafting the Cream Cheese Frosting
Beat softened cream cheese and butter together until delightfully smooth and creamy. Gradually add powdered sugar, about one cup at a time, beating well after each addition. Finally, stir in vanilla extract and a pinch of salt to balance the sweetness for the perfect frosting consistency.
Step 9: Frosting Your Cooling Cake
Once fully cooled, generously frost your cake with the luscious cream cheese frosting. Use a knife or spatula to cover every nook and cranny, creating a beautifully smooth surface.
Step 10: Decorating for Festive Flair
Top your Red Velvet Tree Cake Recipe with green sprinkles or edible glitter to mimic tree decorations. For an enchanting snowy effect, drizzle piping gel or melted white chocolate over the frosting. This final touch transforms your cake into a holiday superstar.
Step 11: Serving and Enjoying
Slice and share your masterpiece with friends and family. The moist red velvet layers paired with tangy cream cheese frosting promise smiles all around.
How to Serve Red Velvet Tree Cake Recipe
Garnishes
The magic of this cake is amplified through simple garnishes. Green sprinkles recreate lush pine needles, while edible glitter adds sparkle like morning frost—make sure to experiment with your favorite reds and greens to amplify the festive vibe. Piping gel or melted white chocolate can add a beautiful snowy effect for an extra charming touch.
Side Dishes
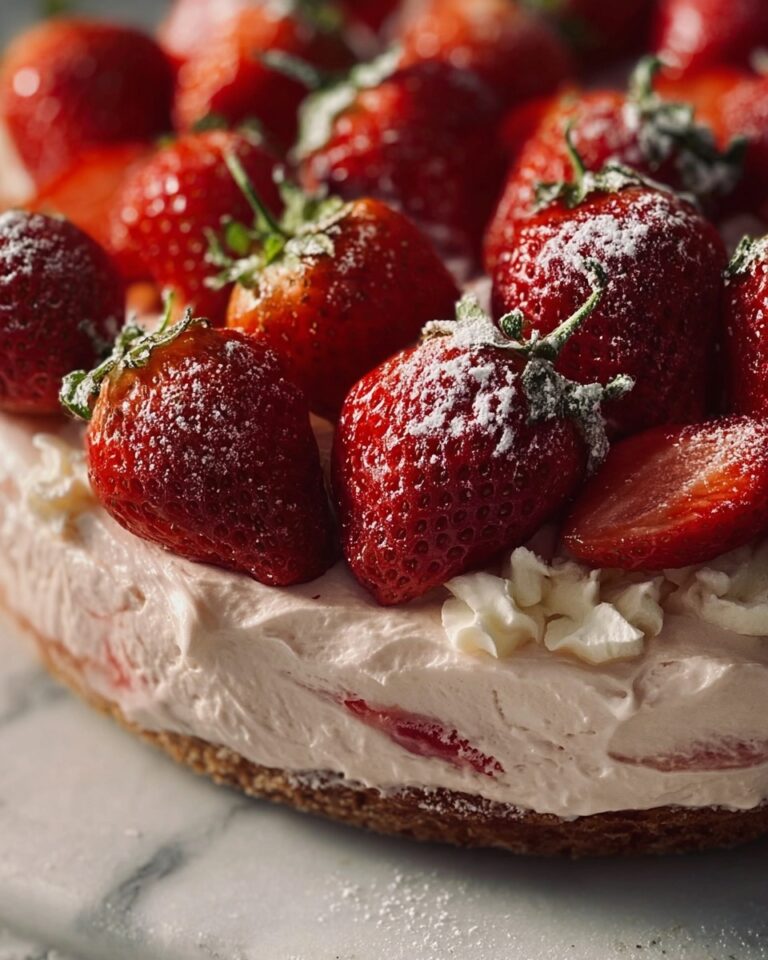
Red Velvet Tree Cake pairs beautifully with light, fresh sides that contrast its richness. Think whipped cream, fresh berries, or even a scoop of vanilla bean ice cream. A cup of coffee or hot cocoa also makes a comforting companion for each slice.
Creative Ways to Present
Beyond the classic cake stand, consider presenting your Red Velvet Tree Cake Recipe on a wooden board surrounded by pinecones or holly leaves to enhance the tree theme. You can add a personalized touch with edible gold leaf or candy “ornaments” to elevate your dessert display to a centerpiece level.
Make Ahead and Storage
Storing Leftovers
Keep leftover cake stored in an airtight container in the refrigerator to preserve freshness and prevent the cream cheese frosting from spoiling. The cake will stay moist and delicious for up to 4 days when properly stored.
Freezing
To freeze, wrap individual slices or the whole cake tightly in plastic wrap and then in aluminum foil to avoid freezer burn. Freeze for up to 2 months. When ready to enjoy, thaw overnight in the refrigerator before serving.
Reheating
Since this cake is best enjoyed chilled due to the cream cheese frosting, reheating is generally not necessary. However, if you prefer it slightly warm, let the slice come to room temperature naturally instead of using a microwave to maintain texture and flavor.
FAQs
Can I make this cake without red food coloring?
Yes, although red velvet is famous for its vibrant red color, you can omit or reduce the food coloring and still enjoy a delicious, mildly chocolate-flavored cake. The visual impact will be less dramatic but the flavor remains wonderful.
What if I don’t have buttermilk?
Simple! You can substitute by adding 1 tablespoon of white vinegar or lemon juice to 1 cup of milk, letting it sit for 5 minutes to curdle. This homemade buttermilk mimic will work perfectly in the recipe.
Can I use regular round cake pans instead of a tree-shaped pan?
Absolutely. Bake your cake in round pans and then stack or carve the layers into a tree shape. This approach gives more flexibility if you don’t have a specialty mold but still want the festive look.
How do I prevent the cream cheese frosting from being too sweet?
Adding a pinch of salt balances the sweetness beautifully. Also, make sure to beat the frosting until smooth rather than overly thick to avoid an overly sugary mouthfeel.
Is this cake suitable for special occasions beyond holidays?
Definitely! This Red Velvet Tree Cake Recipe works wonderfully for birthdays, anniversaries, or any celebration where a stunning, indulgent cake is desired. Customize decoration to fit the theme anytime.
Final Thoughts
This Red Velvet Tree Cake Recipe is truly a joy to bake and even more delightful to share. Its moist texture, vibrant color, and luscious cream cheese frosting come together to create a dessert that’s as beautiful as it is delicious. Whether for the holidays or any special occasion, this cake will bring smiles, warmth, and that cozy homemade feeling everyone loves. Give it a try—you won’t regret it!
Print
Red Velvet Tree Cake Recipe
- Prep Time: 25 minutes
- Cook Time: 30-35 minutes
- Total Time: 55-60 minutes
- Yield: 8-10 servings (1 tree-shaped cake)
- Category: Dessert
- Method: Baking
- Cuisine: American
Description
This Red Velvet Tree Cake is a festive and visually striking dessert perfect for holiday celebrations. Featuring a moist, flavorful red velvet cake baked in a tree-shaped pan, it is layered with creamy homemade cream cheese frosting and decorated with green sprinkles and optional ‘snow’ effects using piping gel or melted white chocolate. This recipe serves 8-10 people and combines classic red velvet flavors with a fun, seasonal presentation.
Ingredients
For the Cake
- 2 ½ cups all-purpose flour
- 1 ½ teaspoons baking powder
- 1 teaspoon baking soda
- 1 teaspoon salt
- 2 tablespoons cocoa powder
- 1 cup vegetable oil
- 1 ½ cups granulated sugar
- 2 large eggs
- 1 teaspoon vanilla extract
- 1 cup buttermilk
- 2 tablespoons red food coloring
- 1 teaspoon white vinegar
For the Cream Cheese Frosting
- 8 oz cream cheese, softened
- ½ cup unsalted butter, softened
- 4 cups powdered sugar
- 1 teaspoon vanilla extract
- Pinch of salt
For Decoration
- Green sprinkles or edible glitter (for tree decoration)
- Piping gel or melted white chocolate (optional, for snow effect)
Instructions
- Preheat and Prepare Pan: Preheat your oven to 350°F (175°C). Grease and flour a tree-shaped cake pan, or use regular round pans if you don’t have a tree mold.
- Mix Dry Ingredients: In a medium bowl, whisk together the all-purpose flour, baking powder, baking soda, salt, and cocoa powder until well combined.
- Beat Wet Ingredients: In a large mixing bowl, beat the vegetable oil and granulated sugar until the mixture is light and fluffy. Add the eggs one at a time, beating thoroughly after each addition. Stir in the vanilla extract.
- Combine Buttermilk Mixture: In a separate bowl, combine the buttermilk, red food coloring, and white vinegar.
- Combine Batter: Gradually add the dry ingredients to the wet ingredients, alternating with the buttermilk mixture. Start and end with the dry ingredients. Mix the batter until just combined, taking care not to overmix.
- Bake the Cake: Pour the batter into the prepared cake pan(s). Bake for 30 to 35 minutes, or until a toothpick inserted into the center of the cake comes out clean.
- Cool the Cake: Allow the cake to cool in the pan for 10 minutes. Then transfer it to a wire rack and cool completely before frosting.
- Prepare Frosting: While the cake cools, beat together the softened cream cheese and butter until smooth and creamy. Gradually beat in the powdered sugar, one cup at a time, ensuring each addition is fully incorporated. Stir in vanilla extract and a pinch of salt.
- Frost the Cake: Once the cake is completely cooled, generously frost it with the cream cheese frosting.
- Decorate: Decorate your frosted cake with green sprinkles or edible glitter to create a festive tree effect. Optionally, use piping gel or melted white chocolate to add a snow-like detail on the tree.
- Serve and Enjoy: Slice your Red Velvet Tree Cake, serve, and enjoy the festive treat with family and friends.
Notes
- If you don’t have a tree-shaped pan, use round cake pans and stack the layers to create a cone shape for a similar tree effect.
- Make sure the cake is completely cooled before frosting to prevent the frosting from melting.
- You can substitute buttermilk with regular milk mixed with 1 tablespoon of vinegar or lemon juice.
- For a more vibrant color, increase the amount of red food coloring slightly, but be cautious of taste.
- Store leftover cake covered in the refrigerator and bring to room temperature before serving for best texture.


