Description
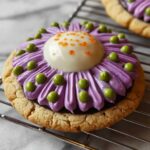
Witch Hat Cookies are festive Halloween treats featuring a soft peanut butter cookie base dyed with purple gel food coloring, dipped in sprinkles or sanding sugar for a spooky touch, and topped with a Hershey’s Hug or Kiss to resemble a witch’s hat. These cookies are perfect for holiday parties or trick-or-treaters and offer a fun and colorful twist on classic peanut butter cookies.
Ingredients
Scale
Dry Ingredients
- 1 ½ cups all-purpose flour
- 2 tsp cornstarch
- ½ tsp baking soda
- ¼ tsp baking powder
- ⅛ tsp fine sea salt
Wet Ingredients
- ½ cup unsalted butter, softened
- 1 cup granulated sugar
- 1 large egg
- ¾ cup creamy peanut butter
- 1 tsp vanilla extract
- Purple gel food coloring (or any color of choice)
Decorations
- Halloween sprinkles or purple sanding sugar
- 33 Hershey’s Hugs or Kisses, unwrapped
Instructions
- Cream the Wet Ingredients: In a bowl, cream together the softened butter and granulated sugar using an electric mixer for 2 minutes until the mixture is light and fluffy. Then add the egg, creamy peanut butter, and vanilla extract, mixing until all ingredients are well combined.
- Combine Dry and Wet Mixtures: Gradually add the dry ingredients (flour, cornstarch, baking soda, baking powder, and salt) to the wet mixture while stirring gently until fully incorporated into a smooth dough.
- Add Color to Dough: Incorporate purple gel food coloring evenly throughout the dough by folding or mixing until the color is consistent.
- Chill the Dough: Cover the dough with plastic wrap and refrigerate it for at least 2 hours or overnight to firm up the dough for easier handling and better texture when baked.
- Prepare Dough Balls: After chilling, roll the dough into balls and coat each ball thoroughly in Halloween sprinkles or purple sanding sugar for a festive and colorful exterior.
- Arrange and Bake: Place the coated dough balls about 2 inches apart on a lined baking sheet. Bake in a preheated oven at 350°F (175°C) for 9-11 minutes or until the cookies are puffed and starting to crack on top.
- Freeze Before Decorating: Immediately after baking, place the tray of cookies in the freezer for 10 minutes to cool them quickly, which helps prevent the chocolate toppings from melting when added.
Notes
- Be sure to chill the dough thoroughly to make rolling and coating easier and to improve cookie texture.
- Using gel food coloring prevents the dough from becoming too wet like liquid colorings might.
- You can substitute peanut butter with a nut-free butter alternative if needed for allergy concerns.
- Freezing the cookies before adding chocolate ensures that the chocolate kiss or hug keeps its shape and does not melt upon contact.
- The cookies are soft and will harden slightly as they cool, so avoid overbaking to retain tenderness.